
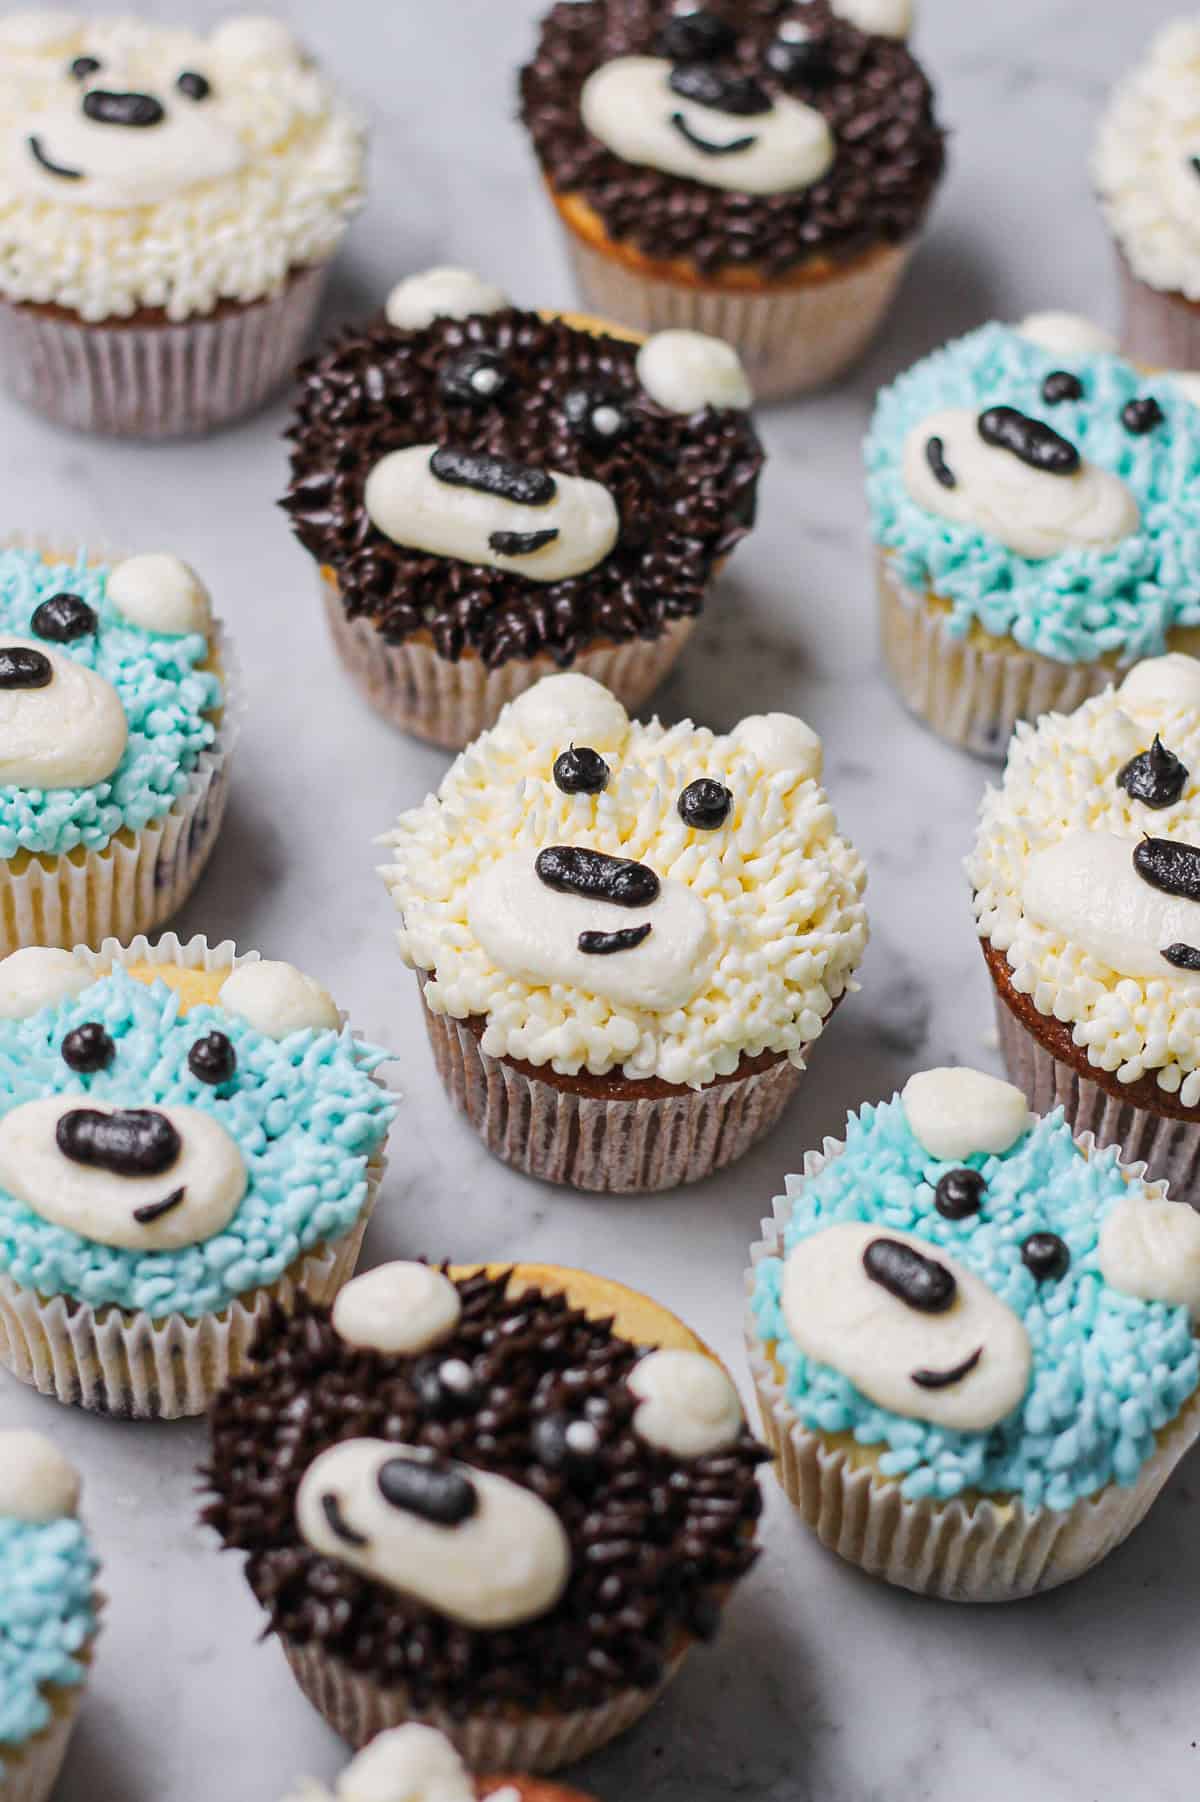
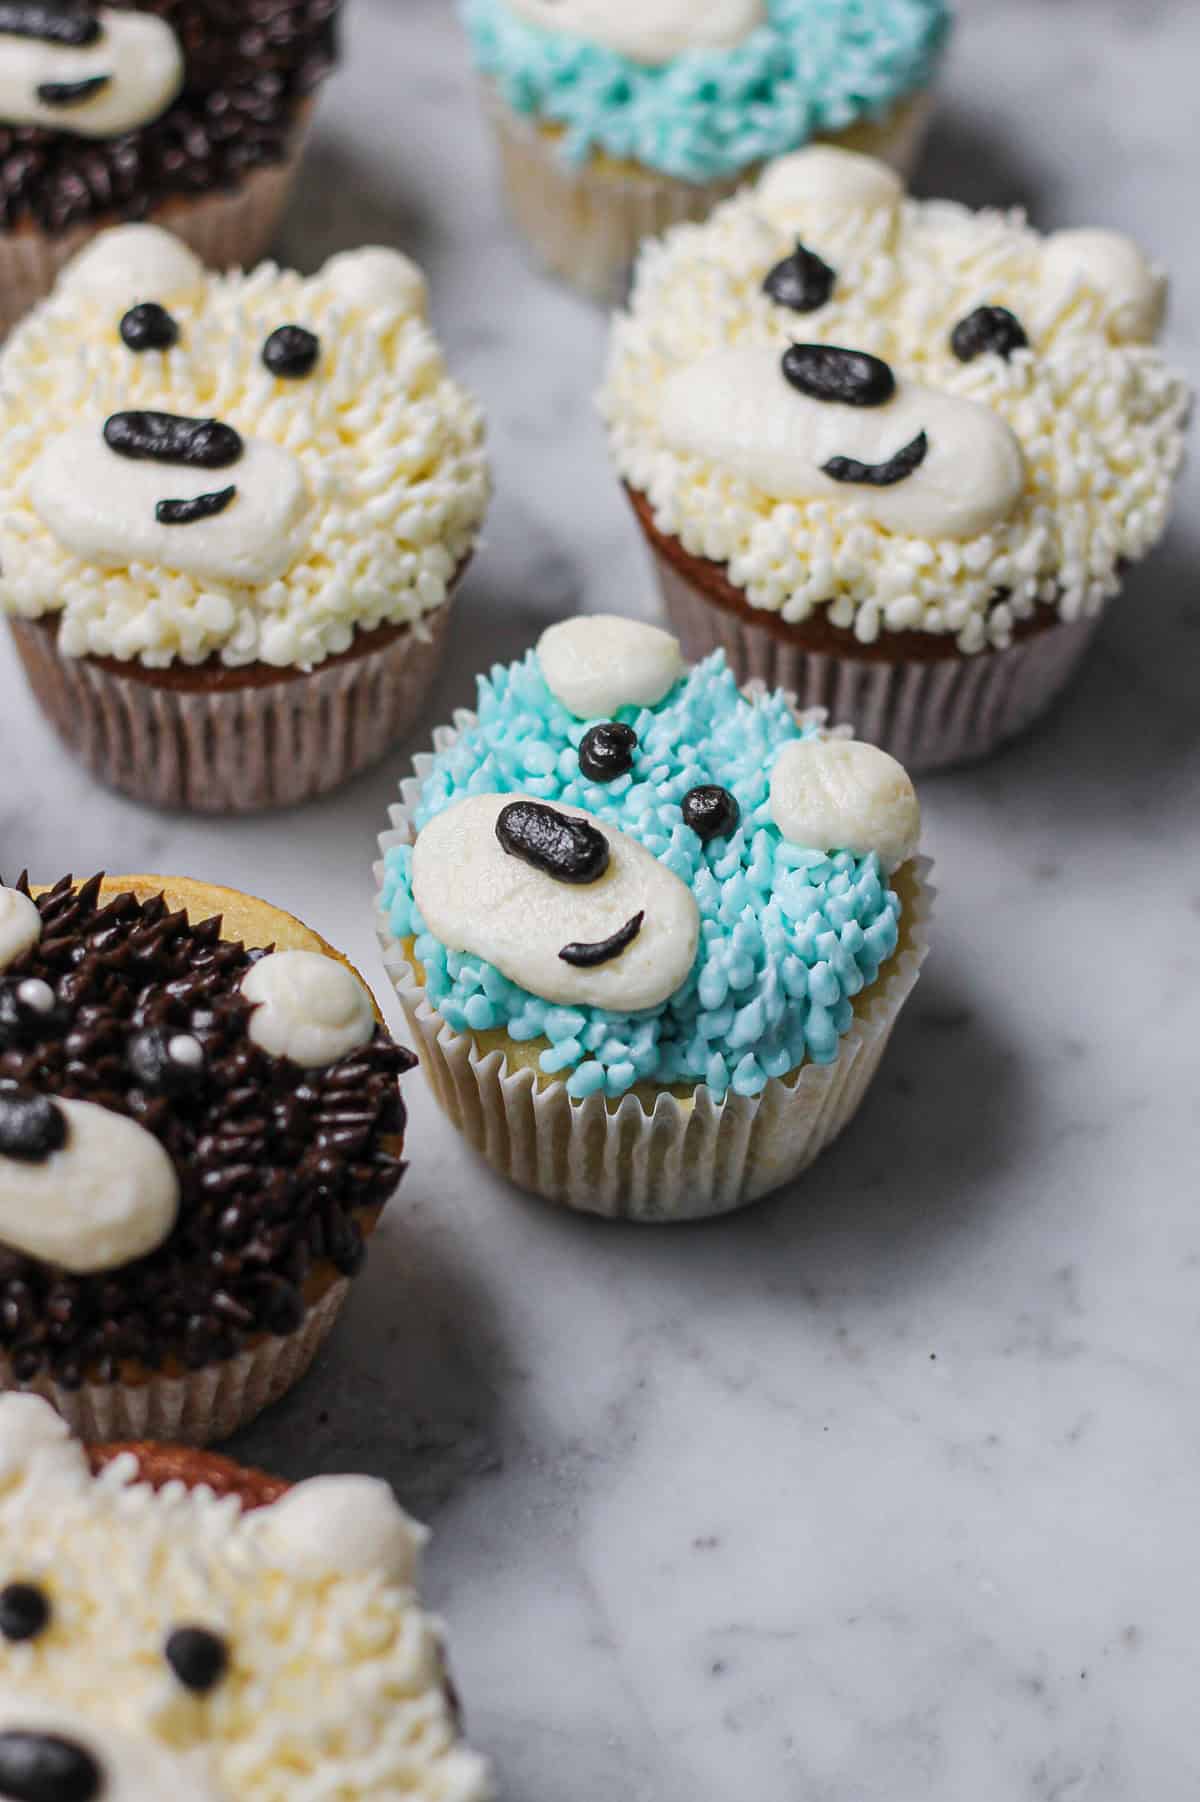
I dreamed up this set of teddy bear cupcakes for the first birthday of a friend's baby, and they drew a lot of "awws" from everyone at the party. While they were a project, they're totally doable in your kitchen! Decorated entirely in flavors of delicious homemade buttercream, they're pretty simple, without fondant, candy, or specialty toppers. Piped "fur" with a grass piping tip and a few other simple designs made with frosting transform this batch of cupcakes into something special. I made an assortment of flavors and colors, but the beauty of these is that they're very customizable for any birthday celebration, baby shower, or animal-themed party.
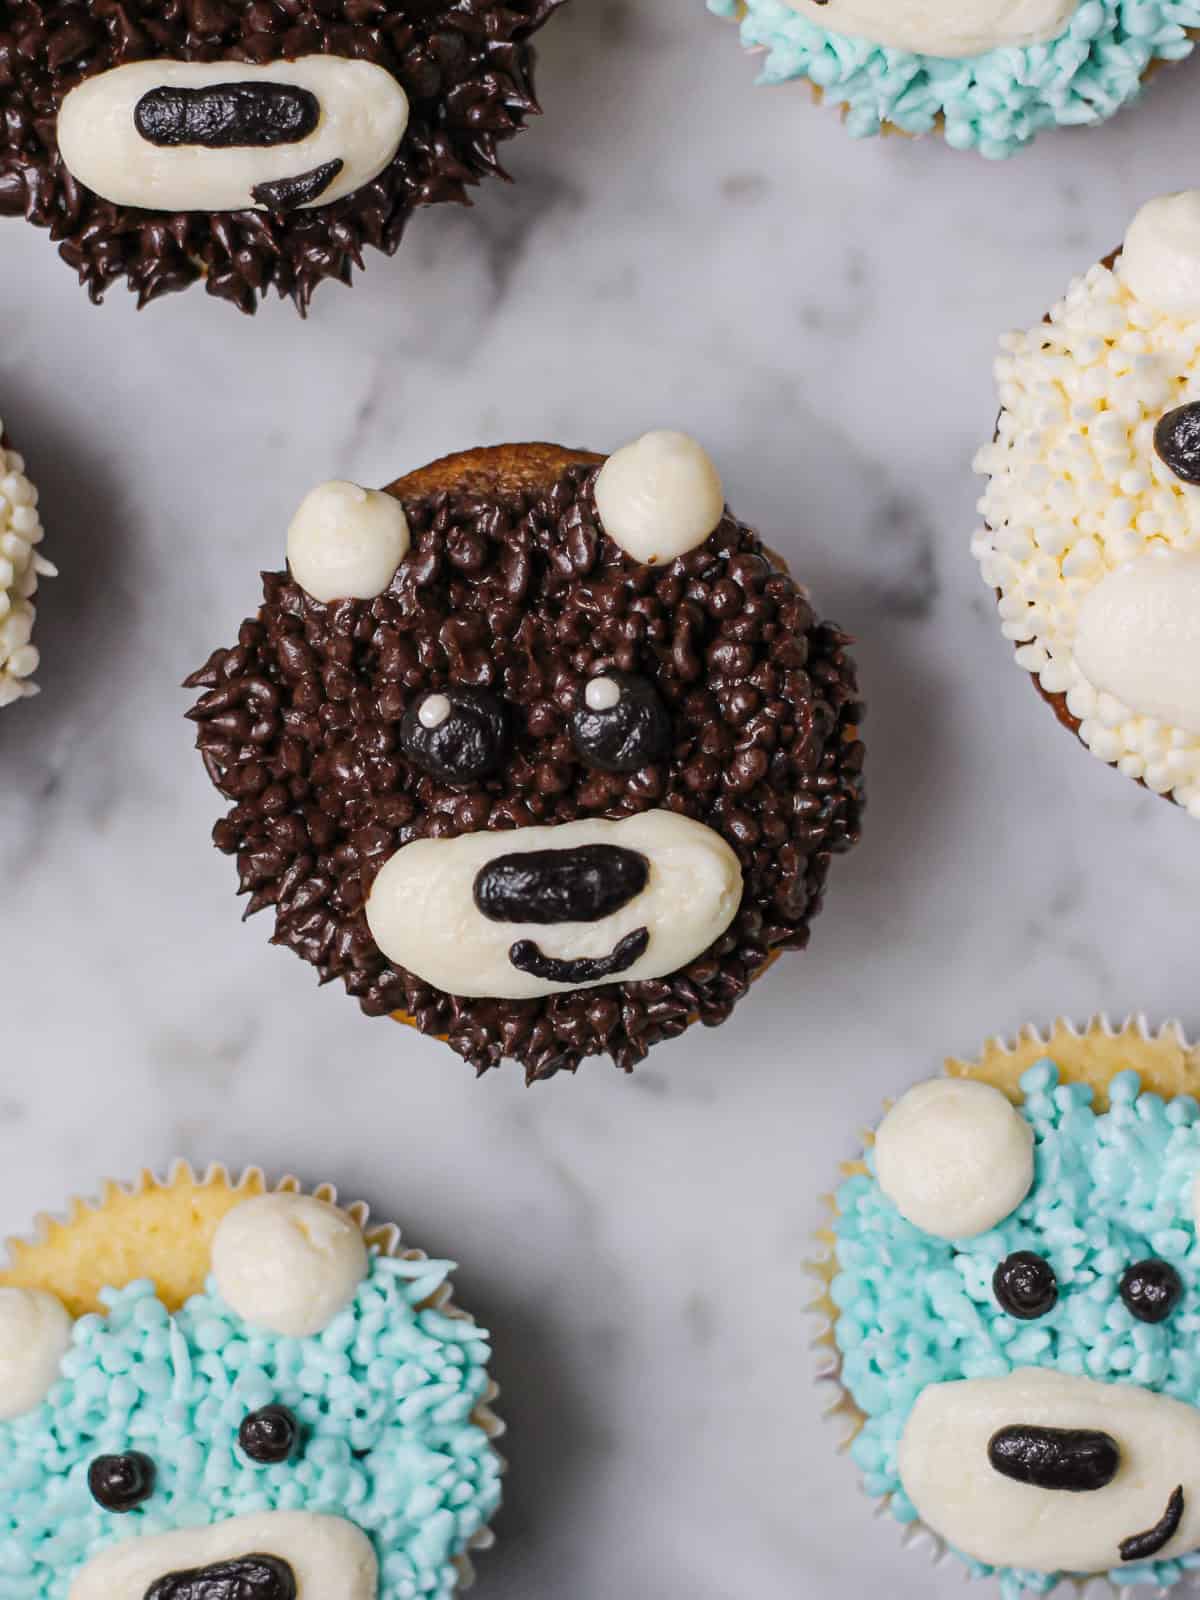
If you've been around here a while, you know I love using buttercream to create designs on dessert!
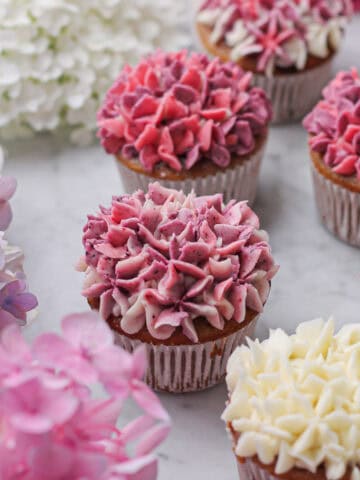
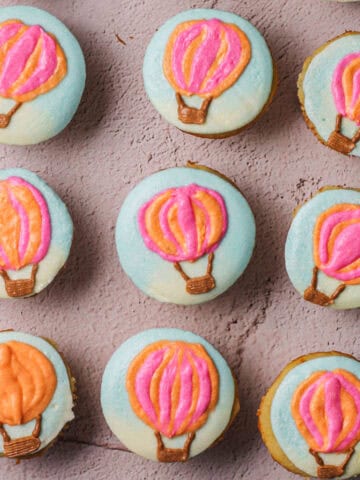
This tutorial uses the same fur-piping trick I do with my black cat cake, just shrunk down to a smaller tip for cupcakes. Be sure to check out my hot air balloon cupcakes and hydrangea cupcakes if you also enjoy fun decorating tutorials.
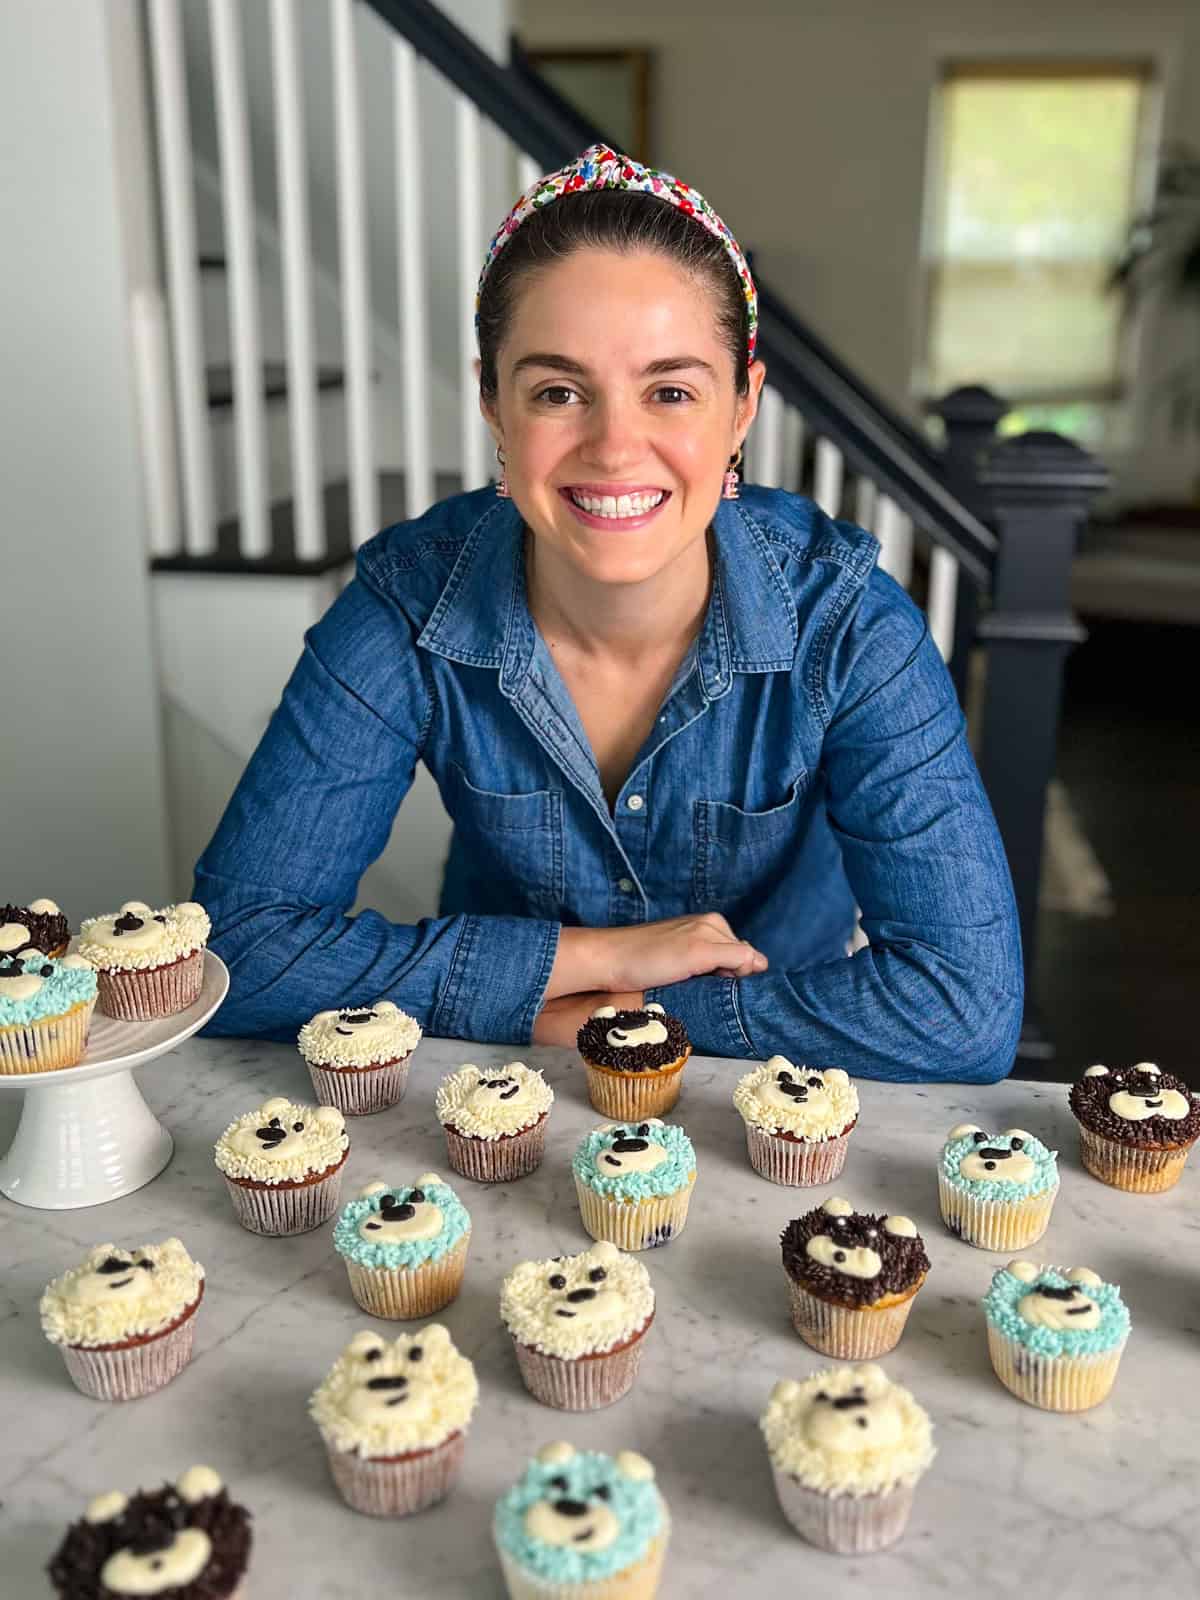
Jump to:
- Reasons to Love These Teddy Bear Cupcakes
- 🎥 Quick Decorating Video
- 📋 Planning Your Bears
- Tools for Decorating
- Best Results: Baking in Grams
- 🧸 How to Make Buttercream Teddy Bear Cupcakes
- Pro Tip: Smoothing out Frosting
- 💡 Piping Fur (Read This Before Decorating)
- 🐻 Step-by-Step Teddy Bear Decorating
- 🐻❄️ Making Polar Bears or White Teddy Bears
- 💭 Make-Ahead Tip for a Party
- Storage Instructions for Decorated Cupcakes
- ❓ Teddy Bear Cupcakes FAQ
- 🐻 More Cupcake Decorating Ideas
- Teddy Bear Cupcakes
Reasons to Love These Teddy Bear Cupcakes
- No fondant, no candy — Every part of the bear is buttercream, which is tasty and also makes your shopping list here simple. You largely use pantry staples instead of a niche topper or candy.
- Multiple bears, one easy method — The technique here makes it easy to create whatever color or flavor cupcakes you'd like! When I made my set of cupcakes for a baby's first birthday, the parents were looking for chocolate and light-colored options of frosting for variety, but you could take this in a number of different directions.
- Forgiving to pipe — Fur is a nice, beginner-friendly piping texture. Stray strands that feel like mistakes are really just added fluff for your bears, so don't sweat it.
- Make-ahead friendly — Bake the cupcakes and whip up the buttercream days in advance, then decorate when you're ready. You may safely freeze them ahead of time, too, if you need to start prepping components of this tutorial weeks ahead of a particular occasion.
🎥 Quick Decorating Video
📋 Planning Your Bears
This is a decorating tutorial, so the "recipe" is really the frosting plus the technique. Here's everything I used, but treat this as a buffet where you select what works for you!
The cupcakes and buttercream-frosted bears
I made roughly 60 cupcakes in total, across a mix of flavors. The recipe card here makes 18 of them, in strawberry with a white vanilla frosting. But you can easily tint that for brown bears with cocoa powder if desired, and who doesn't love chocolate and strawberry together?!
Use these as inspiration and a launching board for your designs.
- For brown bears — I baked a version of my dirty chai cake batter, which as written yields approximately 22 cupcakes. I removed the spice from the mix to create espresso cupcakes. I topped them with a triple batch of my small batch chocolate buttercream.
- For the white teddy bears/polar bears — I used my mini strawberry Bundt cakes, baked as cupcakes, to give me 18 cupcakes. I paired them with a vanilla frosting.
- For the blue and white teddy bears — I used my lemon blueberry mascarpone cake batter, baked as cupcakes for 22 cupcakes, and topped them off with a homemade almond buttercream.
For all of these, you really can use whatever cupcake recipe you love (or go even easier and grab a box mix! No shame in that.).
For the black facial features on all the cupcakes — deepen a few tablespoons of buttercream with a bit of black or brown cocoa or a touch of black gel for the eyes and nose.
Tools for Decorating
- A grass/fur piping tip — Wilton 233 gives fine, realistic fur; the larger version of this tip (Wilton 234) works too for the coat
- A couple of small round tips (like a 3, 4, or 10) for the muzzle, nose, and eyes
- Piping bags — one per color/tip so you're not constantly swapping
- A toothpick to lightly mark where the eyes and nose go before you commit
Best Results: Baking in Grams
If you’re not already, use a kitchen scale for accuracy in baking.
While I include cups and grams in my recipe cards, weighing your ingredients and writing or following a recipe using a standard metric like grams ensures consistency.
I highly recommend investing $30 or less in a kitchen scale.
🧸 How to Make Buttercream Teddy Bear Cupcakes
Bake and fully cool your cupcakes first. However many flavors of cupcakes and frosting you plan to use, it helps to have them all laid out and ready to go in front of you from the start.
This way, once you're ready to pipe your fur, you can roll with the process instead of having to stop and go make the buttercream. Or bake a new batch of cupcakes.
I like to bake everything a day or two ahead and freeze the cupcakes to preserve their freshness.
Then, I will often make my buttercream a day ahead of decorating, as I like to divvy up the work this way. And my favorite part of this process is the decorating, so it's nice to be able to fully focus on that once all the other components are made.
Pro Tip: Smoothing out Frosting
As I suggest on my posts for making frosting, a key step to follow before putting your frosting on any cake or cupcake is to smooth it out!
This is important because it will really elevate the appearance of a dessert. Rough frosting will give your baked goods a more amateurish look, so don't skip this step!
To smooth frosting:
- Take a small amount of it at a time, adding it into a mixing bowl you can easily hold.
- Then, use a larger spoon or spatula to swipe the frosting around the bowl, pressing it against the sides to push the air from the center of the bowl outward.
- Repeat this motion until your spoon or spatula moves more easily through the bowl and you don't see tears in the buttercream.
💡 Piping Fur (Read This Before Decorating)
The single most important note with using a grass tip: press the tip against the cupcake, let the buttercream grab onto the cupcake, then pull the piping bag up and away.
Pressing, connecting, and pulling back is what gives you strands of "fur" instead of a blobby mess! It's very forgiving once you get the rhythm.
Work in short strokes, overlapping as you go, until the whole top of the cupcake is covered in fur.
Minimalist piping guide:
- One color of frosting for the fur
- Divvy up the buttercream, placing most of it in a piping bag fitted with the grass tip (Wilton 233 or 234), as this will be what covers much of your cupcake
- You’ll also want a bag of frosting with that same color and fitted with a larger, open round piping tip like Wilton 10 or 12 — this will be for the muzzle and ears
- One in a darker color (recommend black or brown) for the eyes and a smaller round tip on this bag
🐻 Step-by-Step Teddy Bear Decorating
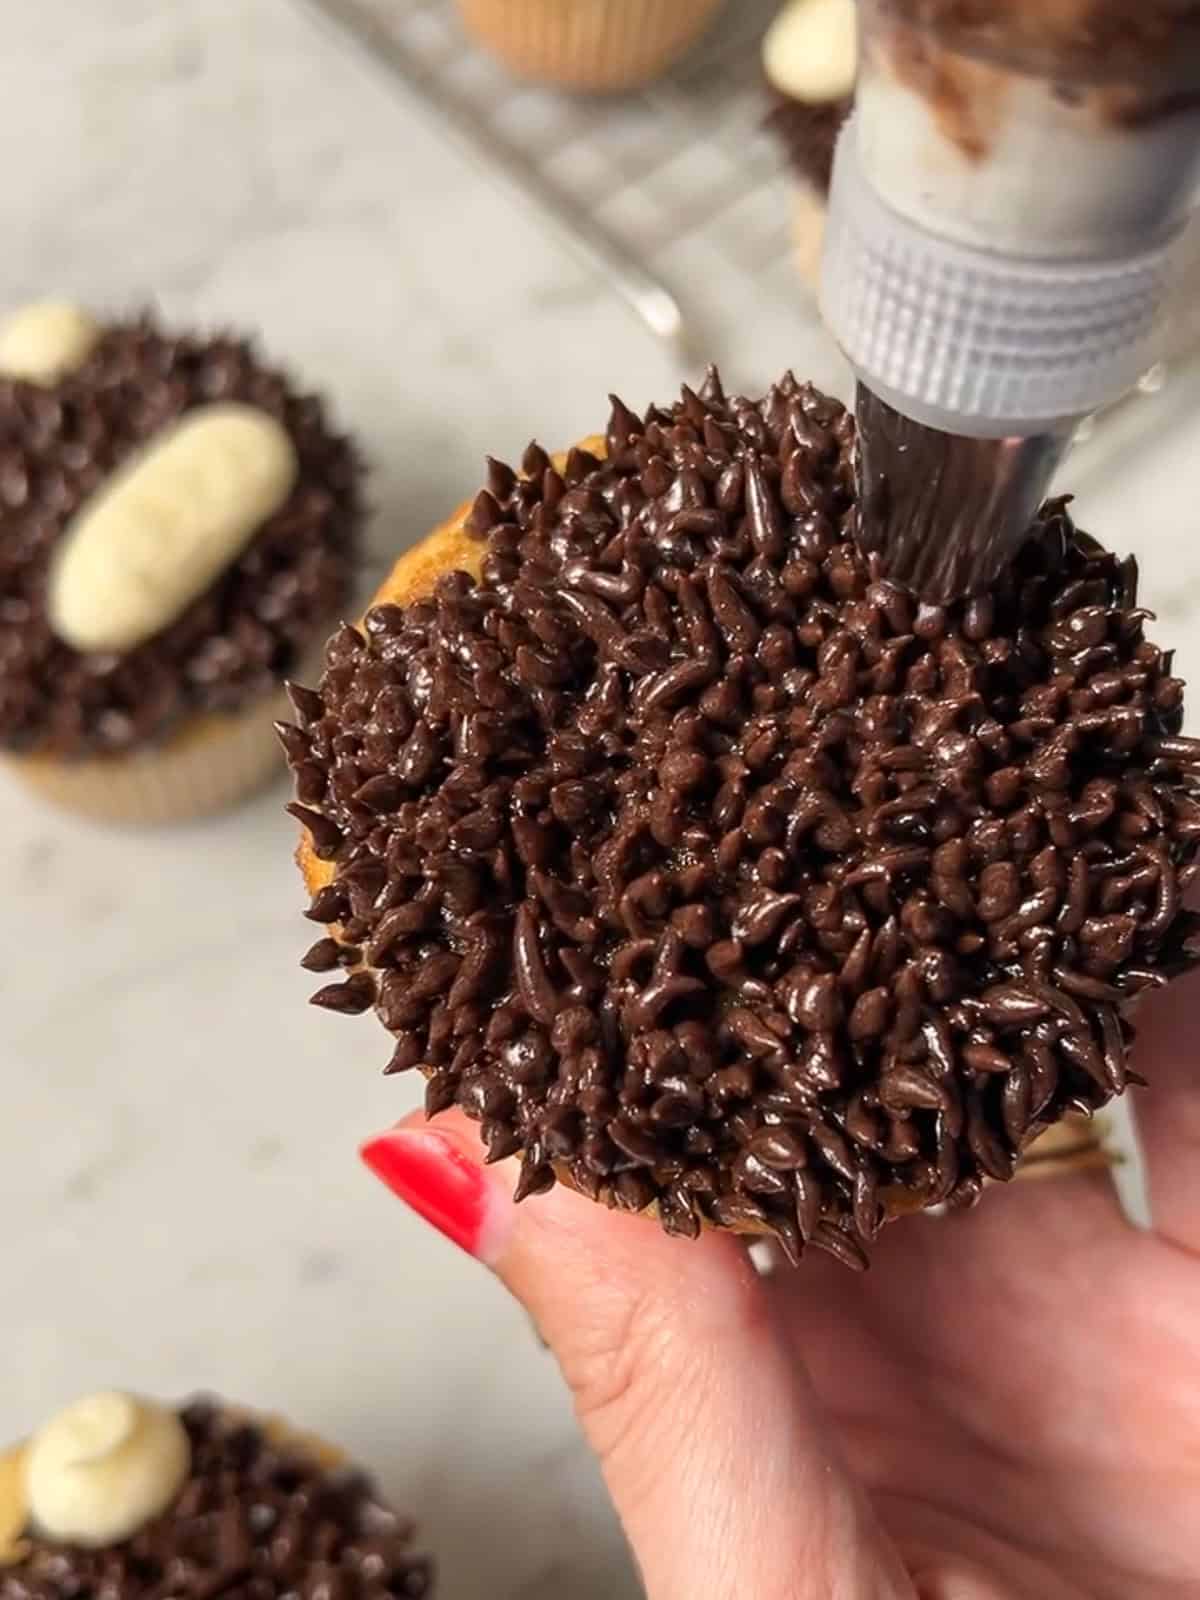
Step 1: Pipe the fur. With the grass tip and buttercream color(s) and flavor(s) of your choice, cover the entire top of the cupcake in fur. Be sure to press, connect, and pull the tip away with each motion. I recommend piping the fur onto all the bears at once instead of switching to other piping bags and fully piping one bear at a time! That's much more time consuming.
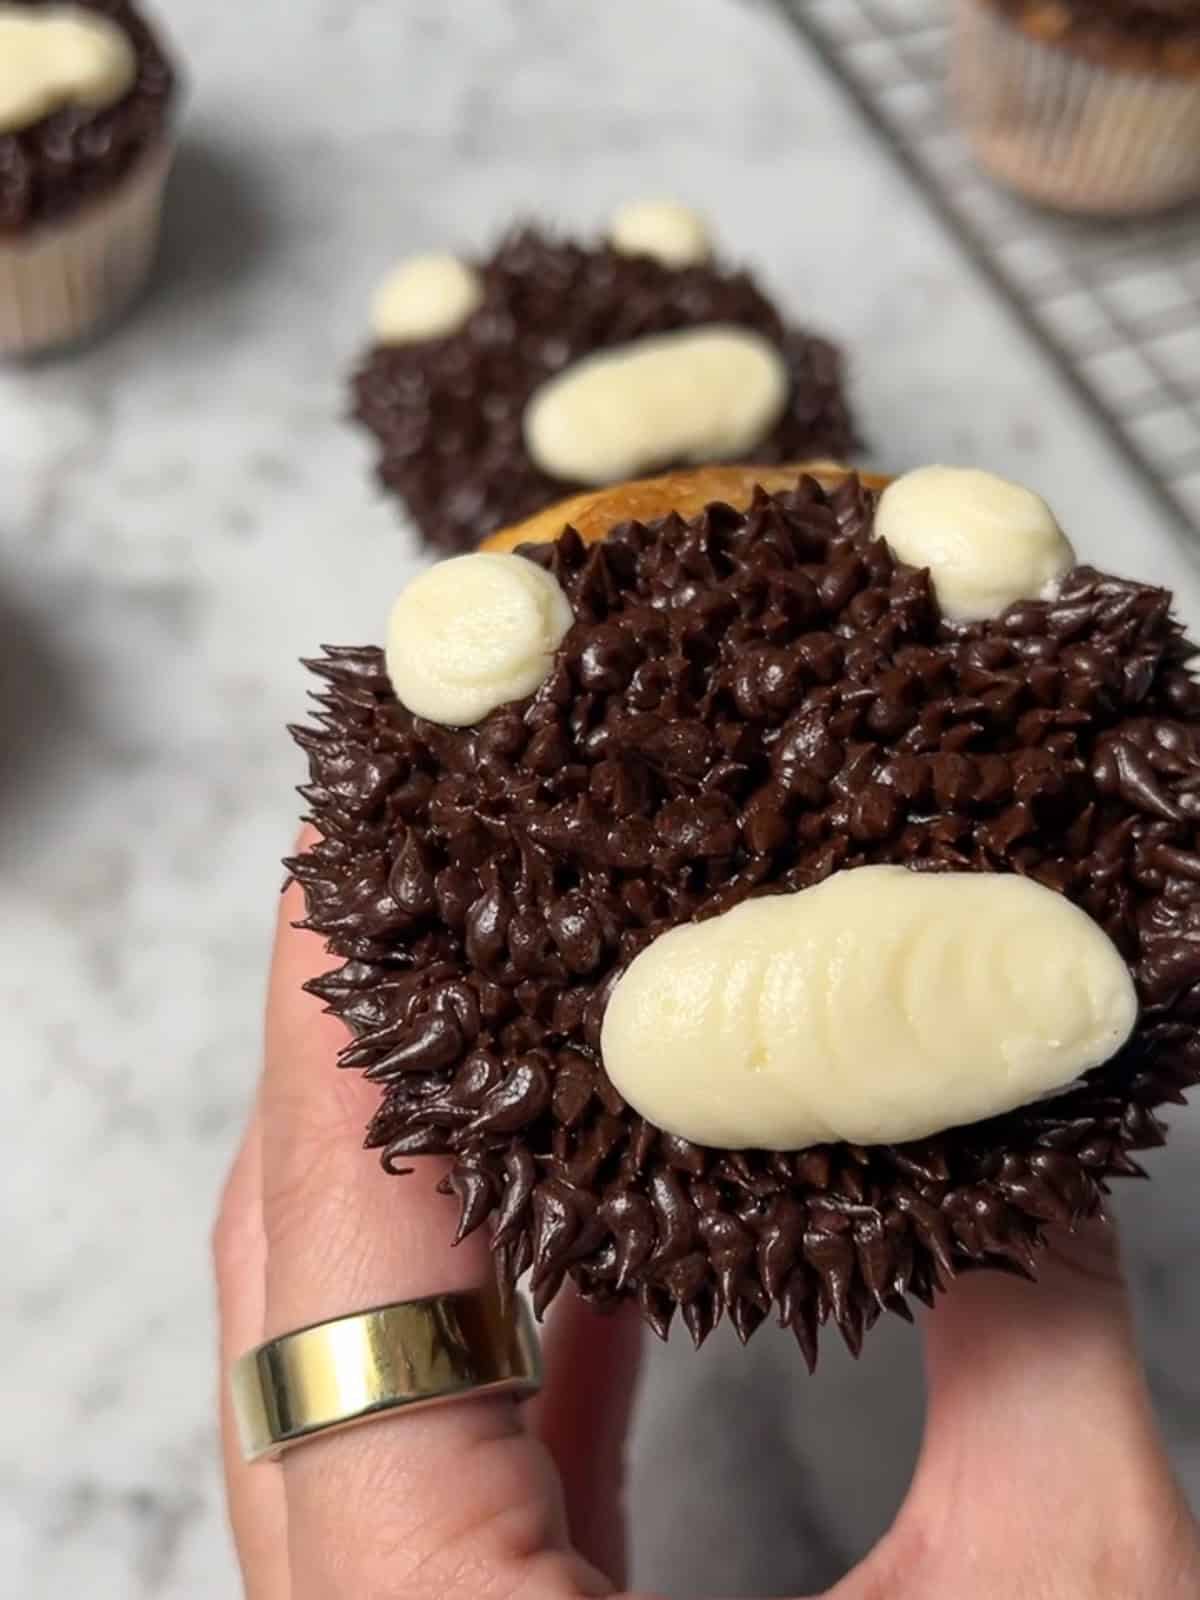
Step 2: Add the muzzle and ears. After all the bears have gotten their fur, switch to your frosting bag with the large, round open tip and white frosting. Pipe a small mound low and center for the snout. Gently and slowly move the frosting in an oval shape to even out the shape. Using your same larger, open piping tip, release frosting from your piping bag to form the ears near the top edge, pressing gently into the fur.
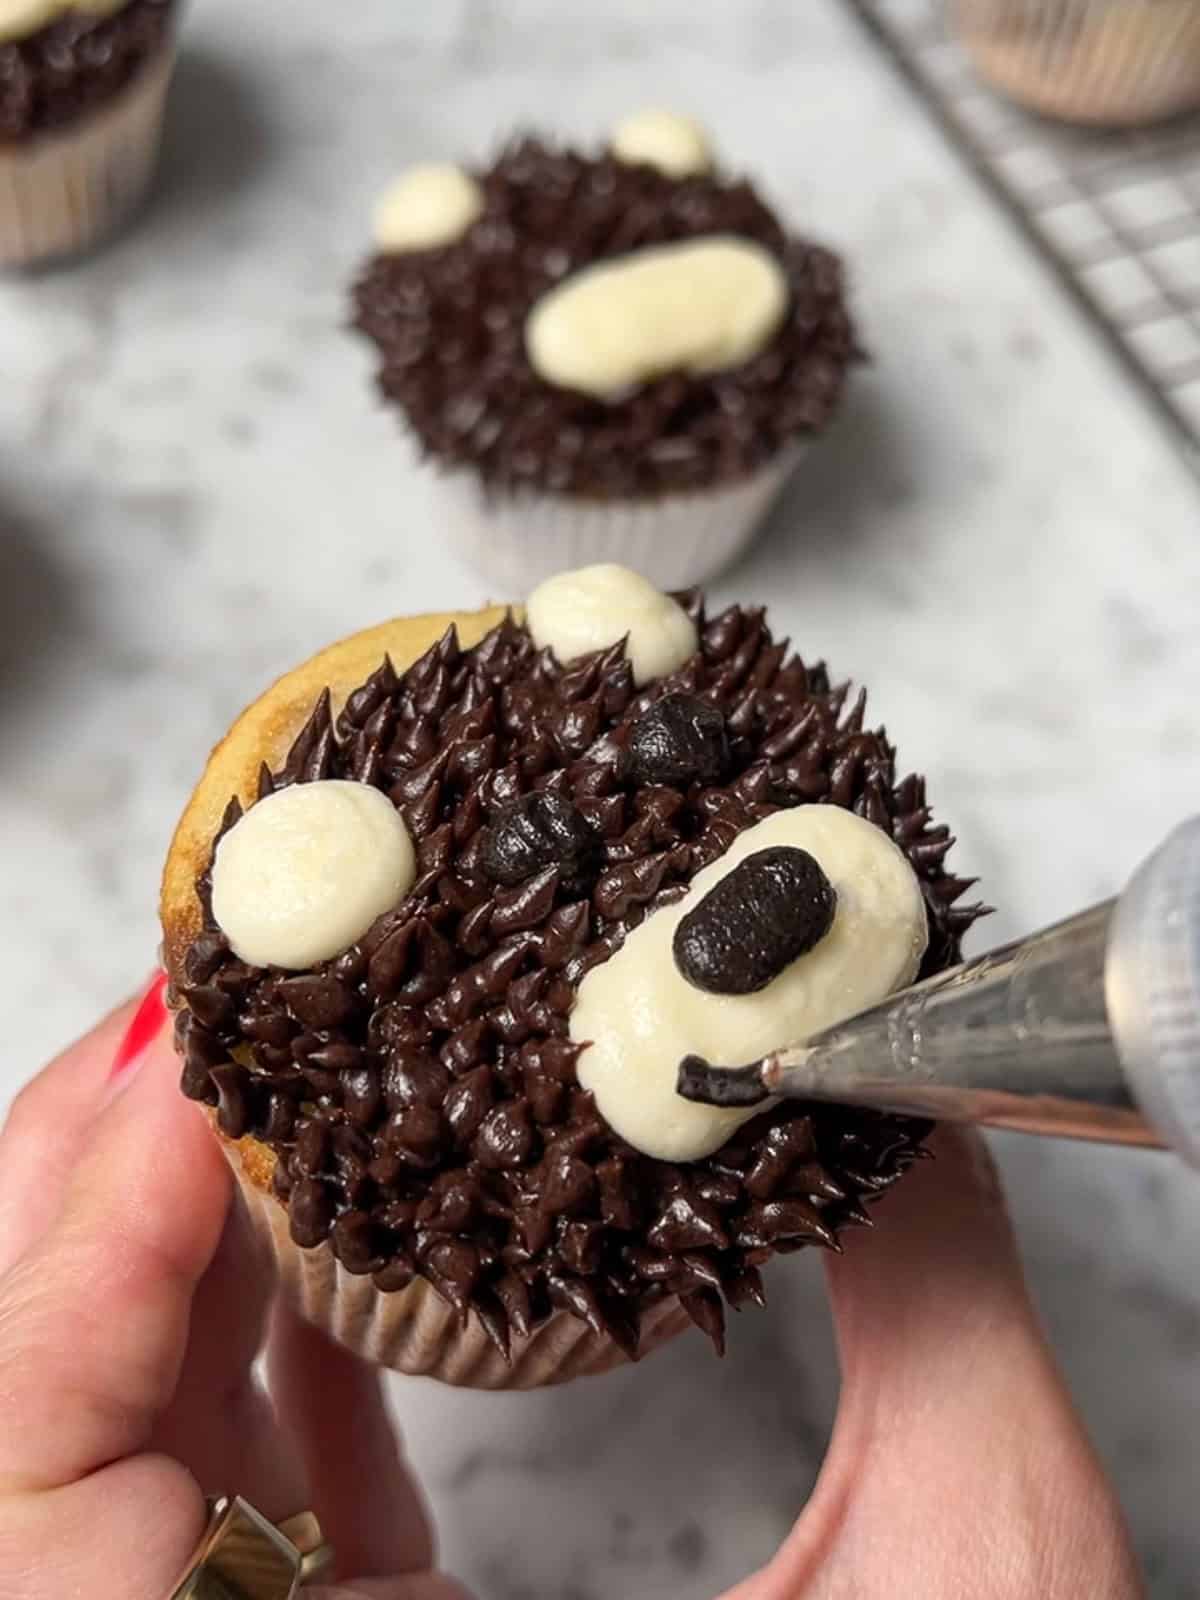
Step 3: Pipe the face. With a small round tip and your black or dark brown chocolate buttercream, pipe an oval nose on the muzzle and two small dots just above for eyes. Feel free to use a toothpick as an initial marker for where you want to pipe your frosting.
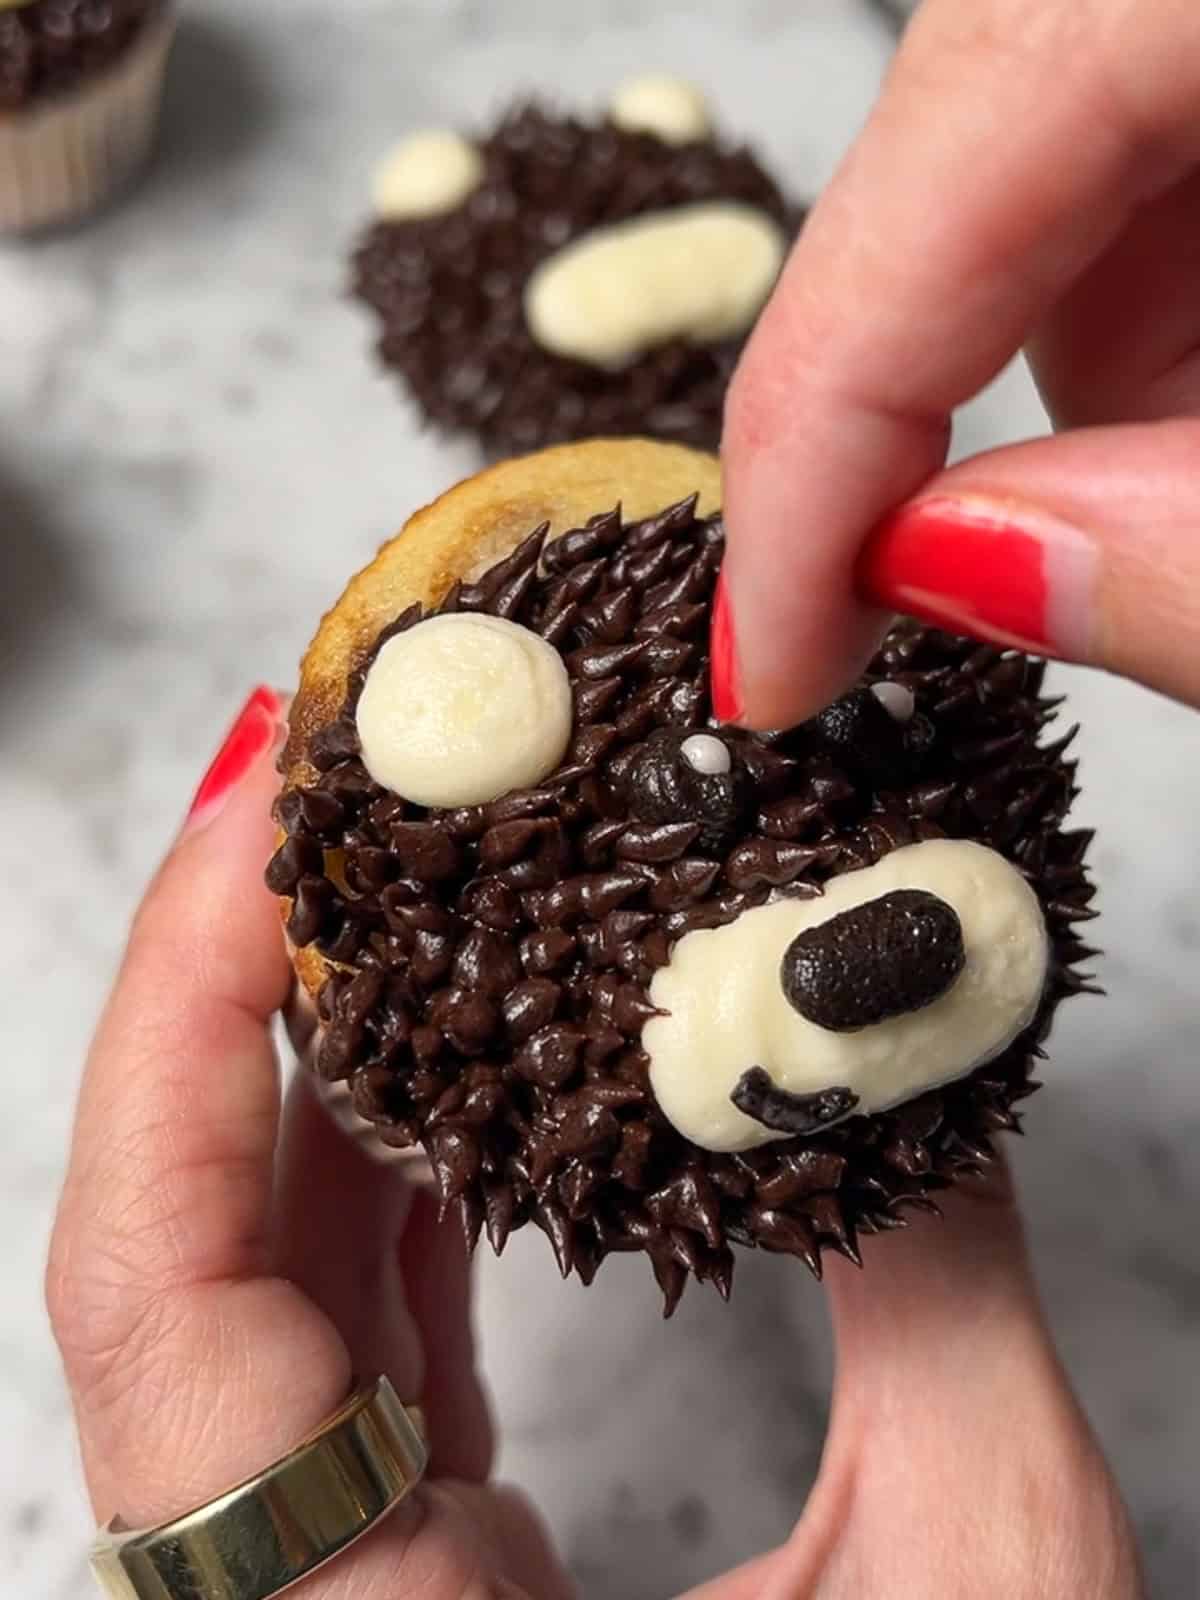
Step 4: Add optional finishing details. Because my bears had dark, chocolaty faces, I also included white sugar pearls in their eyes for some added dimension! These aren't necessary, though, and you could easily achieve the same effect with tiny dots of white frosting.
🐻❄️ Making Polar Bears or White Teddy Bears
Follow the same process as above, swapping in a white buttercream for the fur, muzzle, and ears. Tint a small amount of the frosting black with cocoa powder and/or black gel food coloring.
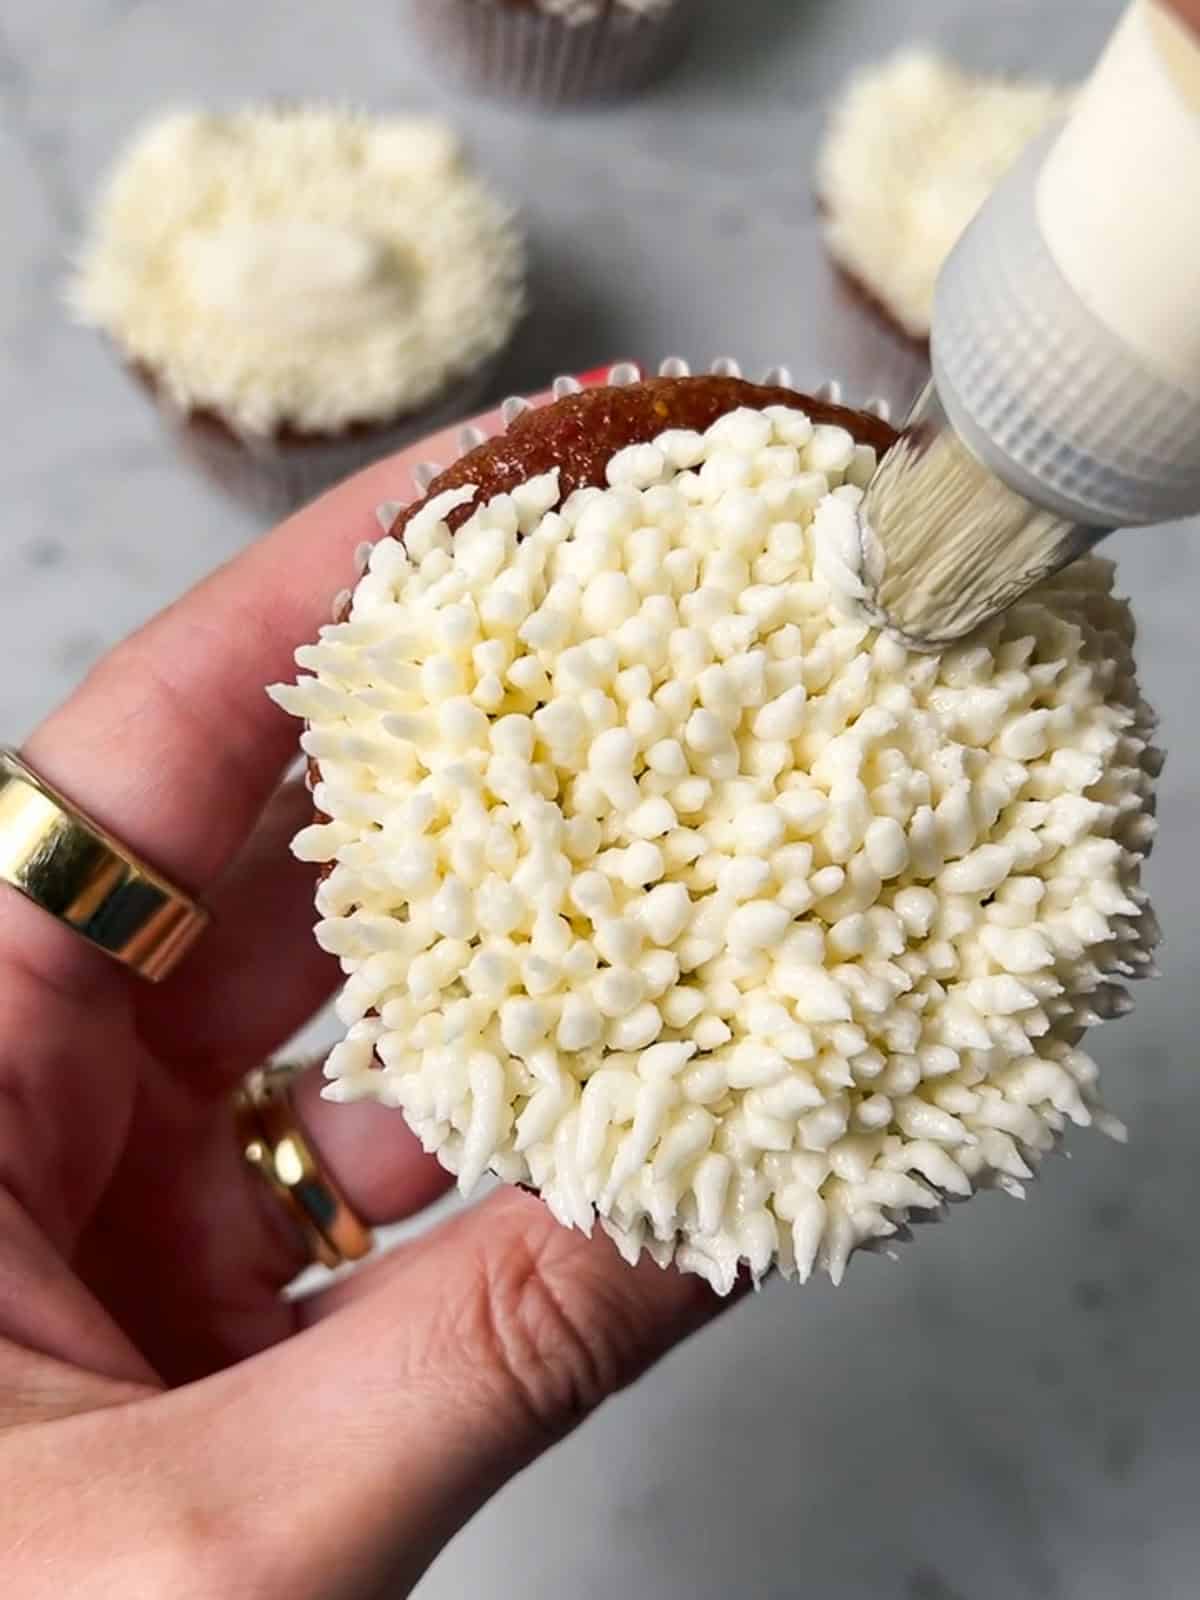
Step 1: Pipe white fur over the whole top with the grass tip and white buttercream.
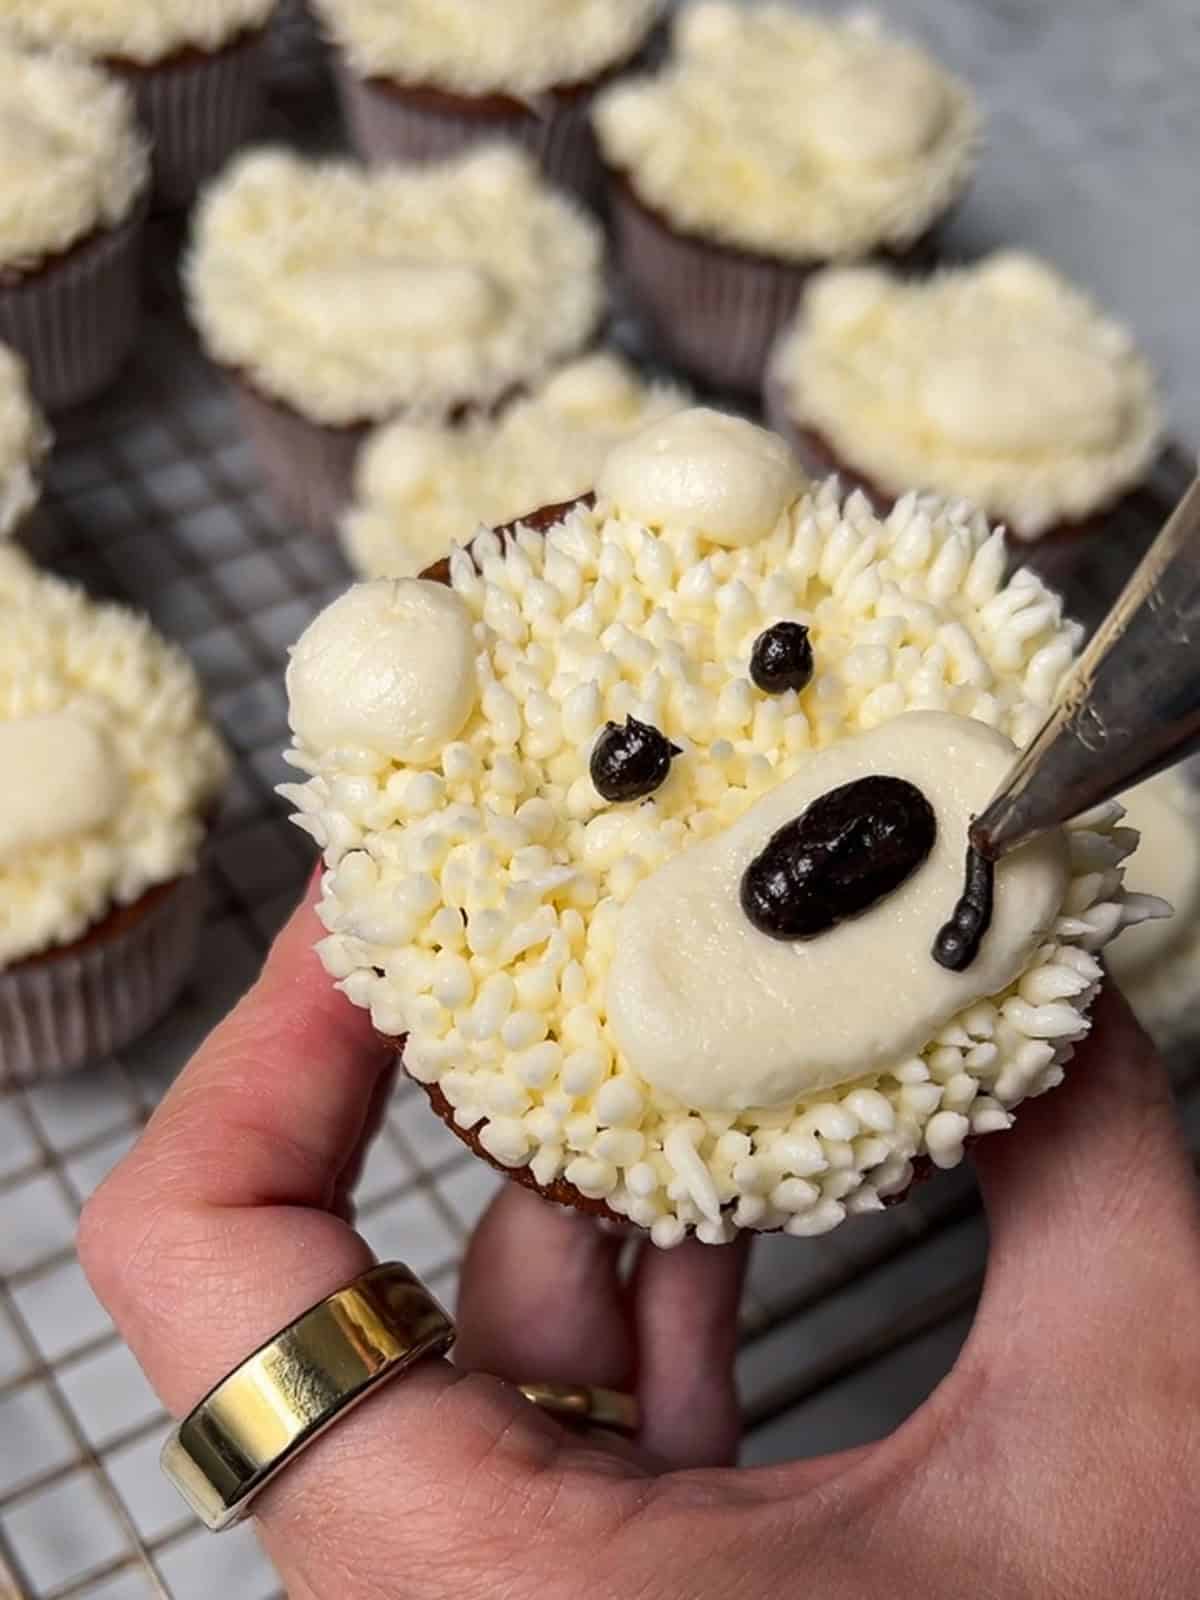
Step 2: Add a white muzzle and ears, followed by a dark nose, mouth, and eyes.
If any of your details (like the ears, mouth, or nose) looks rough after your initial piping, don't fret. One beauty of the American buttercream used here is that after sitting out on your counter for a bit or chilling in your refrigerator, the frosting will form somewhat of a crust. You'll know this when you go to gently touch or press the frosting and it doesn't budge under the pressure of your finger.
Once you've reached that stage, you can take a spoon and use the rounded back of it to press against any of your shapes that look wonky. The spoon will help even them out; just be sure to use a light touch!
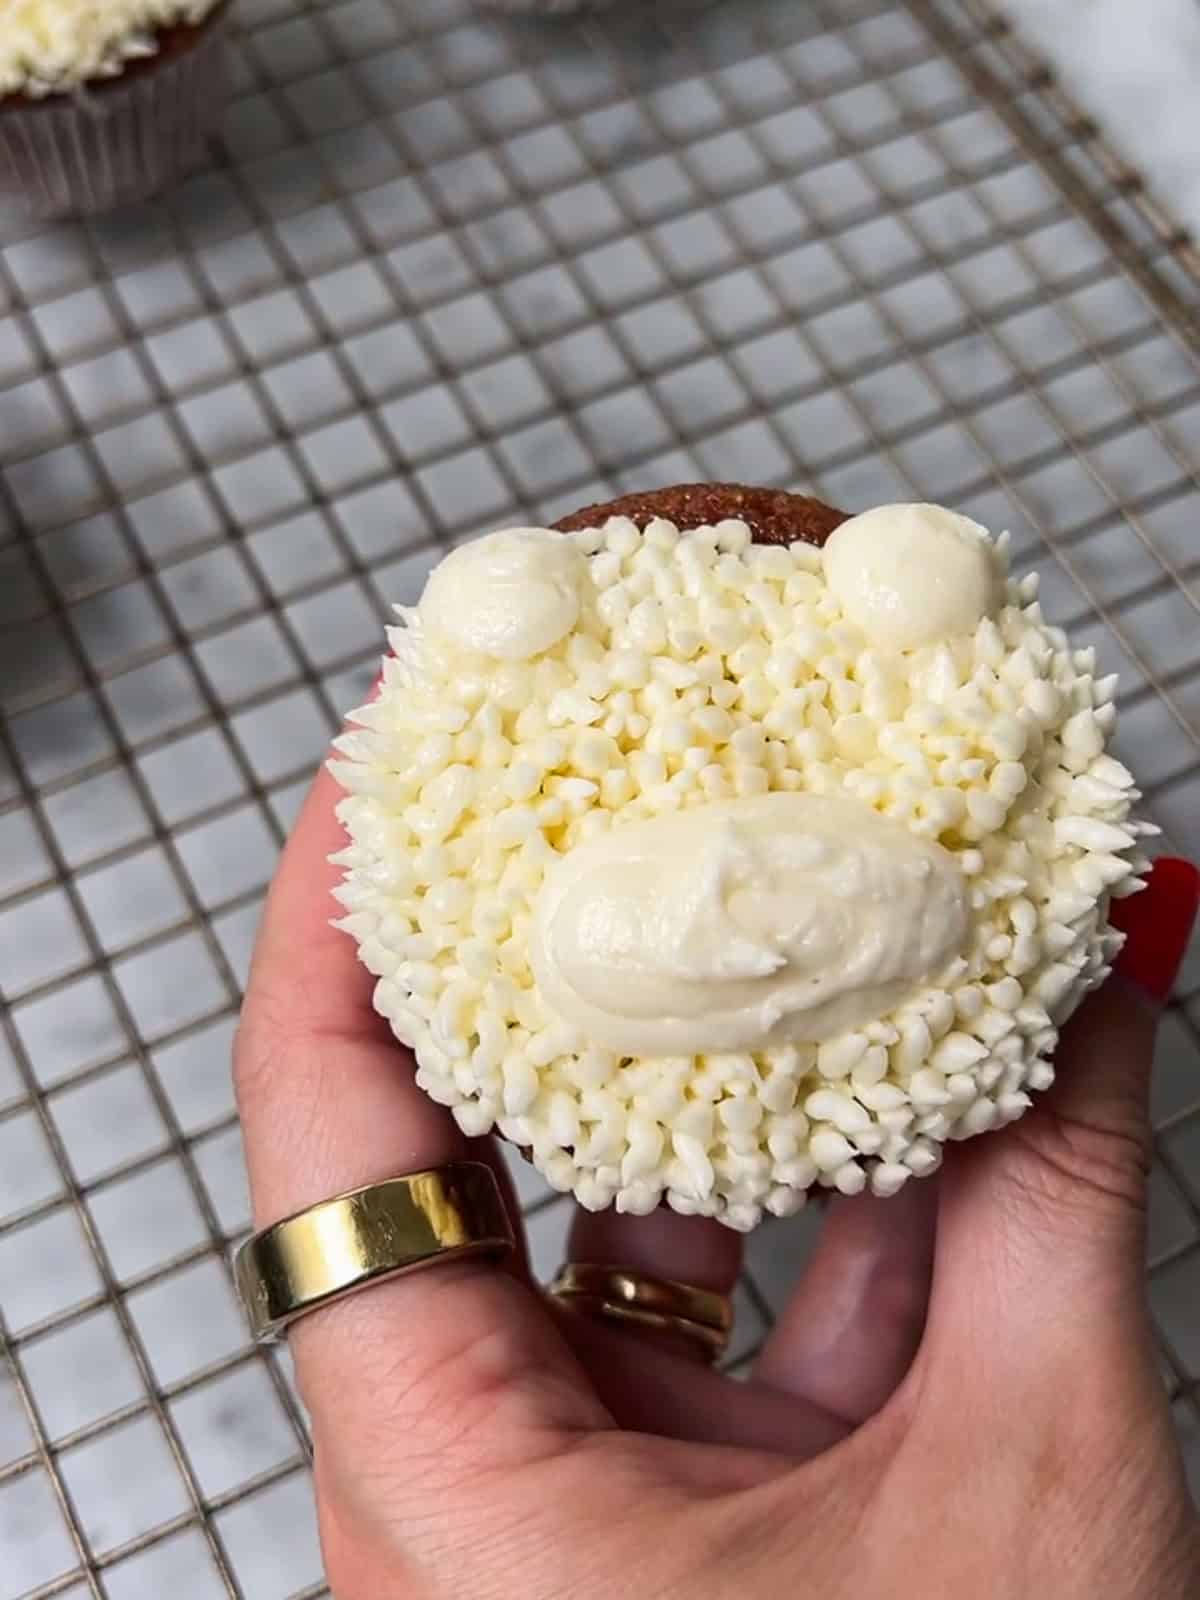
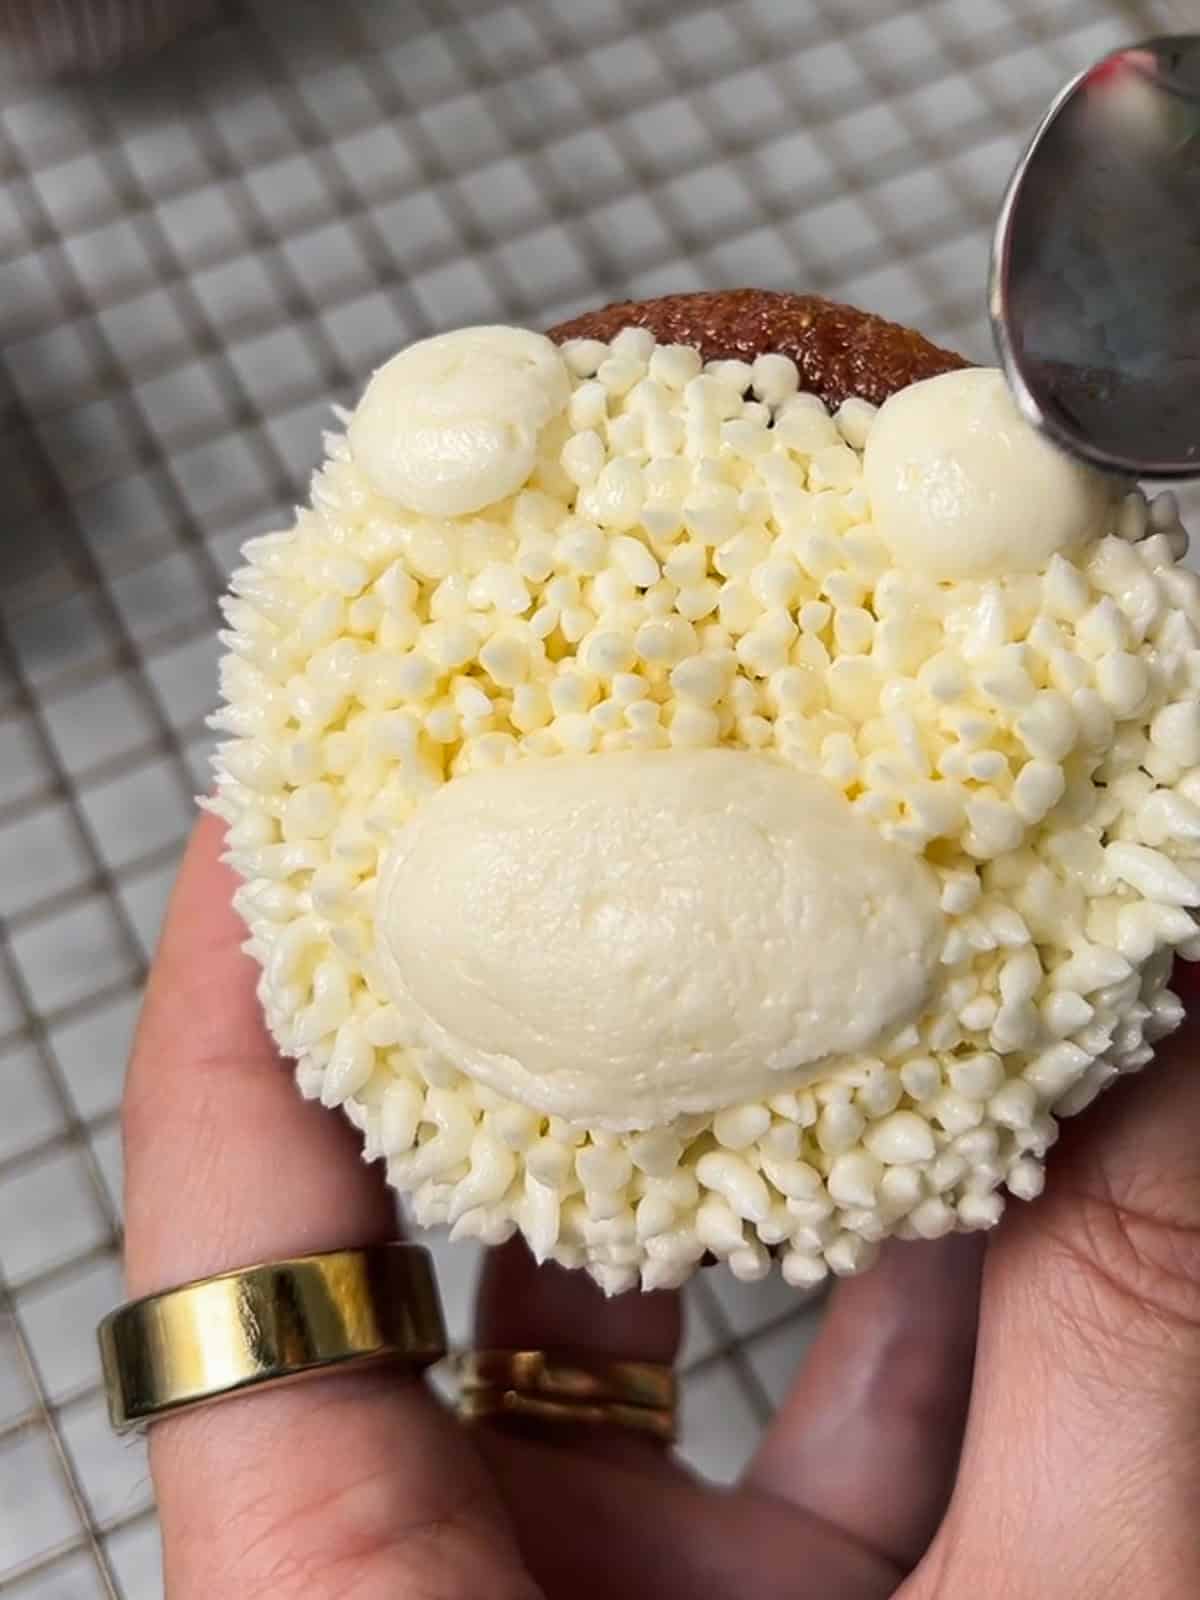
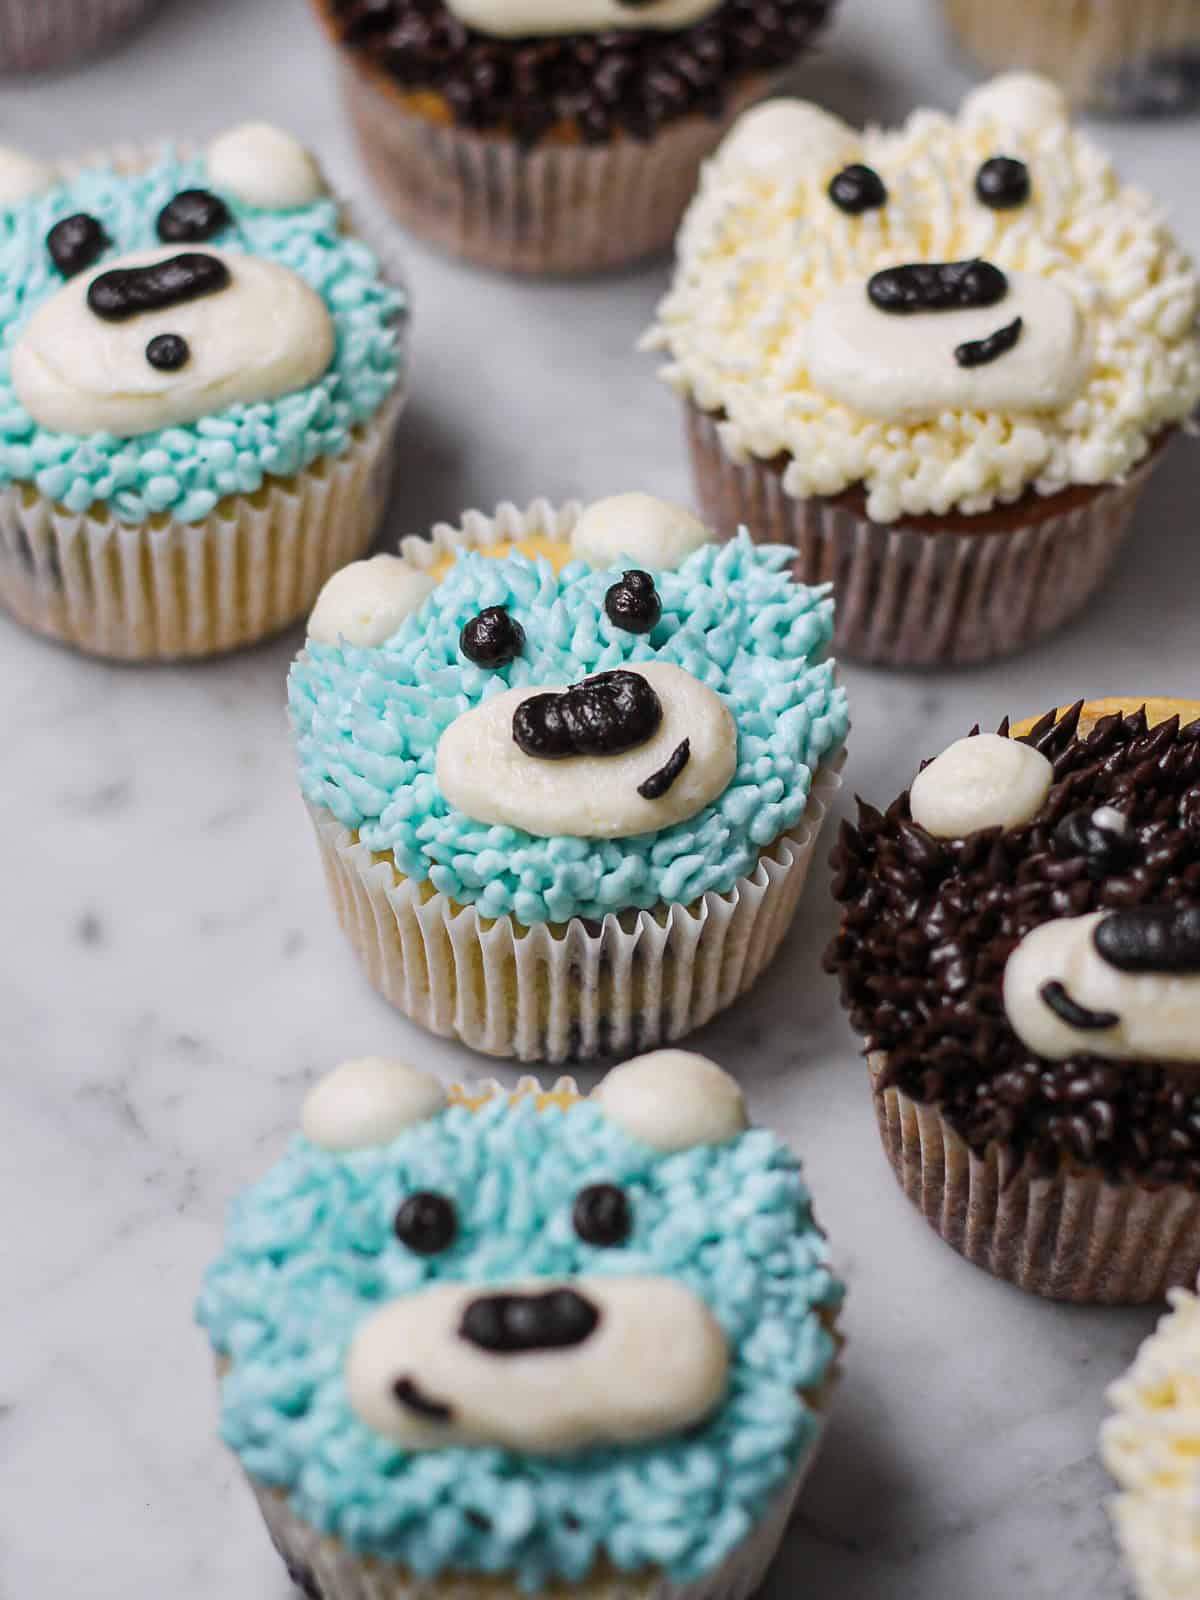
I didn't stop there! For more inspiration, check out the cute blue and white teddy bears. These would be sweet to theme for a little boy or girl's birthday or baby shower!
💭 Make-Ahead Tip for a Party
Whenever I'm decorating for an event, I split the work across days.
Bake and cool the cupcakes (or bake and freeze them), and make any and all buttercreams up to a couple of days ahead.
All frostings referenced here keep well in the fridge or freezer before you need them for this tutorial.
Storage Instructions for Decorated Cupcakes
Store your teddy bear cupcakes in an airtight container.
They hold their shape at cool room temperature for a day. For anything longer, refrigerate and bring them back to room temperature about 30 minutes before serving so the crumb is soft and the buttercream isn't stiff.
For freezing tips, I've got a whole guide to freezing and storing cupcakes with frosting.
❓ Teddy Bear Cupcakes FAQ
Nope! Every part of these bears is piped buttercream, from the fur and ears to the muzzle, eyes, and nose!
I skip fondant and candy to keep this tutorial on the simpler side with pantry staples. All you need is a grass piping tip and a couple of open round tips.
A grass (or multi-opening) tip. I like Wilton 233 for fine, realistic strands, though a 234 works too. The trick is to press the tip against the cupcake so the buttercream grabs on, then pull straight up and away to form the fur.
You could also create a different texture from fur but still get a nice look with other piping tips like Wilton 32.
Yes, and I recommend it.
Bake the cupcakes (or bake and freeze them) and make your buttercream up to two days ahead. Then decorate the bears ideally the day of or the day before the party.
🐻 More Cupcake Decorating Ideas
Teddy Bear Cupcakes
- Total Time: 110 minutes
- Yield: 18 cupcakes 1x
Description
Learn how to decorate teddy bear cupcakes with piped buttercream 'fur' — no fondant, no candy. A beginner-friendly tutorial for brown, polar, and colorful bears.
Ingredients
Strawberry Cupcakes
- Use 200 g of your favorite strawberry jam or preserves, OR make it at home with the below ingredients
- 1 cup (120 g) strawberries, fresh or frozen (14–16 medium)
- 4 tablespoons granulated sugar
- 3 teaspoons lemon juice, bottled or fresh
- Pinch of salt
Strawberry Cupcake Batter
- 1 cup (220 g) granulated sugar
- ⅔ cup (140 g) canola oil
- 4 eggs, room temperature
- 1½ teaspoons almond extract
- 3 teaspoons vanilla
- 1½ cups (200 g) all-purpose flour
- 1 ounce (30 grams) freeze dried strawberry powder
- 1 teaspoon baking powder
- 1 teaspoon baking soda
- 1 teaspoon salt
- ½ cup (120 g) buttermilk, room temperature
Vanilla Buttercream
- 12 tablespoons (170 grams) of unsalted butter, room temperature
- 5 cup (575 gram) of powdered sugar
- ⅓ cup (80 grams) heavy cream
- 1 tablespoon vanilla extract
- ½ teaspoon fine salt or to taste
- A few drops of lemon or lime juice (or white vinegar) to cut sweetness; add to your preference
For tinting features (eyes, nose, and mouth)
- Cocoa powder or brown or black gel food color
- 1–2 teaspoons black cocoa or a touch of black gel (darkest noses and eyes)
Instructions
- Make the strawberry puree (skip if using jam). Cook the strawberries with the sugar and lemon juice over medium heat until thick and jam-like — about 5 minutes for fresh, 10–15 for frozen. Cool, then blend smooth.
- Prep. Preheat the oven to 350°F and line your cupcake tins (18 total).
- Mix the wet ingredients. In a large bowl, whisk together the sugar, oil, eggs, and the almond and vanilla extracts. Whisk in the cooled strawberry puree.
- Add the dry ingredients. In a separate bowl, combine the flour, freeze dried strawberry powder, baking powder, baking soda, and salt. Add to the wet ingredients alternating with the buttermilk, beginning and ending with the flour.
- Bake. Divide the batter among the liners and bake about 19–21 minutes, until a toothpick comes out clean. Cool completely before decorating (I bake a day or two ahead and refrigerate or freeze).
- Make the buttercream. In a stand mixer, combine the butter, powdered sugar, extract, heavy cream, and salt. Start on low in short bursts so the sugar doesn't fly, then increase speed and beat 5 minutes until smooth.
- Divide and tint. Split the buttercream into bowls for the bears you're making. Remember you'll need some of your frosting to be darkened with cocoa powder and food gel for their facial features.
- Fit grass piping tips into the fur bags and open round tips into the muzzle and feature bags (which should be a dark color frosting).
- Pipe the fur. Press the grass tip against the cupcake so the buttercream connects, then pull straight up and away to form strands. Cover the whole top. Repeat this across all your cupcakes until they're furry!
- Add the muzzle and ears. With a round tip (like Wilton 10 or 12), pipe an oval mound low and center. Place your piping tip toward the upper edges of the cupcake to create two dots of frosting for ears.
- Pipe the face. With a smaller round tip and your darkest buttercream, pipe an oval nose on the muzzle and two dots above for eyes.
- Repeat for all the bears and keep cool until serving.
Notes
- Make-ahead: bake cupcakes and make buttercream up to 2 days ahead; decorate cold, ideally the day of or day before the party.
- Storage: airtight container; holds shape at cool room temp for a day, or refrigerate longer and bring to room temperature ~30 minutes before serving.
- Tips: a Wilton 233 grass tip gives the finest fur (234 also works for making a larger footprint on the cupcakes).
- As noted in the blog post, there are many options to select for decorating. For the purposes of this recipe card, know that the nutritional facts are based off of strawberry cupcakes with a vanilla buttercream frosting.
- Leftover buttercream keeps in an airtight container in the freezer up to 3 months; thaw and rewhip before using.
The nutritional values are approximate and can vary based on specific ingredient brands and measurements.
- Prep Time: 30 minutes
- Buttercream and Cupcake Assembly: 60 minutes
- Cook Time: 20 minutes
- Category: Dessert
- Cuisine: American
Nutrition
- Serving Size: 1 cupcake
- Calories: 407
- Sugar: 48 g
- Sodium: 317 mg
- Fat: 18 g
- Saturated Fat: 7 g
- Trans Fat: 0 g
- Carbohydrates: 58 g
- Fiber: 1 g
- Protein: 3 g
- Cholesterol: 67 mg


Leave a Reply