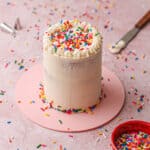
Need a small cake for a special occasion? This adorable 4-inch mini birthday cake is ready to steal the show. Despite its size, this small-batch recipe is perfect for sharing with 3–4 people (depending on slice size) or serving as a fun smash cake. It’s packed (and topped) with rainbow sprinkles for big party vibes. 🎉 And my personal favorite part: no electric mixer needed for the batter—just a bowl and whisk.

When just a few friends or family are gathering, this option is great. You don't end up having massive slabs of leftover cake to freeze or store.
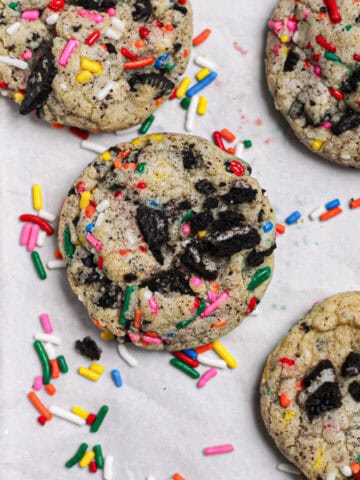
Plus, these little 4-inch cake layers are so cute that they literally made a friend gasp: First when she saw this adorable cake and then again when she cut into the sprinkle-filled layers! I've brought this cake along with my birthday cake cookies made from scratch to parties, and they make for a very festive combo for anybody celebrating a birthday. 🎉
While this vanilla option is a birthday classic, I love baking small-batch desserts and have more where that came from. If you prefer fruit-forward flavors, try these moist mini strawberry bundt cakes or my mini apple bundt cakes with spiced glaze.
For those who love a classic, my bite-sized carrot cakes offer that same perfect portion without the leftover waste.
🧁And if you need a cupcake equivalent of this mini birthday cake, my small batch vanilla cupcakes are a great solution.
Jump to:
- 📋 Ingredient List
- 💭 How many does a 4-inch cake serve?
- 🎥 Quick Recipe Video
- Best Results: Baking in Grams
- 📖 Step-by-Step Instructions
- Pro Tips for Making the Best Buttercream
- 💭 Top Tip for Decorating this Mini Cake
- Frosting & Assembling this 4-Inch Mini Birthday Cake
- Flavor and Color Variations
- Size Variations and Options
- Cake Tools You'll Need
- Storage and Serving Instructions for this Mini Cake
- FAQ & Troubleshooting
- 🥳 More Treats for a Party
- 4-Inch Mini Birthday Cake
📋 Ingredient List

This recipe makes enough batter for three four-inch cake layers. See the recipe card below for the full ingredient list and quantities. Here are some of the noteworthy ones:
- Unsalted butter, melted and cooled - Using melted butter and oil together will give this cake lots of moisture, as well as flavor. Because this butter is melted, that's also why you can whip the cake batter by hand instead of having to turn on your stand mixer.
- Clear imitation vanilla extract (pure vanilla extract works but is slightly different) - Not only does clear imitation vanilla extract tend to be cheaper, it actually creates a more authentic Funfetti flavor. It also keeps your cake whiter (given that vanilla extract is brown). Plus, it retains more flavor when baked at higher temperatures. You can read more about it from Wilton's blog.
- Almond extract - Taking a note from Molly Yeh's funfetti cake recipe, we use a hint of almond extract to bring in those sweet and classic Funfetti box cake vibes.
- Rainbow sprinkles - Whether you're making this recipe for birthday parties or a regular weekday, you need sprinkles! They add a nice pop of color as you bite into these cute little cake layers!
💭 How many does a 4-inch cake serve?
A 4-inch cake typically serves 3-4 people, depending on slice size. It’s perfect for small celebrations, date nights, or as a smash cake.
🎥 Quick Recipe Video
Best Results: Baking in Grams
If you’re not already, use a kitchen scale for accuracy in baking.
While I include cups and grams in my recipe cards, weighing your ingredients and writing or following a recipe using a standard metric like grams ensures consistency.
I highly recommend investing $30 or less in a kitchen scale.
📖 Step-by-Step Instructions
The cake batter comes together easily by hand. No electric mixer required until you dive into making the buttercream.
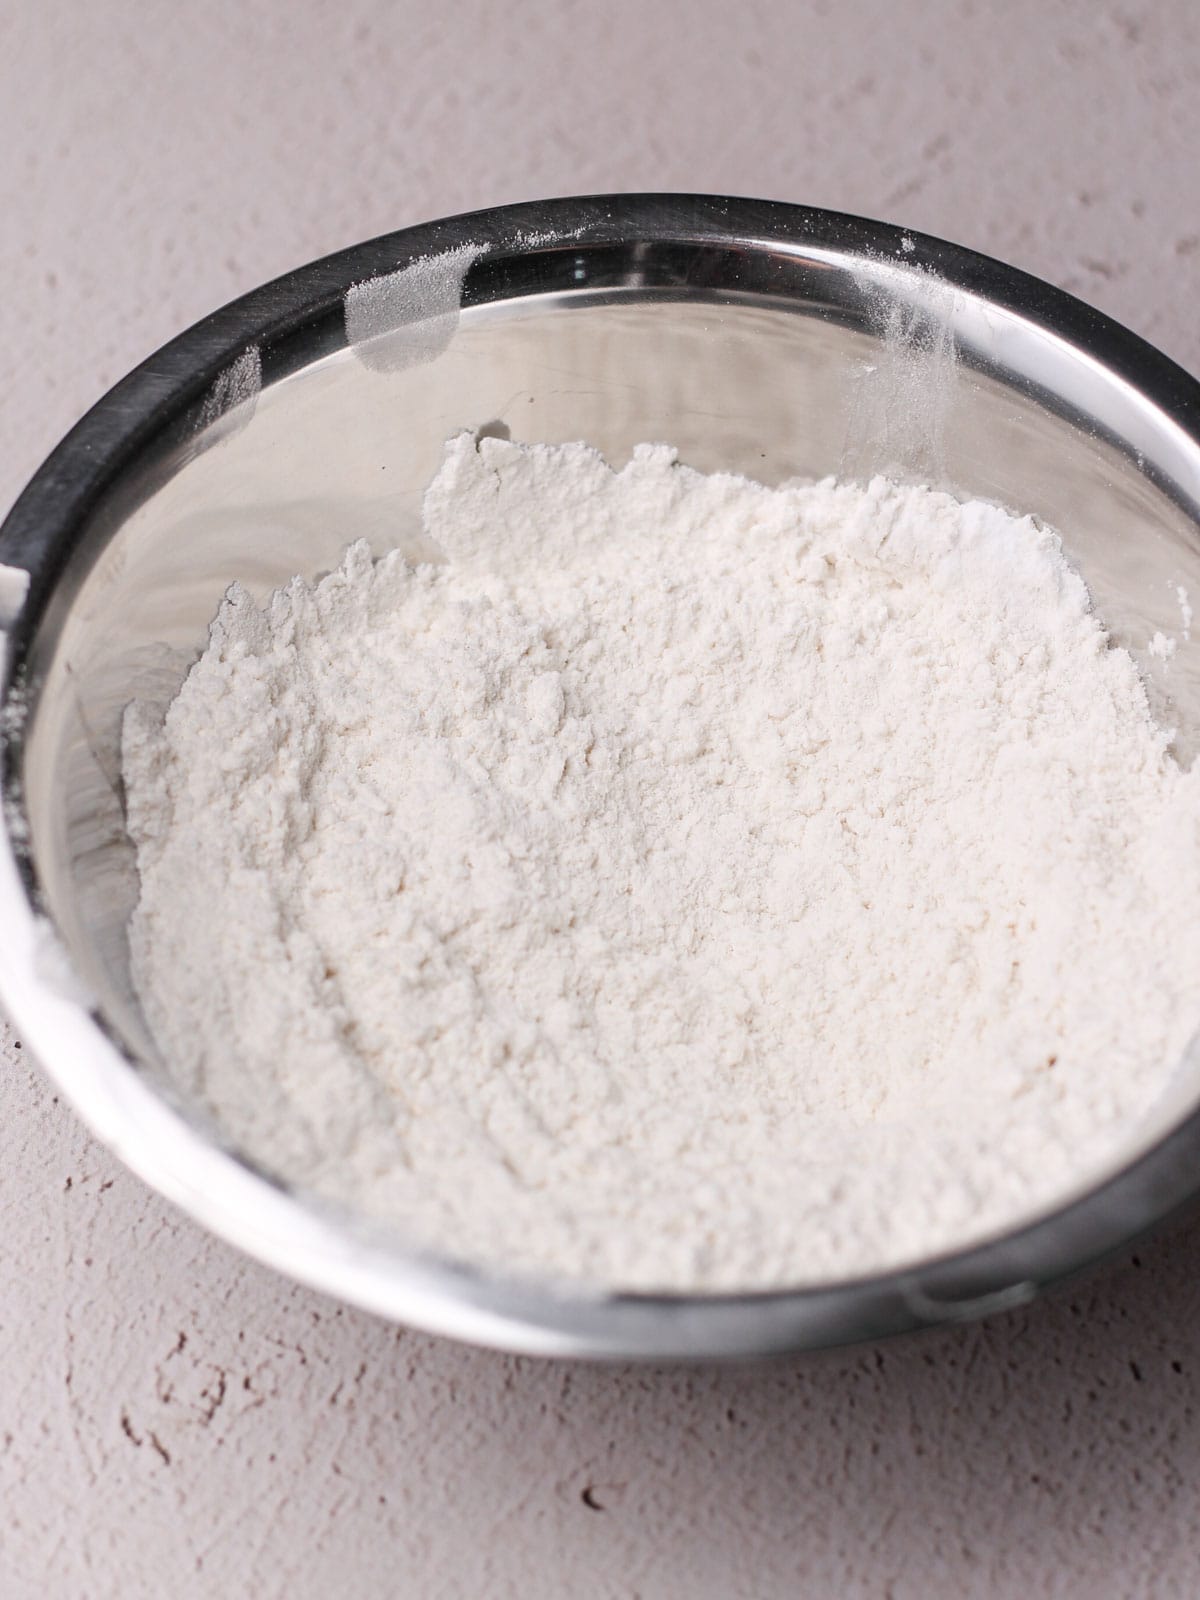
Step 1: Start by preheating your oven to 350°F and greasing three 4” cake pans (or lining with parchment paper). To a large bowl, add and whisk together all-purpose flour, baking powder, baking soda, and kosher salt. Set aside.

Step 2: Using a whisk, mix your melted and cooled butter, sugar, vanilla and almond extracts, and oil together for about 2 minutes.

Step 3: Stop mixing to add your whole egg and beat again for another minute.

Step 4: Add half of your bowl of dry ingredients and half of your buttermilk to your primary mixing bowl. Mix for about 45 seconds. Repeat this step to incorporate all buttermilk and flour, as well as fold in your rainbow sprinkles.

Step 5: Pour and evenly spread the batter into your three 4-inch cake pans. Bake for 25-30 minutes or until cakes appear buttery and dense. You'll want to see them bounce back at the touch of your finger.

Step 6: Let cakes cool in pan about 5 minutes before transferring to a wire rack to cool completely before frosting.
Pro Tips for Making the Best Buttercream

- Want a super smooth frosting? For about 5 minutes, let your mixer fully combine your room temperature butter, extracts, powdered sugar, and milk or heavy cream. Then spend a few using a flexible rubber spatula to swipe the frosting around in your bowl. Push buttercream from the middle to the sides of the bowl, watching as the tears and bubbles. This creates a nice, fluffy frosting for your cake.
- Buttercream too sweet? Add a few dashes of lemon juice, lime juice, or distilled white vinegar to your bowl of buttercream. Any one of these acidic ingredients will yield a less sweet frosting. Taste test to your preference.
- Prefer a tangier frosting? You can also add some cream cheese to this recipe if you prefer a bit of tanginess in your frosting. It will also help offset sweetness if you prefer a less sugary tasting buttercream.
💭 Top Tip for Decorating this Mini Cake
Cake is easier to decorate when it's cold compared to warm or even room temperature.
At room temperature, crumbs can get pulled from the cake into the frosting, creating a messier look.
For the best decorating experience, wrap your cakes in plastic wrap and freeze them for at least an hour before decorating. Do this once they've cooled, about 20-30 minutes after baking.
The plastic wrap locks in the moisture in the freezer, so you don't need to worry about this process drying out your cake! Then you can crumb coat your cake!
Frosting & Assembling this 4-Inch Mini Birthday Cake

Step 1: After whipping together all your ingredients for the American buttercream in this recipe, pipe (with a pastry bag and round piping tip) or spread a dollop of onto a cake circle to act as glue to hold the layer in place. Set first cake layer on top of that.

Step 2: Pipe about a third of your frosting on top of the layer and spread evenly with a cake spatula, spoon or knife.

Step 3: Place second cake layer on top of the first, adding more frosting between the layers as needed to fill in any gaps. Repeat step with final cake layer.

Step 4: Starting from the base of the cake and moving to the top, pipe a thick layer of frosting all around your cake’s sides and top.

Step 5: Place a cake scraper (or back of a bench scraper) against the side of the cake and gently pull the cake around to smooth out bubbles in the frosting.

Step 6: Continue this process until the whole cake is smooth. Then, use a standard-sized or small offset spatula to push the excess cake frosting around the cake's top (looks a bit like a little crown 👑) toward the center of the cake.

Step 7: If desired, use an open star tip to create a decorative border around the top of your cake with buttercream swirls.

Step 8: Add a thin layer of sprinkles to its top and base. Or leave the cake plain for a more classic look.
Flavor and Color Variations
- Flavor - Swap your favorite extracts into the cake batter or frosting to change it up! Lemon, coconut, and raspberry are some alternatives that come to mind.
- Filling - Like I do in my strawberry vanilla cake, have fun experimenting with filling between the layers. Just be sure to pipe a border tall enough to contain it.
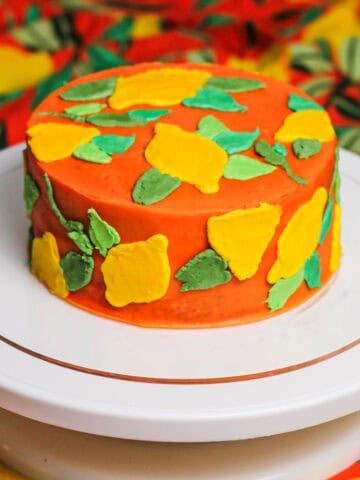
- Appearance - There are so many color options that would be fun on this! I made one version with different shades of blue and green - the possibilities are infinite.
Size Variations and Options
This recipe works well as a smash cake, but it makes for an excellent mini birthday cake or celebration cake for all ages.
And spread this cake recipe even more by divvying it up further.
I actually used these three small layers for two separate occasions once.
- I stacked and decorated two layers for a smash cake for a friend's baby.
- I used the remaining layer for a bite-sized dessert for friends celebrating an engagement.
6-inch cake layers - You could also use two round 6-inch cake pans.
Whether you use 4" or 6" pans, this small batch vanilla cake is perfect for people who like a special dessert but don't have a massive sweet tooth. A little can go a long way!

Cake Tools You'll Need
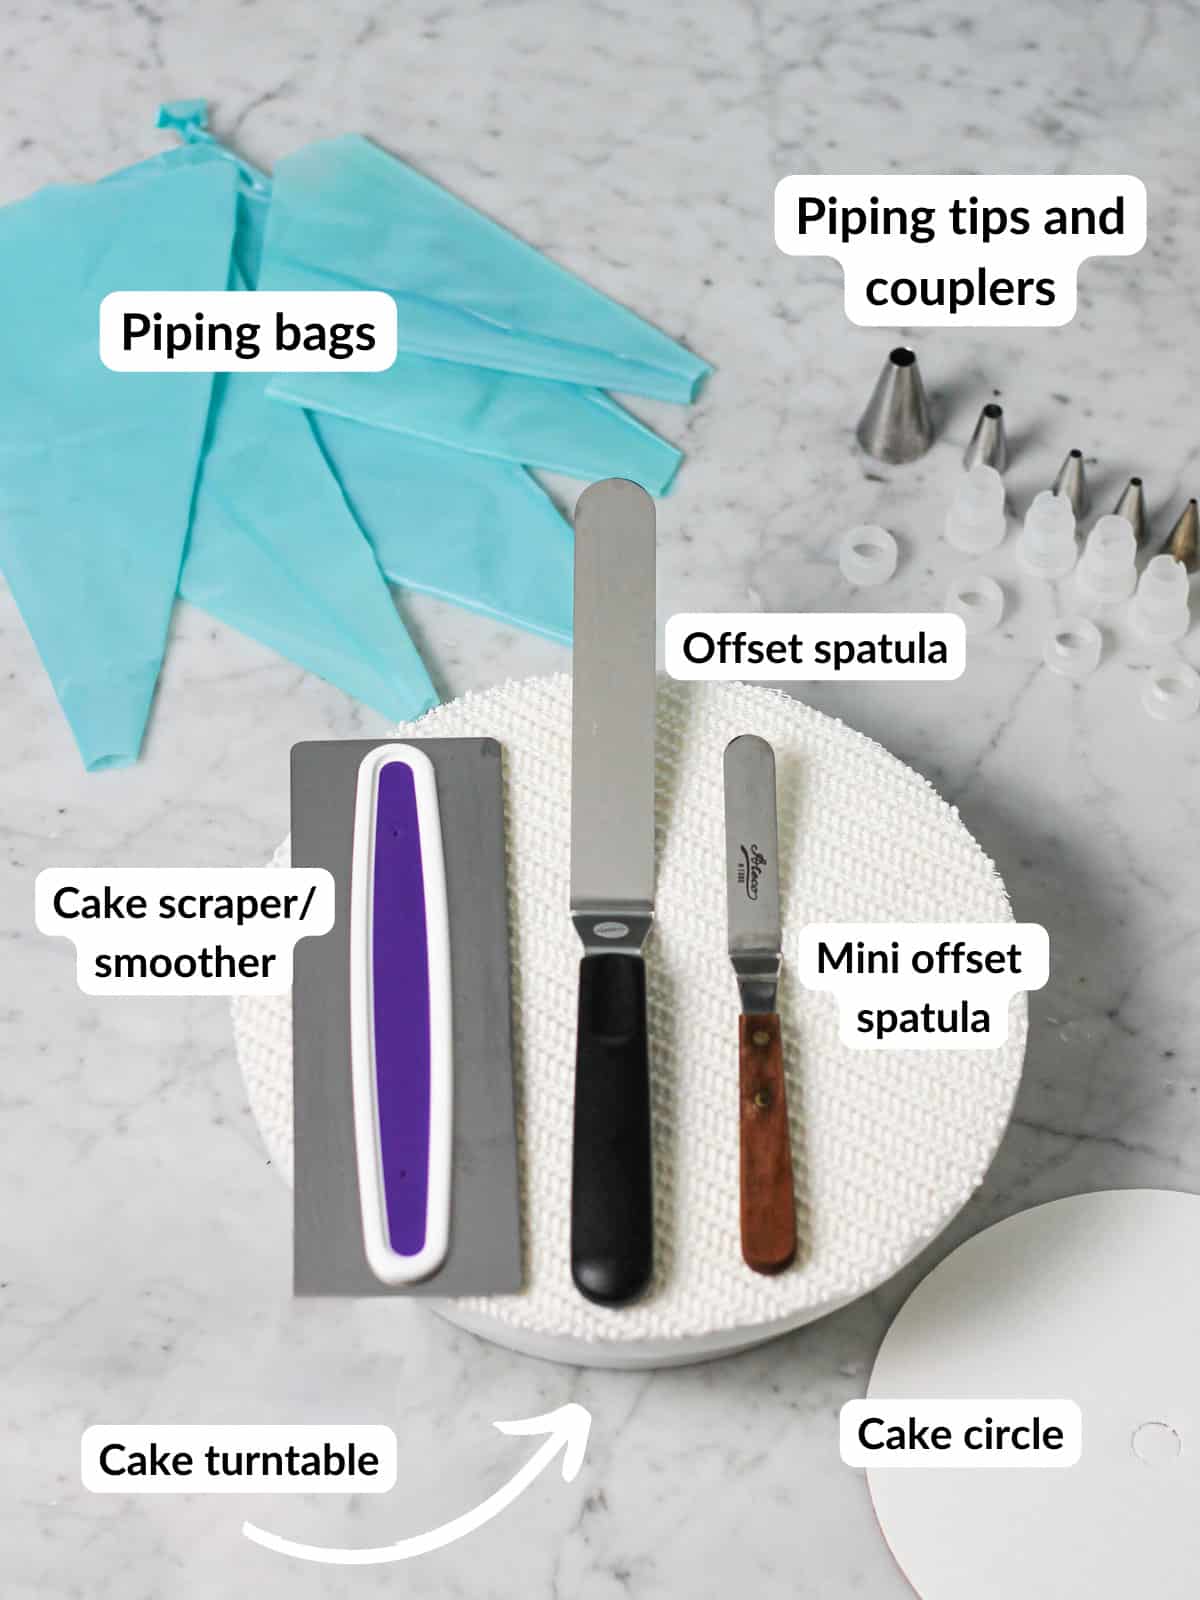
If you're a frequent cake or dessert maker, you probably already have most or all of the equipment you need for baking this cake.
For ease of decorating this tiny layer cake you will want:
- Four-inch cake pans (I know it's an odd pan size, but I think they're the perfect size for smaller gatherings. I love the ones I have from Fat Daddio's!)
- A cake turntable
- Cake circle
- Cake scraper or smoother
- Offset spatula
- Piping bag and tip(s) of your choice
- Stand mixer and paddle attachment or hand mixer for the vanilla buttercream

Storage and Serving Instructions for this Mini Cake
If you want to prep the layers or the frosting in advance for this 4-inch mini birthday cake, that's totally doable.
Freezing - You can freeze each layer for up to three months. Place them in an airtight container in your freezer. Bring them out an hour or two before you'd like to serve them.
I also like to wrap them in plastic wrap first for another layer of protection against freezer burn.
Refrigerating - If you've already made the cake, it'll stay fresh for about 3 days in the refrigerator.
Make sure to store it also in an airtight container. This helps it retain its moisture longer, minimizing dryness and loss of flavor.
Bring it from the refrigerator about an hour before serving for a more tender cake.
Read more about how to freeze frosted cupcakes if you're curious about storing and refrigerating cake-based desserts.
FAQ & Troubleshooting
I've made this recipe on repeat for a while, so you shouldn't have trouble with dryness. But if you do, one of the following may be the culprit.
Overbaking: If you leave the cake in the oven too long or bake it too high of a temperature, your cake's texture will dry out.
Excessive flour: Measuring flour incorrectly (e.g., packing it instead of spooning and leveling) can lead to a dense, dry cake.
Not enough fat or liquid: Make sure to follow the recipe’s ratios carefully when it comes to liquid. Reducing the amount of ingredients like butter or oil will change the cake's moisture level.
Too much leavening agent: An excessive amount of either baking powder or soda can cause the cake to rise and fall. This, too, can leave you with a dry cake.
If you're limited with the tools that you have for cake decorating I recommend, you can still make a really impressive-looking cake.
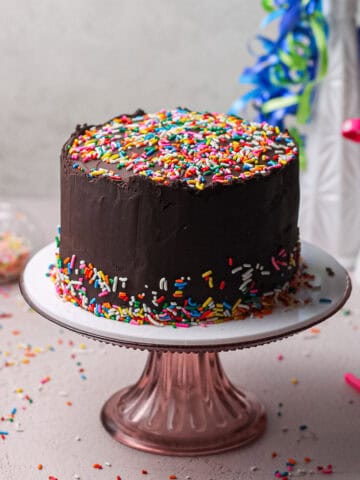
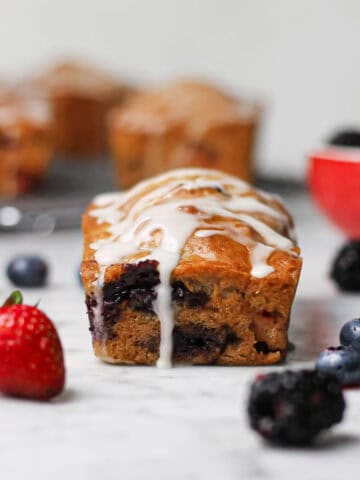
The design on this banana cake with chocolate frosting is doable here if you just have a spoon! You'll use it to make swooping designs all around your cake.
If you have a spoon and piping bags, see my guide for cake decorating with a spoon.
If you plan to decorate more cakes in the future, I recommend the minimal set of tools above to elevate your decorating.
While I've only tried and tested this cake with all-purpose flour, you have options. Look into the Food Network's guide for swapping in gluten-free flour; typically 1:1 replacements seem to work well, though you may need to make more adjustments.
The cake batter can be mixed entirely by hand. An electric mixer is recommended for the buttercream frosting.

Subscribe to receive more recipes like this one in your inbox!
🥳 More Treats for a Party
This recipe joins a few other sprinkle and Funfetti-inspired treats on my blog!
Print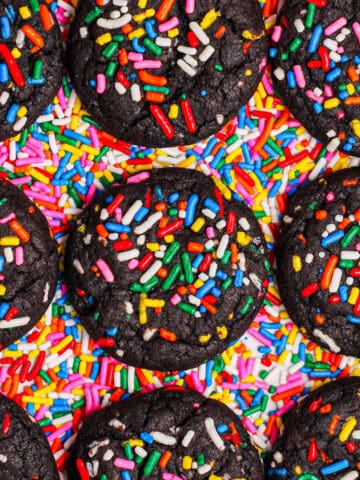

4-Inch Mini Birthday Cake
- Total Time: 70 minutes
- Yield: 1 4-inch, 3-layer cake 1x
Description
This 4-inch mini birthday cake is a great small-batch recipe for intimate celebrations or smash cakes. The batter mixes easily by hand and is finished with a simple homemade buttercream.
Ingredients
Cake Ingredients
- 1 cup (125 grams) all-purpose flour
- ½ teaspoon baking powder
- ½ teaspoon baking soda
- ¼ teaspoon kosher salt
- 6 tablespoons (85 grams) unsalted butter, melted and cooled
- ½ cup (100 grams) granulated sugar
- 2 teaspoons vanilla extract
- 1 teaspoon almond extract
- 1 egg at room temperature
- 2 tablespoons canola oil (or other colorless, odorless oil like vegetable or rapeseed)
- ½ cup (120 grams) buttermilk, room temperature
- ⅓ cup (60 grams) rainbow sprinkles
Vanilla Buttercream
- 4 tablespoons (56 grams) unsalted butter, room temperature
- 2 cups (225 grams) powdered sugar
- ⅓ cup (85 grams) heavy cream (for a thicker frosting) or milk (for thinner)
- 2 teaspoons vanilla extract
- 1 teaspoon almond extract
- Pinch of salt
- Optional: A few drops of lemon or lime juice (or white vinegar) to cut sweetness; add to your preference
Instructions
Cake Instructions
- Preheat your oven to 350 F and grease three 4” cake pans
- To a large bowl, add and whisk together all-purpose flour, baking powder, baking soda, and kosher salt. Set aside.
- In another bowl with a whisk, mix your melted and cooled butter, sugar, vanilla and almond extracts, and oil together for about 2 minutes. Stop mixing to add the egg and beat again for another minute.
- Add half of your bowl of dry ingredients and half of your buttermilk to your primary mixing bowl. Mix for about 45 seconds before repeating step to incorporate all buttermilk and flour, as well as fold in your rainbow sprinkles.
- Pour and evenly spread the batter into your small prepared cake pans. Bake for 25-30 minutes or until cakes appear buttery and dense but bounce back at the touch of your finger.
- Let cakes cool in pan about 5 minutes before transferring to a wire rack to cool completely before frosting.
Vanilla Buttercream and Cake Assembly Instructions
- In the bowl of a stand mixer fitted with the paddle attachment, or in a large mixing bowl using a handheld mixer, beat the unsalted butter, powdered sugar, salt, heavy cream or milk, and vanilla and almond extracts on low for about 30 seconds before increasing speed to medium high for 5 minutes.
- Test taste and add a drop or two of lemon juice to cut sweetness if desired.
- Place frosting in a piping bag fitted with a tip of your choice or use a spoon or spatula to spread it onto your cake.
- Add a dollop of buttercream onto a cake circle to act as glue to hold the layer in place. Set first cake layer on top of that, and pipe about a third of your frosting onto the layer. Spread evenly with a cake spatula, spoon or knife.
- Place second cake layer on top of the first, adding more frosting between the layers as needed to fill in any gaps. Repeat step with final cake layer.
- Starting from the base of the cake and moving to the top, pipe a thick layer of frosting all around your cake’s sides and top.
- Place a cake scraper (or back of a bench scraper) against the side of the cake and gently pull the cake around to smooth out bubbles in the frosting.
- Continue this process until the whole cake is smooth before using a standard-sized or small offset spatula to push the excess cake frosting around the cake's top toward the center of the cake.
- If desired, use an open star tip to create a decorative border around the top of your cake with buttercream swirls, and add sprinkles for fun.
Notes
- Nutritional values are approximate and may vary based on specific ingredients, brands, and preparation methods. For the most accurate information, please consult a registered dietitian or nutritionist.
- This cake yields approximately 4 slices, depending on the size of each one.
- Prep Time: 20 minutes
- Frosting & Assembly: 20 minutes
- Cook Time: 30 minutes
- Category: Dessert
- Cuisine: American
Nutrition
- Serving Size: 1 slice
- Calories: 929
- Sugar: 94 g
- Sodium: 427 mg
- Fat: 45 g
- Saturated Fat: 26 g
- Unsaturated Fat: 19 g
- Trans Fat: 0g
- Carbohydrates: 122 g
- Fiber: 1 g
- Protein: 7 g
- Cholesterol: 150 mg

Savanna
thought the cake was good but not very sweet.
Susan Gravatt
Thanks for trying the recipe. This cake is designed to be less sweet to balance the frosting. If you'd like it sweeter, you can add a bit more sugar to the batter or increase the sugar in the frosting for an overall sweeter cake. Also, sprinkles are made from sugar, so you can add more of them to your batter or the exterior of the cake when frosted.
Julia Z
This recipe was a perfect one for a fast, small layer cake for my husband’s birthday. It was moist, textural, and delicious! Added in cardamom in addition to the cinnamon.
Susan Gravatt
Hi, Julia! This comment just made my day. 🙂 Thanks so much for sharing a review, and I love that you all enjoyed this cake for his birthday!
Katie
As delicious as the cake was, the nutritional information is waaay off. The stats here say that each slice is approximately 229 calories. I track my calories to help me lose some weight, and the calorie count was closer to 900 calories. Per slice.
Don’t get me wrong, I enjoyed the cake very much, but felt a little betrayed at the end.
Susan Gravatt
Hi Katie. Thanks for taking the time to make this cake and flag the nutritional info.
I apologize for the issue you noticed with the numbers; you were correct. The values had unfortunately been calculated on the wrong serving basis. I've fixed them, and the card now reflects the stats.
Glad you enjoyed the cake despite the mix-up, and I hope you will try other recipes of mine in the future.