
If I had to choose my ultimate, yet simple, fall treat, it would be a warm chai latte. Those spices hit just right for me in autumn. And seasonal cakes hold a special place in my heart and belly, too. So here comes this pumpkin chai cake, developed in the style of a Milk Bar cake. It's full of seasonal spices, a Biscoff chai crumb, and a decadent, fluffy mascarpone frosting. Plus, it's built in a cake ring instead of stacked and frosted the usual way, which means no crumb coat and no smoothing the sides. If you've never made a Milk Bar cake, you're in for a treat and a surprise. It's probably easier than you imagined. Let's get to it!
For more fall recipes like this one, try my:
- Dirty chai cake, wrapped in a delicious, marbled chai buttercream,
- Mascarpone cookies, made super soft and chewy from pumpkin and topped with a mascarpone espresso frosting
- Mini apple Bundt cakes are the perfect-sized small cake to serve at fall gatherings
Jump to:
- What Makes This a Milk Bar Pumpkin Chai Cake
- Tools You Need to Make This Pumpkin Chai Cake
- Best Results: Baking in Grams
- Tips for the Chai Crumb and Cake Sponge
- Making the Whipped Mascarpone Frosting
- Cutting Your Cake Rounds
- How to Assemble Your Pumpkin Chai Cake Layers
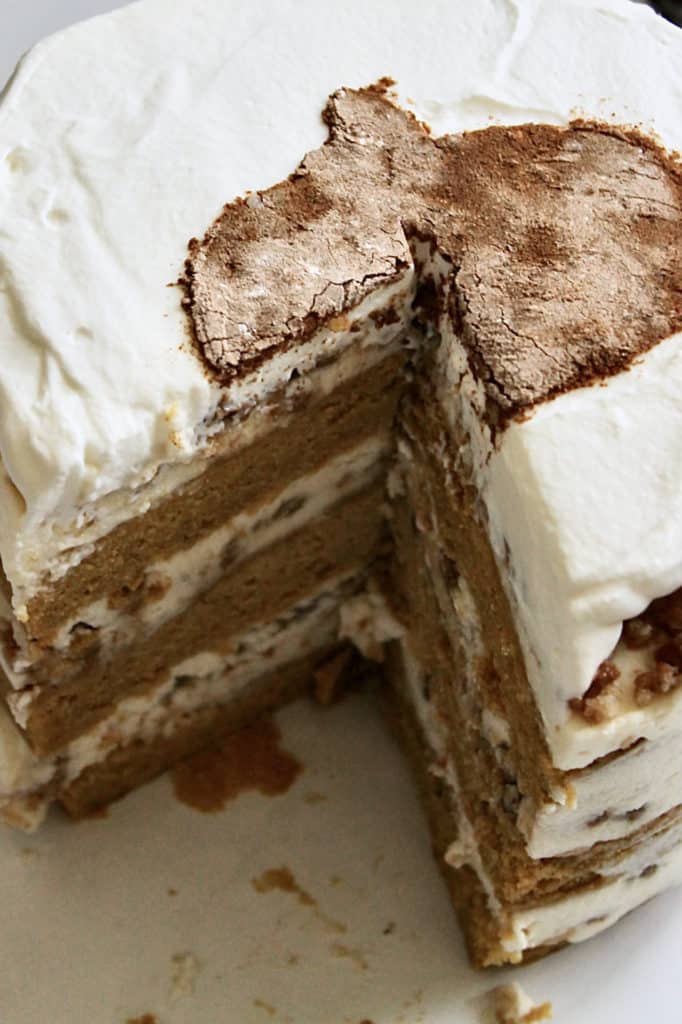
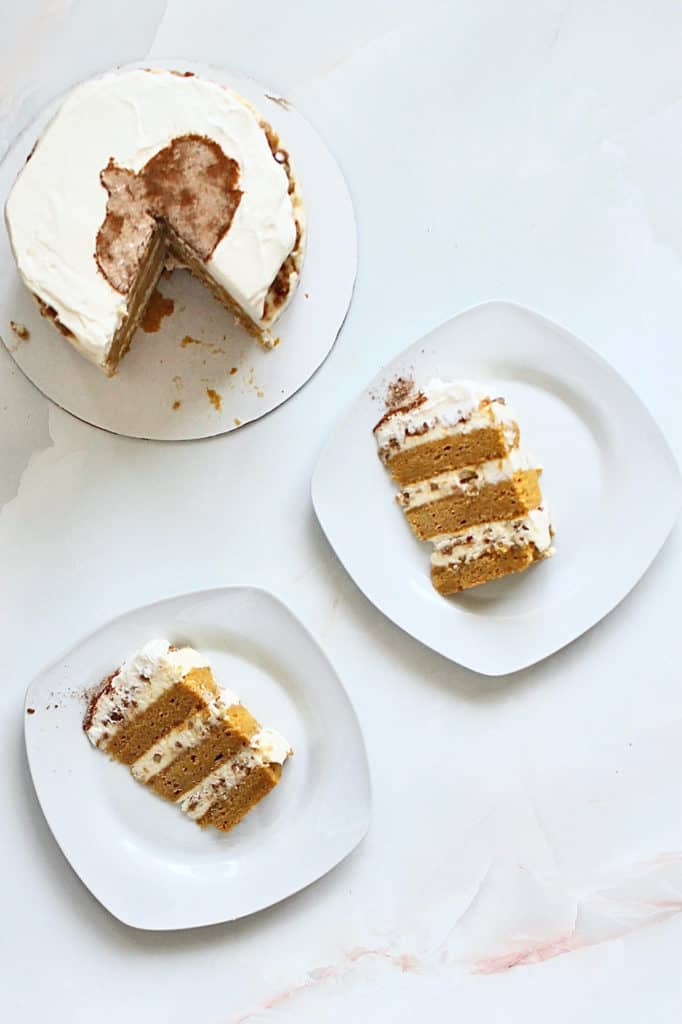
- Making the Pumpkin Design on Top
- How Far Ahead Can You Make This Cake?
- Can You Make This as Pumpkin Chai Bars or Cupcakes?
- How to Store and Freeze Pumpkin Chai Cake
- Pumpkin Chai Cake FAQs
- More Fall Desserts
- Pumpkin Chai Latte Cake
What Makes This a Milk Bar Pumpkin Chai Cake
At the end of August in 2021, I was already dreaming about fall desserts. That's partly because summer was winding down, and I genuinely love autumn. But an online Creative Baking class, taught by Christina Tosi of Milk Bar, definitely played a role here, too.
The homestretch of the course focused on cake, the section I had most eagerly awaited because Milk Bar cakes are as delicious as they are unique. There's often a cake sponge (the layers) and frosting so pretty typical there. But Milk Bar cakes really stand out when it comes to the crumb and cake soak. The crumb adds texture between the layers, while the soak (a liquid poured onto your cake layers) is there for more moisture.
Christina Tosi is a big fan of letting a “flavor story” guide the creative process. Memories, seasons, places, and other foods are often the sources of her dessert inspiration. Fall, chai, and pumpkin really led the way in the flavor story for this pumpkin chai cake.
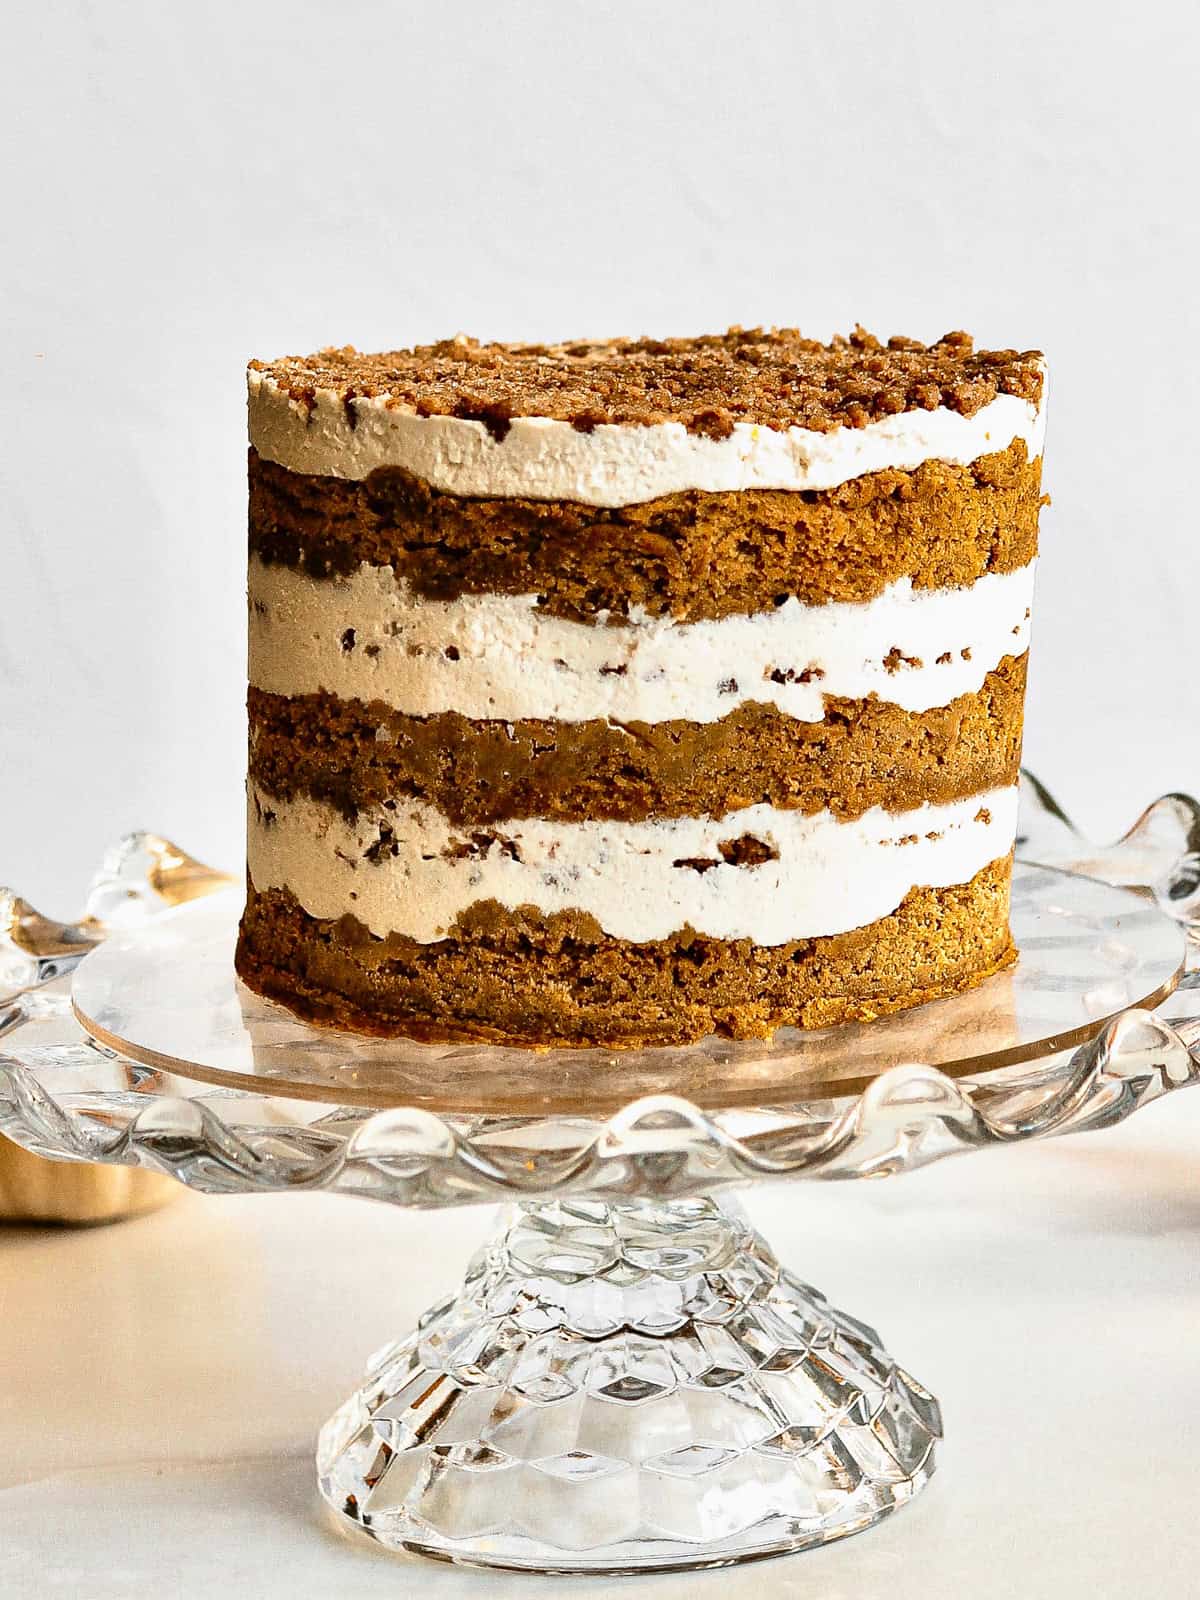
Here, the pumpkin cake sponge is flavored with chai spices, which are also present in the crumb. The crumb also includes Biscoff cookies, and the soak is a few splatters of whole milk. The fluffy, whipped mascarpone frosting pairs so well with the pumpkin and spicier ingredients.
Tools You Need to Make This Pumpkin Chai Cake
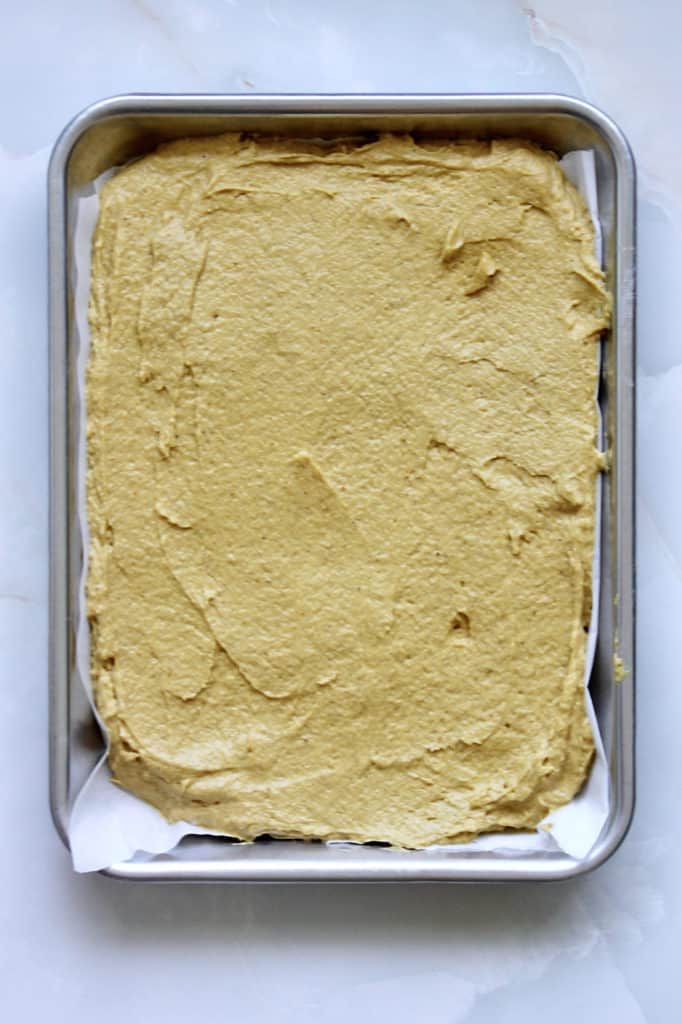
Another big differentiator with a Milk Bar cake is the pan in which it bakes. Unlike your typical layer cake, baked in separate pans, here, you will need one quarter sheet pan to hold and bake all of your batter. You'll cut your layers straight out of this 9 x 13" pan.
And the simplest way to get those layers is with a cake ring. I'd never used one before this class and admittedly hate buying tools I don't foresee using more than once or twice. However, the process for making a Milk Bar cake is in many ways faster than your usual process for stacking and decorating cake with frosting. So the ring is a good investment because you'll want to return to this process for making future cakes! You can find the one I ordered on Amazon. The ring will be where you stack all your cake layers, along with the chai crumb and mascarpone frosting.
You'll also need acetate sheets to put inside the ring. It'll hold your chai cake layers in place and keep them from getting stuck to the metal (which could happen in the freezer without the acetate). You'll peel it away as a final step in the process to reveal and eat your spiced fall cake!
I also wrote and tested this pumpkin cake recipe using a stand mixer, which I highly recommend for making cakes. That said, you can probably get by with a hand mixer. You may spend more time beating your ingredients as a hand mixer lacks the powerful motor you find in a stand mixer. Steps could take you longer.
Best Results: Baking in Grams
If you’re not already, use a kitchen scale for accuracy in baking.
While I include cups and grams in my recipe cards, weighing your ingredients and writing or following a recipe using a standard metric like grams ensures consistency.
I highly recommend investing $30 or less in a kitchen scale.
Tips for the Chai Crumb and Cake Sponge
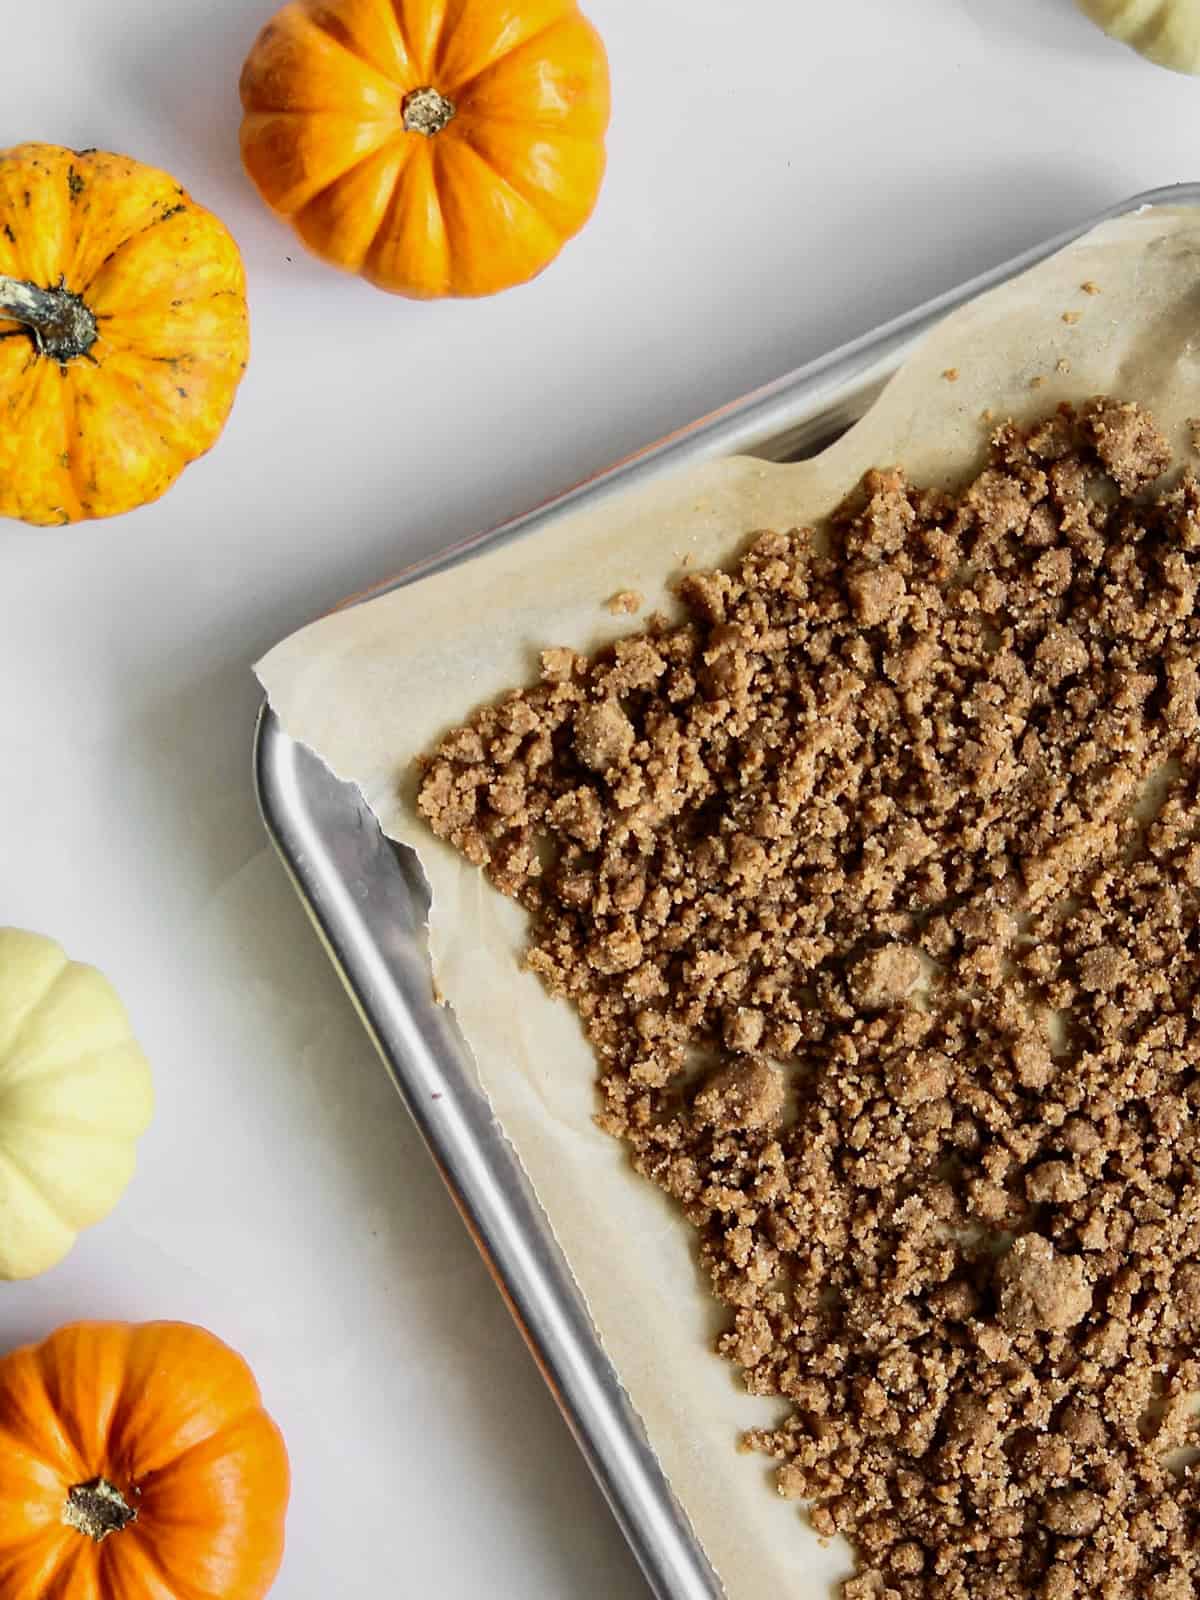
The crumb is key to making this taste like a Milk Bar cake.
It's a mix of sugars, flour, and crumbled Biscoff cookies baked into little clusters, and it goes between every layer and on top. You'll want to make it first, given that it needs to cool completely before you build anything.
For the sponge, cream your butter and sugars very well at the start. This yields a fluffier (read: yummier) cake sponge. And if you notice any batter or dry ingredients flying out of the bowl, cover your stand mixer with a dishtowel. This recipe has a lot of wet batter, particularly in its early steps, and I have to cover my mixer to avoid a big mess.
After incorporating the dry ingredients into the wet ones, scrape the bowl's sides so there are no pockets where dry ingredients have hidden. I use my mixer for about 45 seconds of combining wet and dry, then do the rest by hand with a spatula for another minute or two to avoid over-mixing.
Making the Whipped Mascarpone Frosting
You'll want the bowl of your stand mixer to be cold to the touch before you start. Pop it in the refrigerator or freezer, or, if you're like me and low on space in either, put some ice cubes in the bowl to make it chilly.
When you're ready, pour the ice into a glass with some water, hydrate yourself, then wipe down the bowl. Okay, do what you want with the water, but do be sure your bowl is cold! It'll make your frosting come together more quickly and without your accidentally over-whipping it.
Cutting Your Cake Rounds
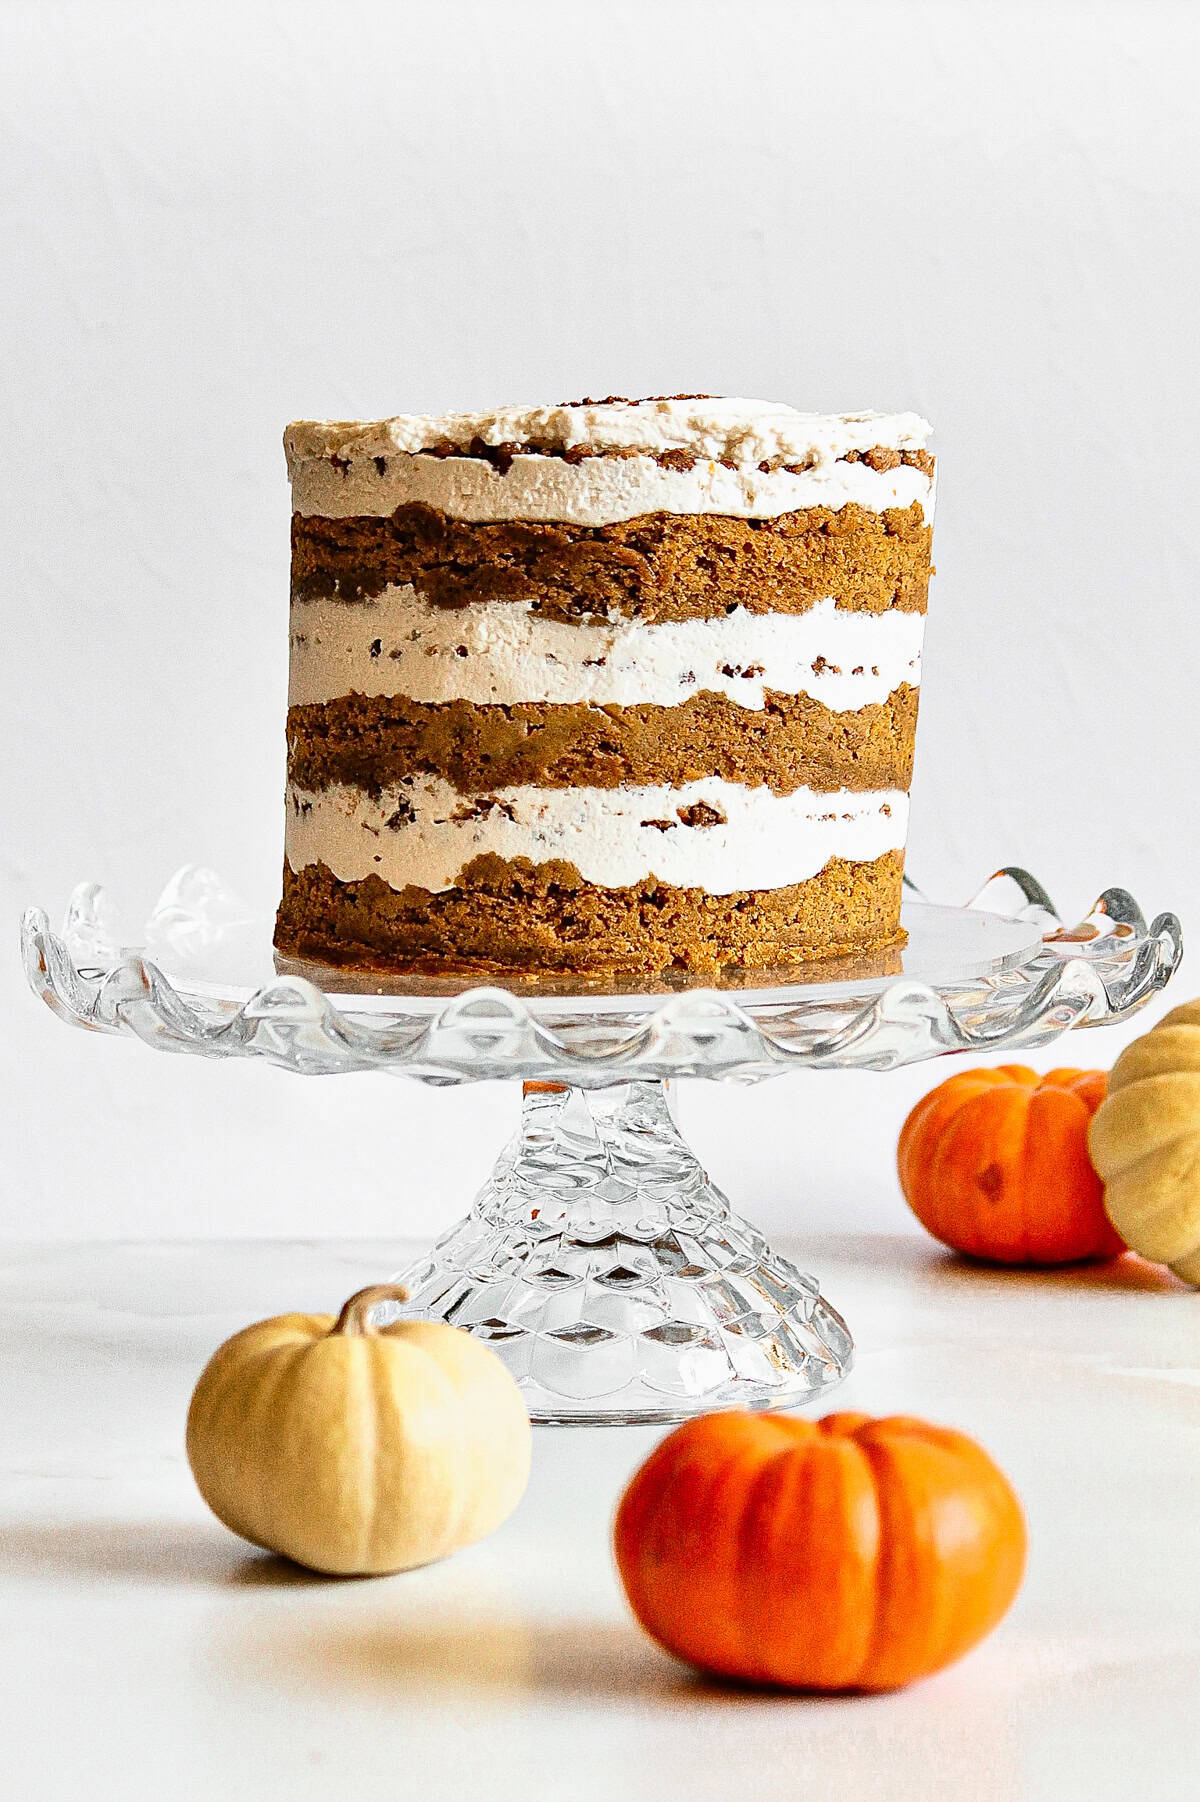
Before you stack anything, you need to cut your layers. Use the 6-inch cake ring to stamp out two full rounds from your cooled sheet of cake, then cut two half circles from what's left. The two full rounds become your middle and top layers. The half circles and any remaining scraps become the bottom layer.
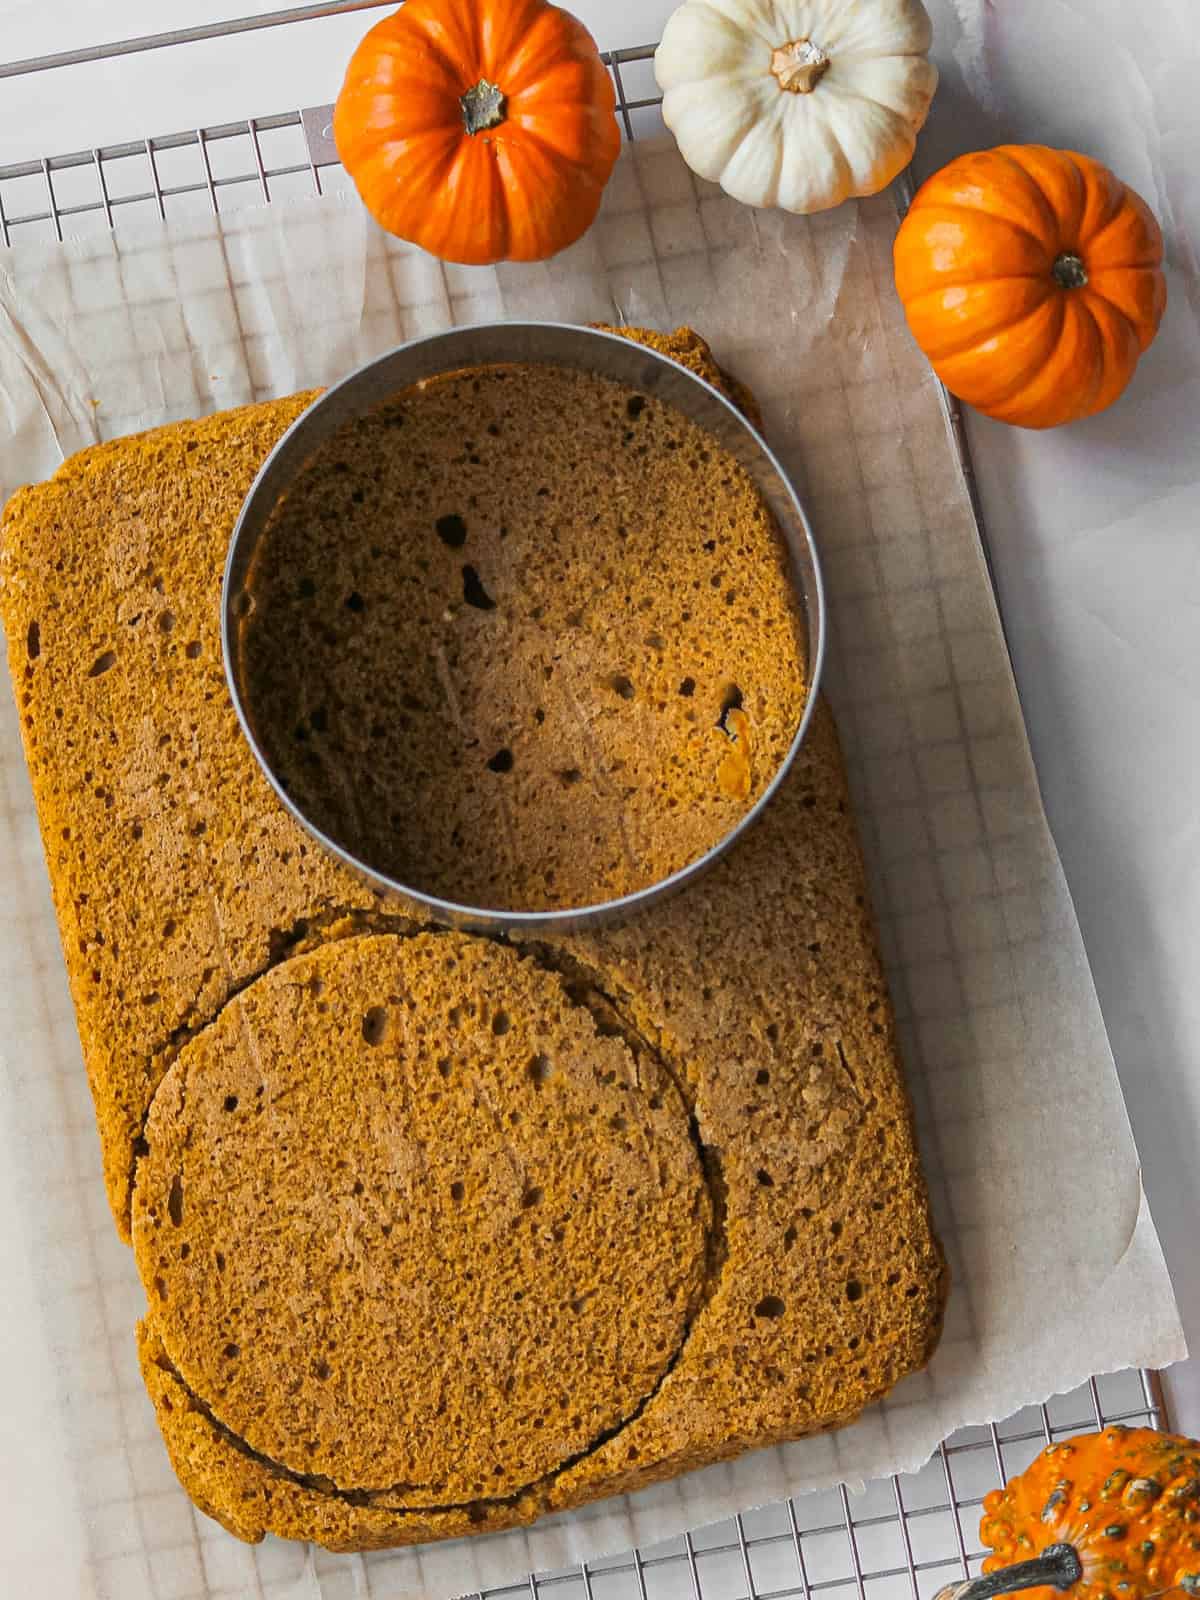
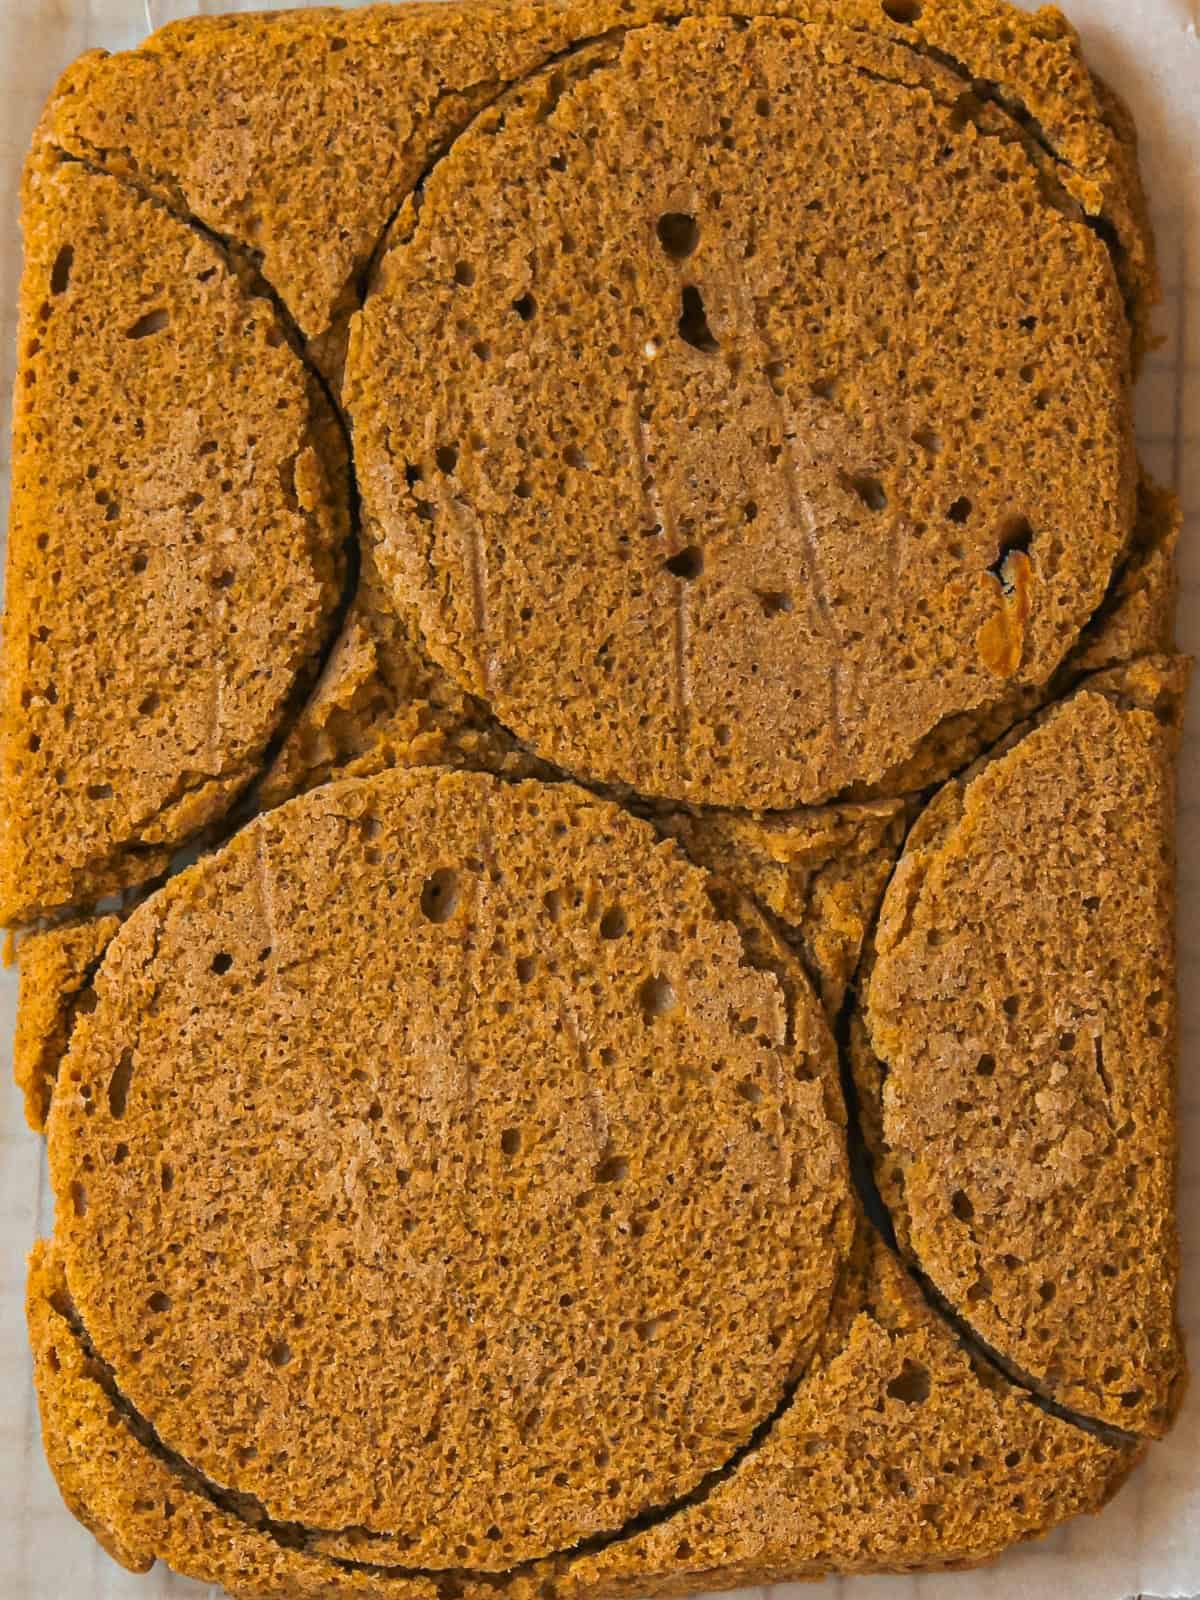
Don't worry about how the bottom layer looks. It all comes together, and imperfections down there won't show through. Just try to make all your layers as flat and even as possible.
How to Assemble Your Pumpkin Chai Cake Layers
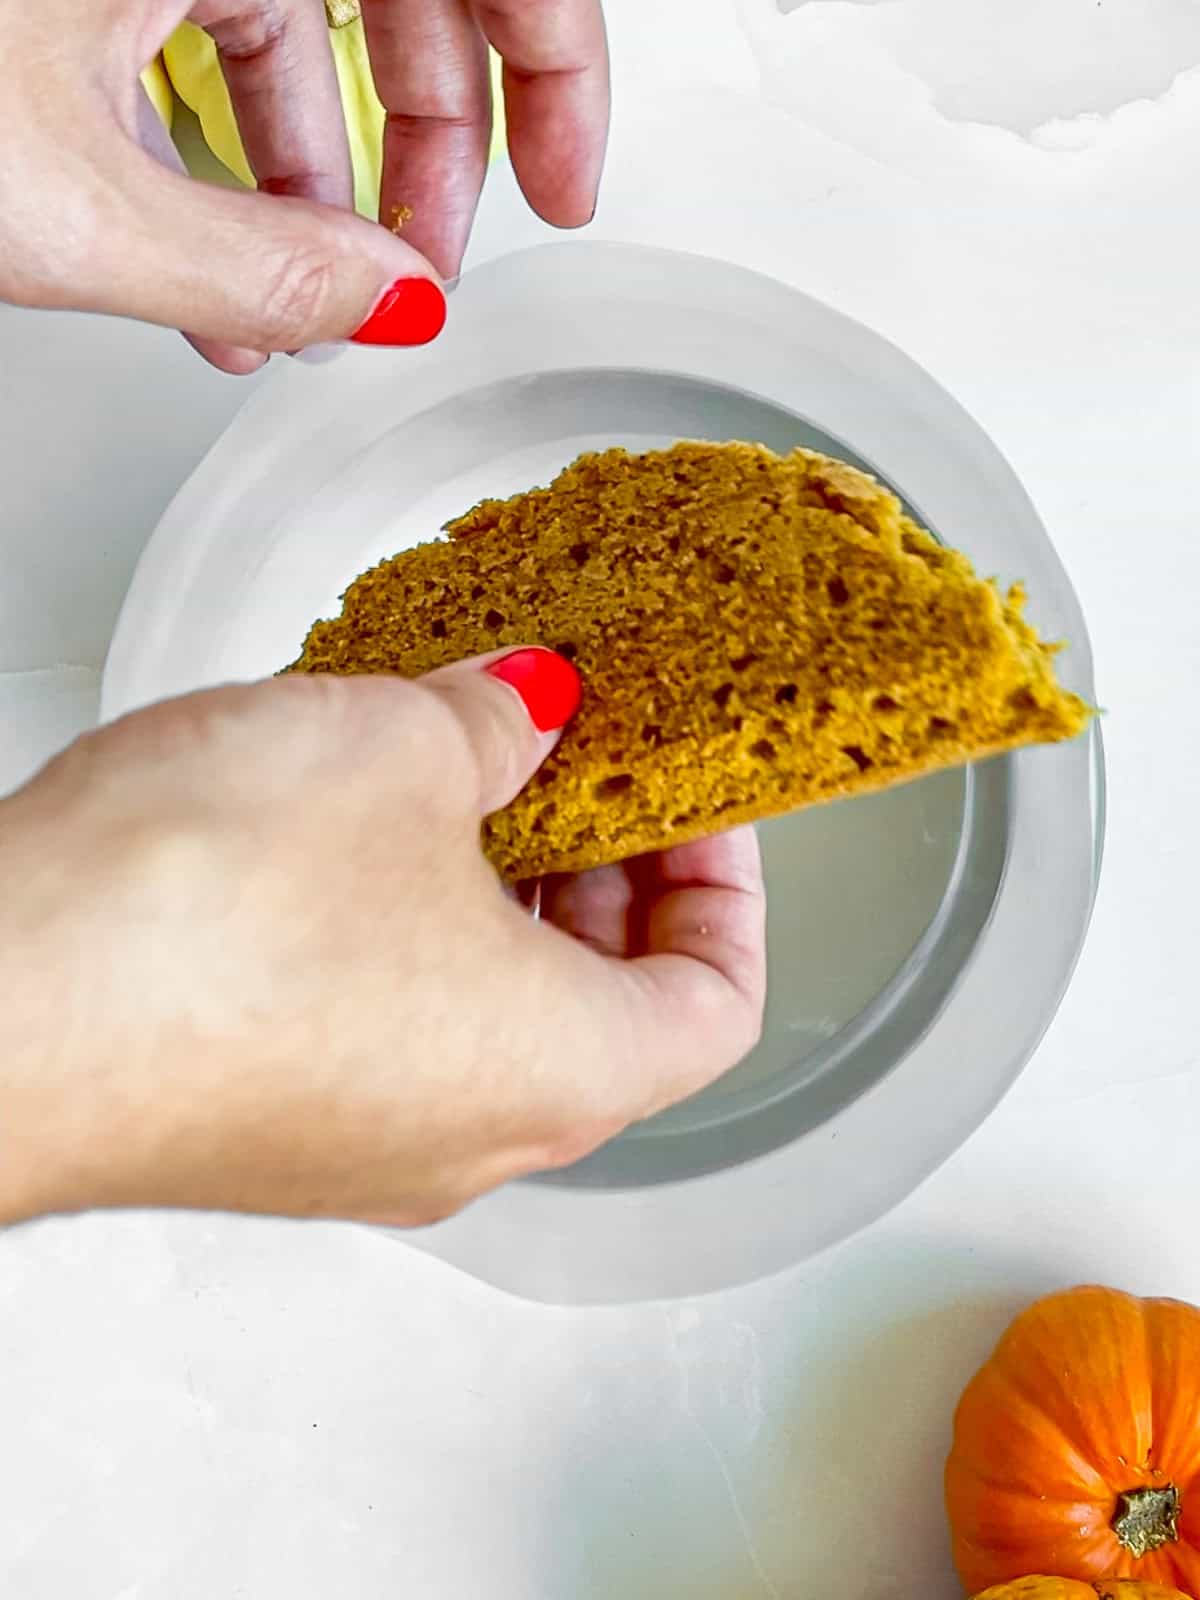
Step 1: Fill your bottom layer with your two half circles, then press down to make it nice and even.
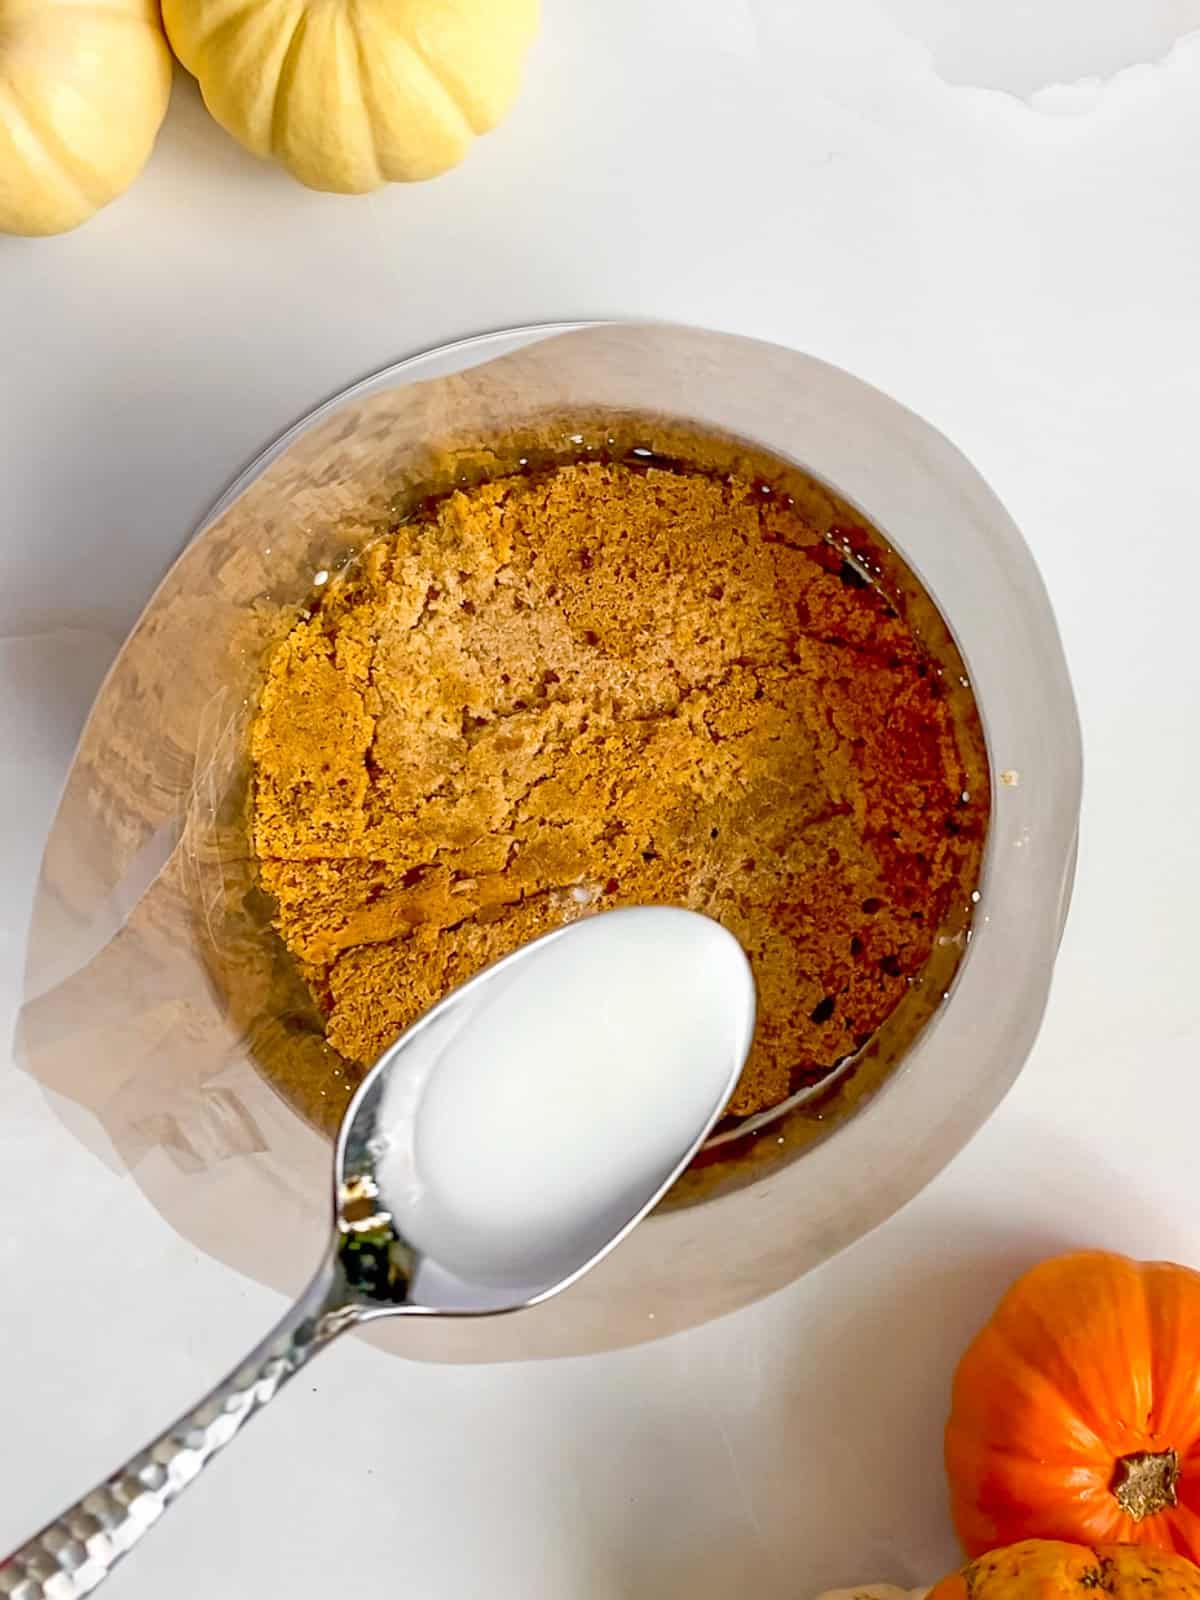
Step 2: Add your milk soak, drizzling it over top of your bottom layer to add moisture to it.
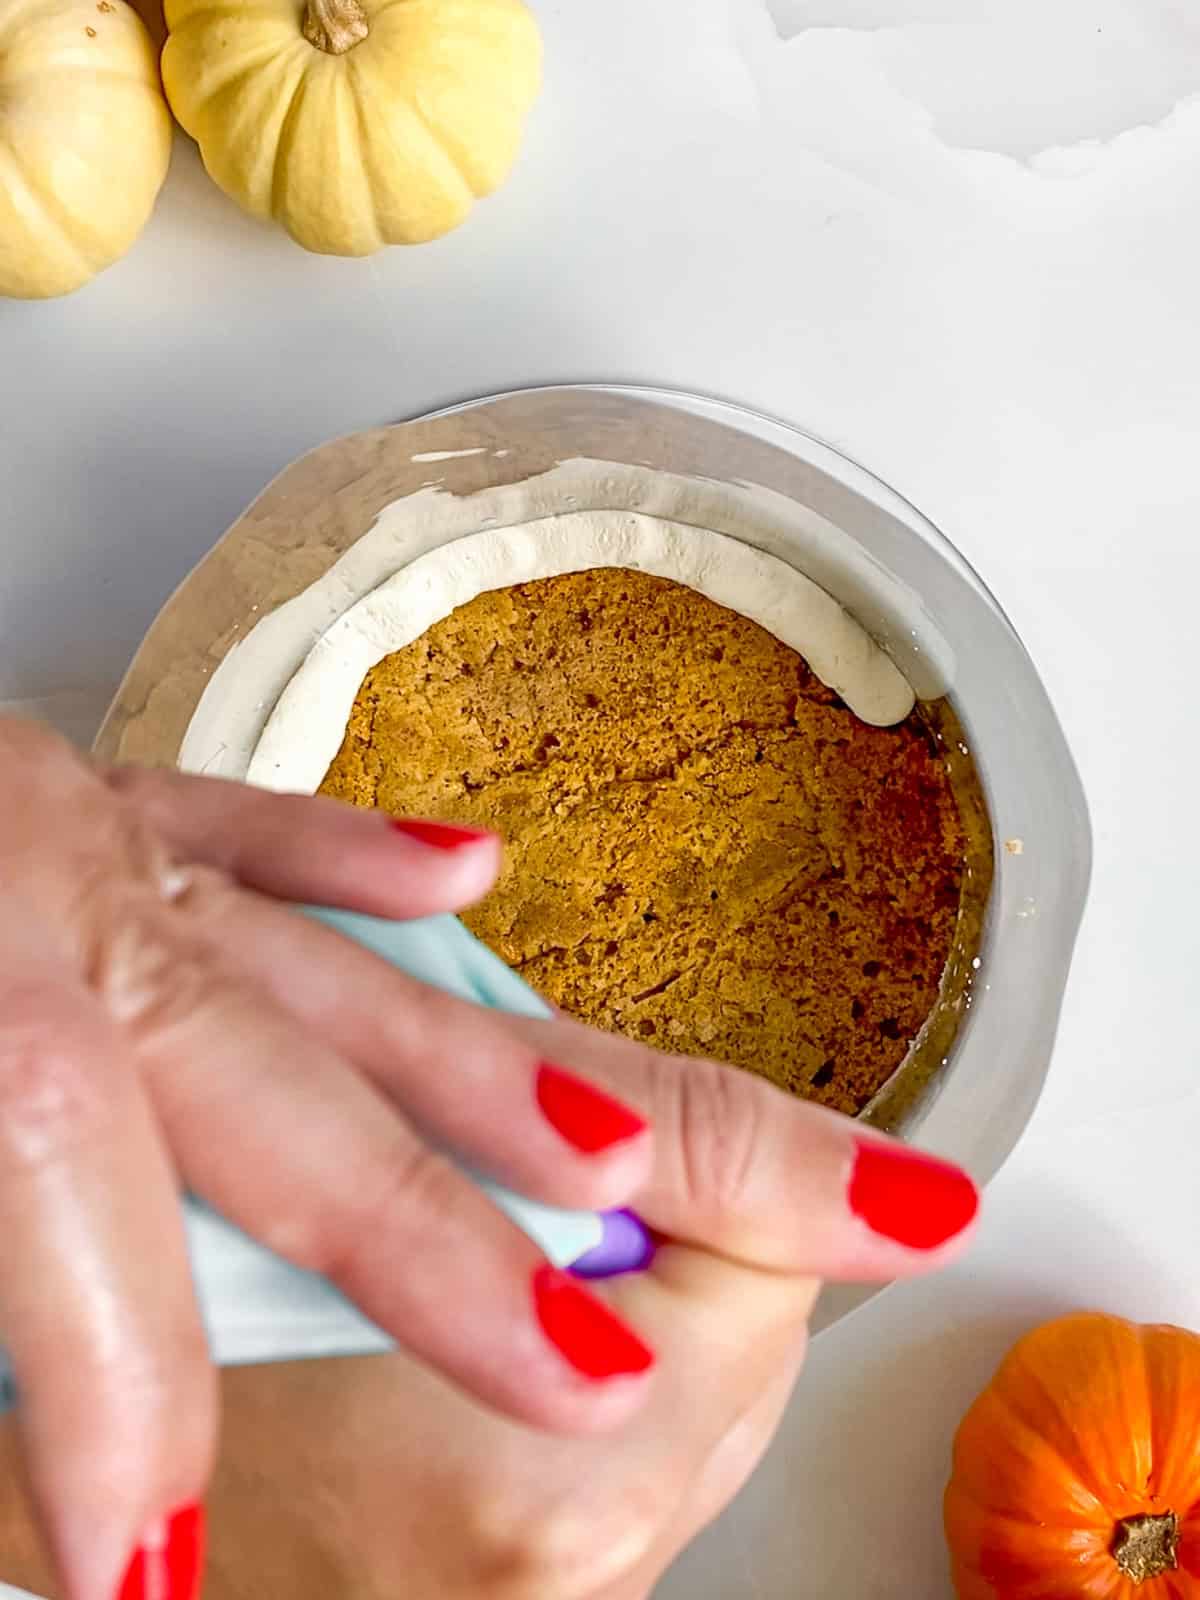
Step 3: Pipe your mascarpone frosting onto your cake using a piping bag.
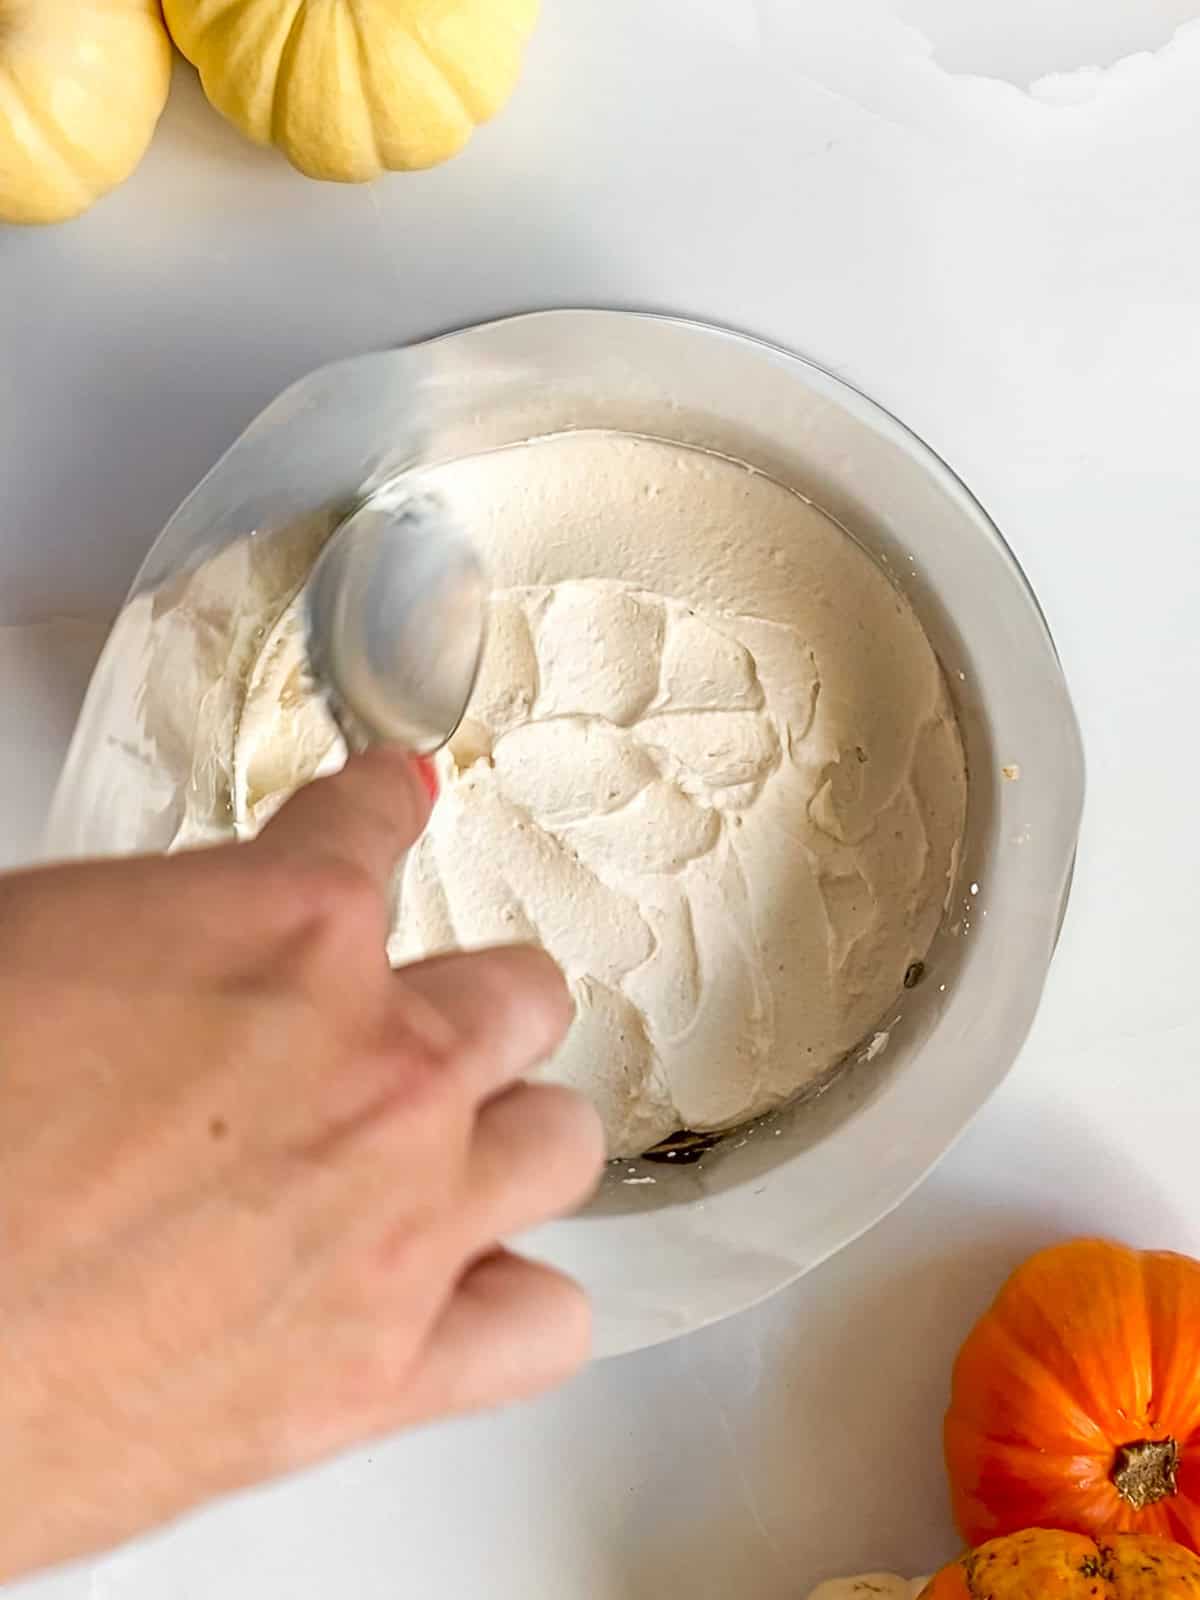
Step 4: Spread your frosting across the cake sponge.
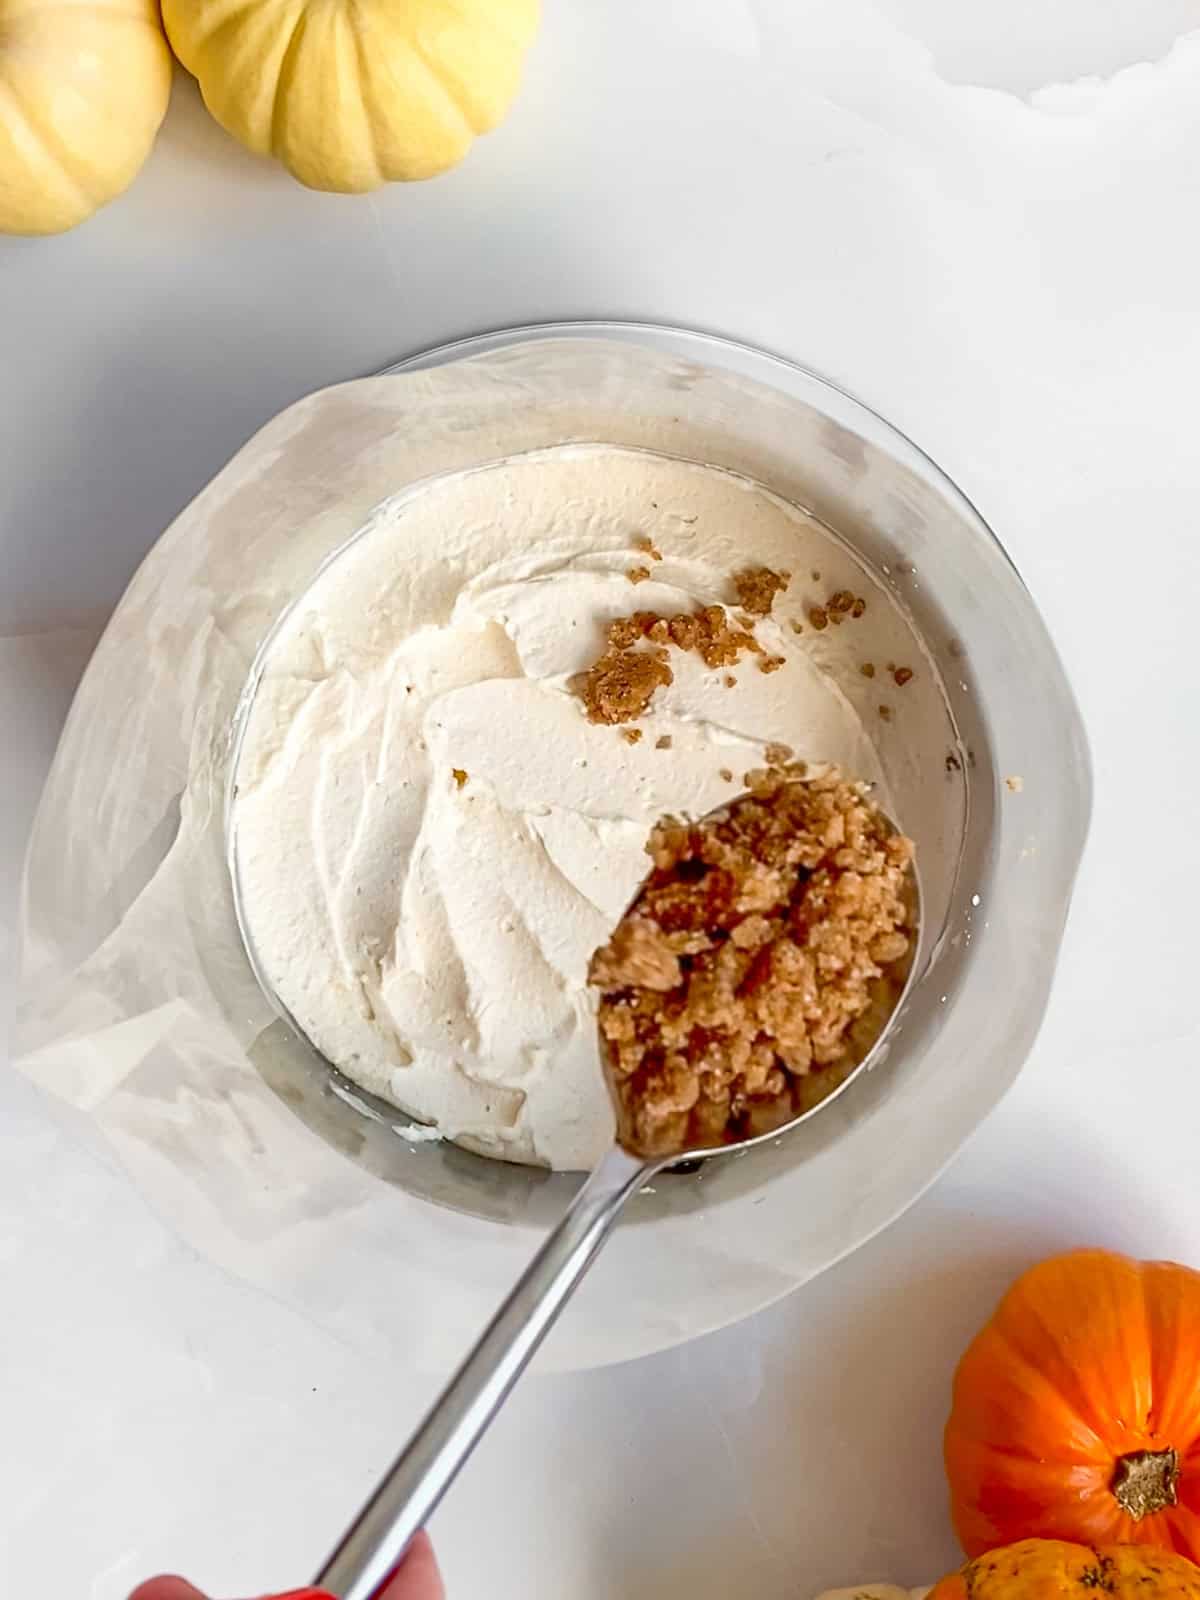
Step 5: Time to add your cake crumbs! Add them in an even layer across the mascarpone frosting.
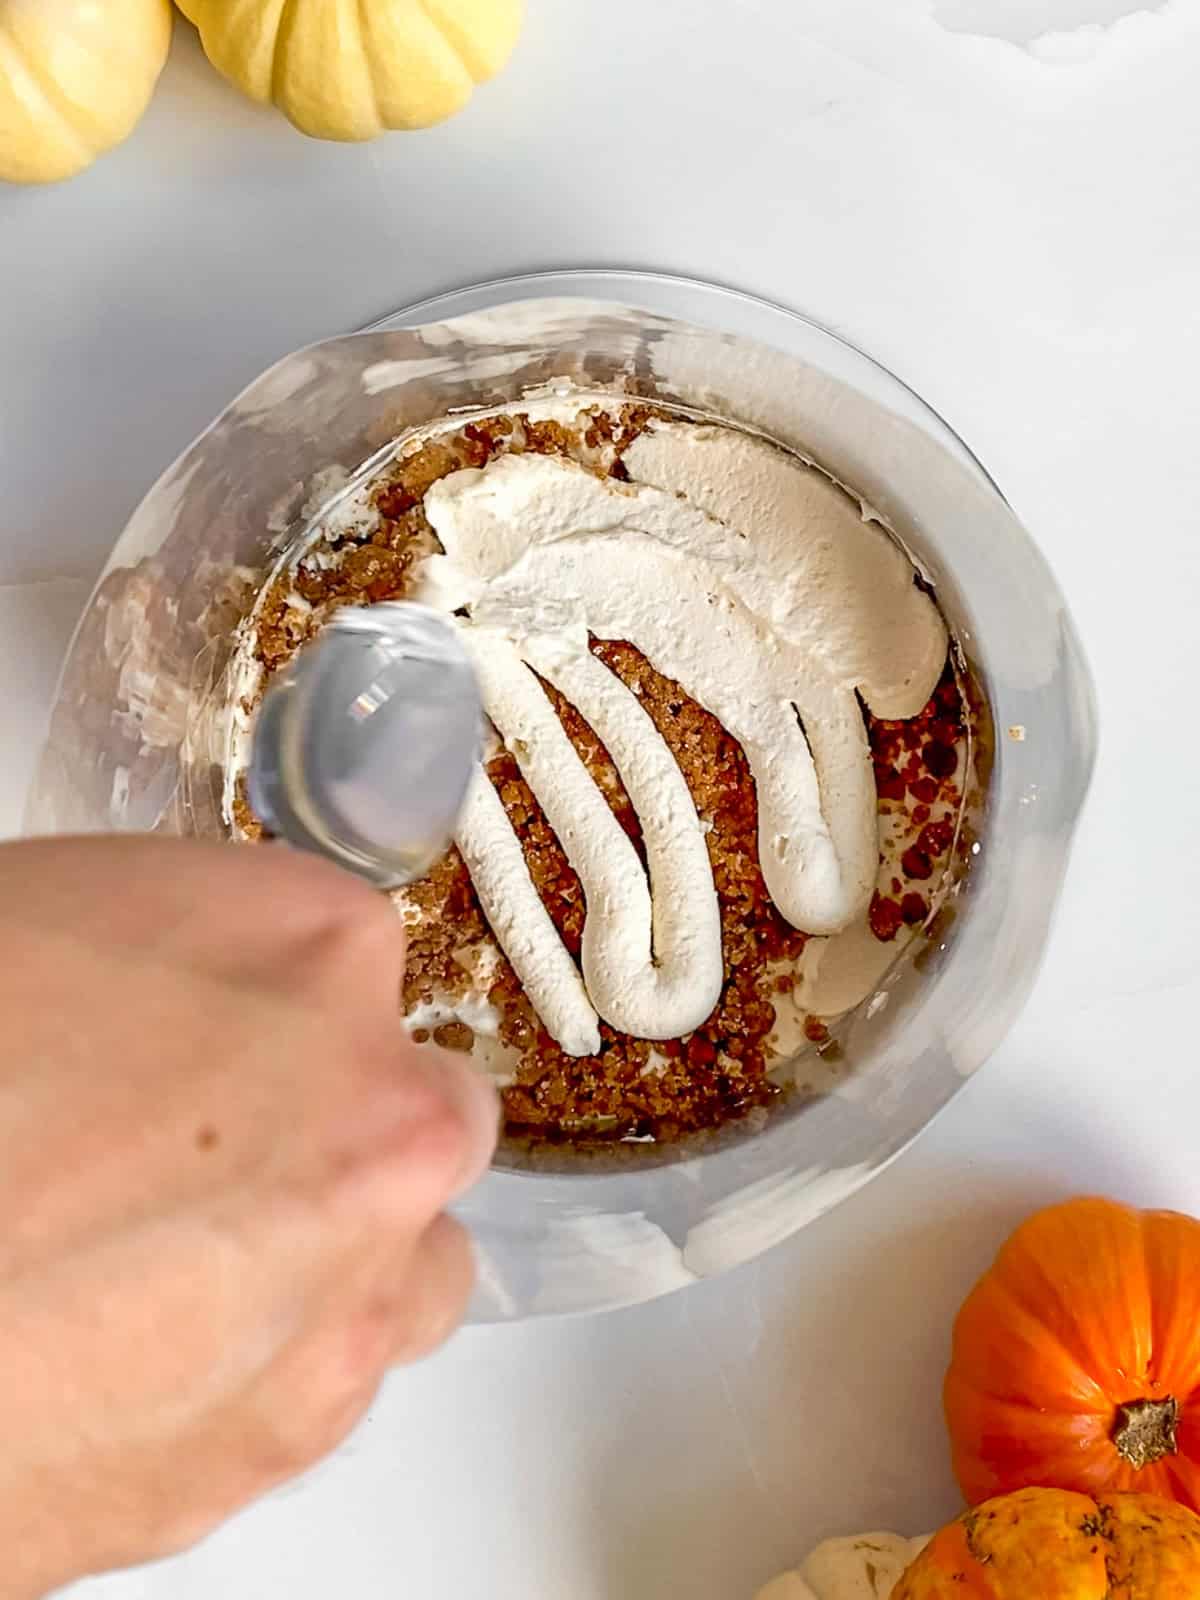
Step 6: Cover the layer of crumbs with frosting to hold them in place.
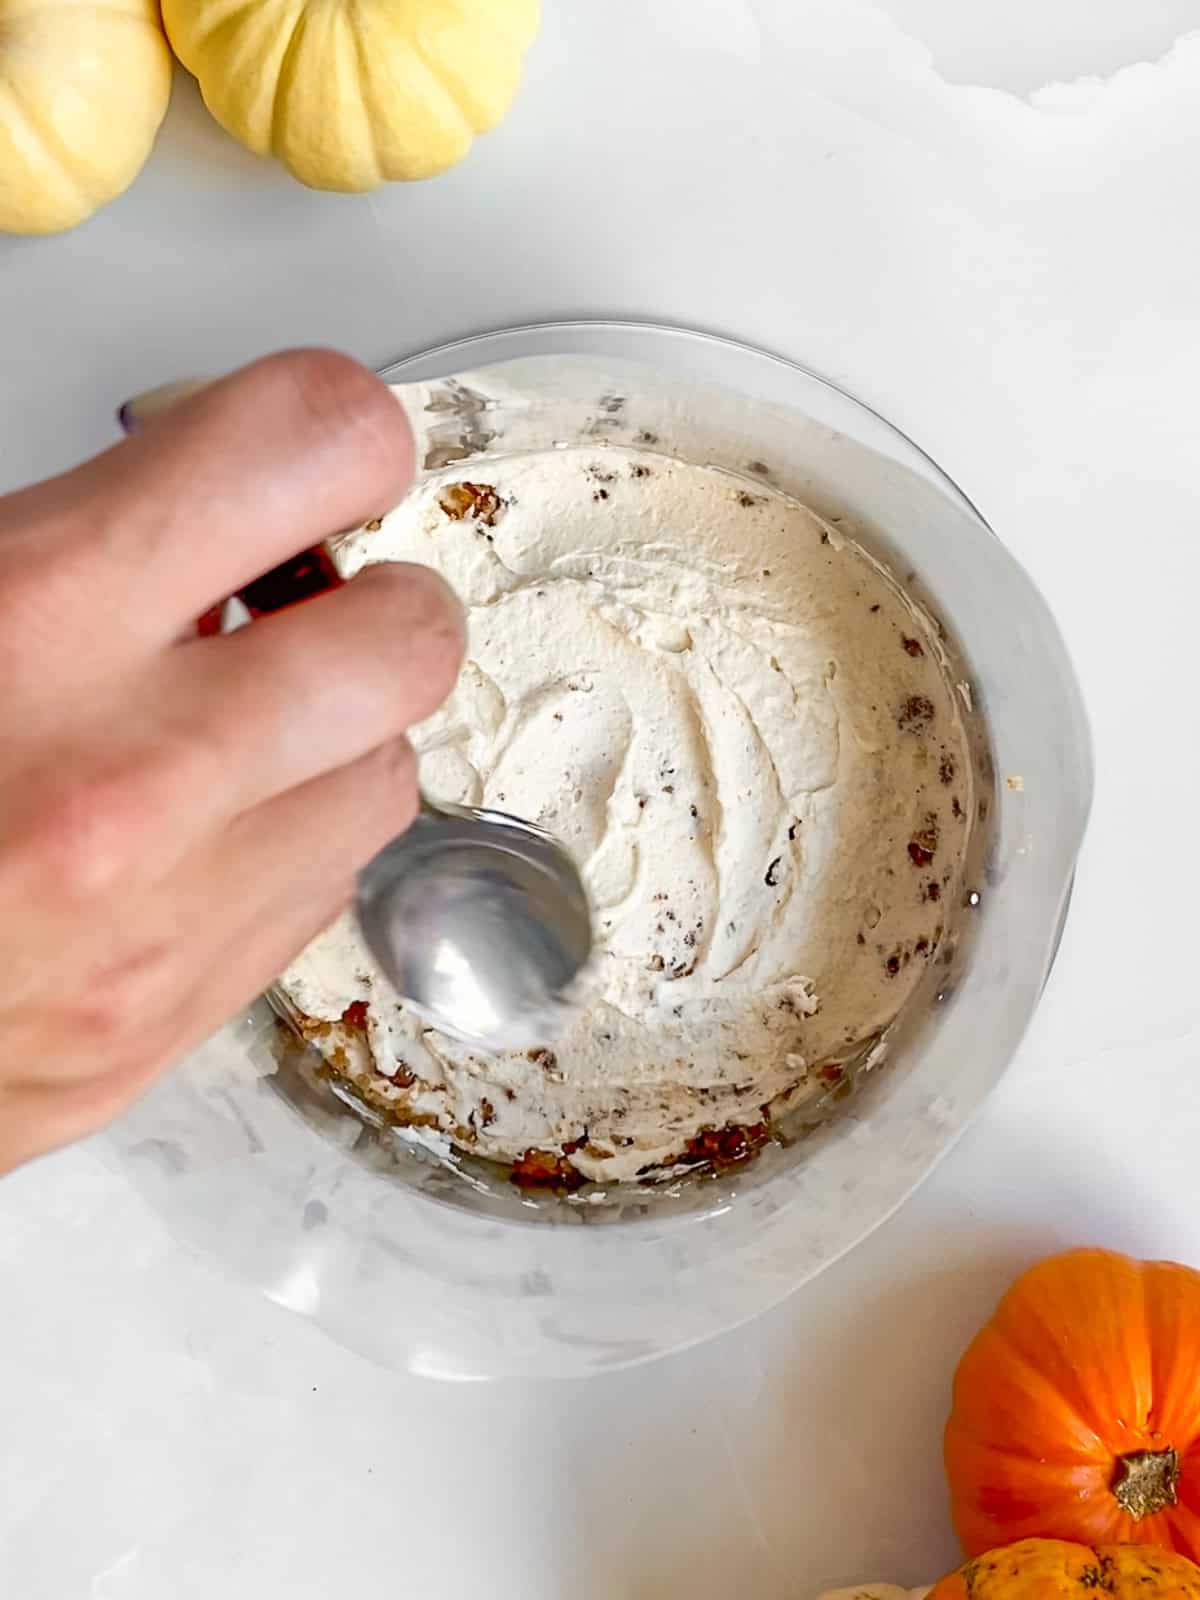
Step 7: Use the back of a spoon to smooth out the frosting so that your cake layers stack evenly.
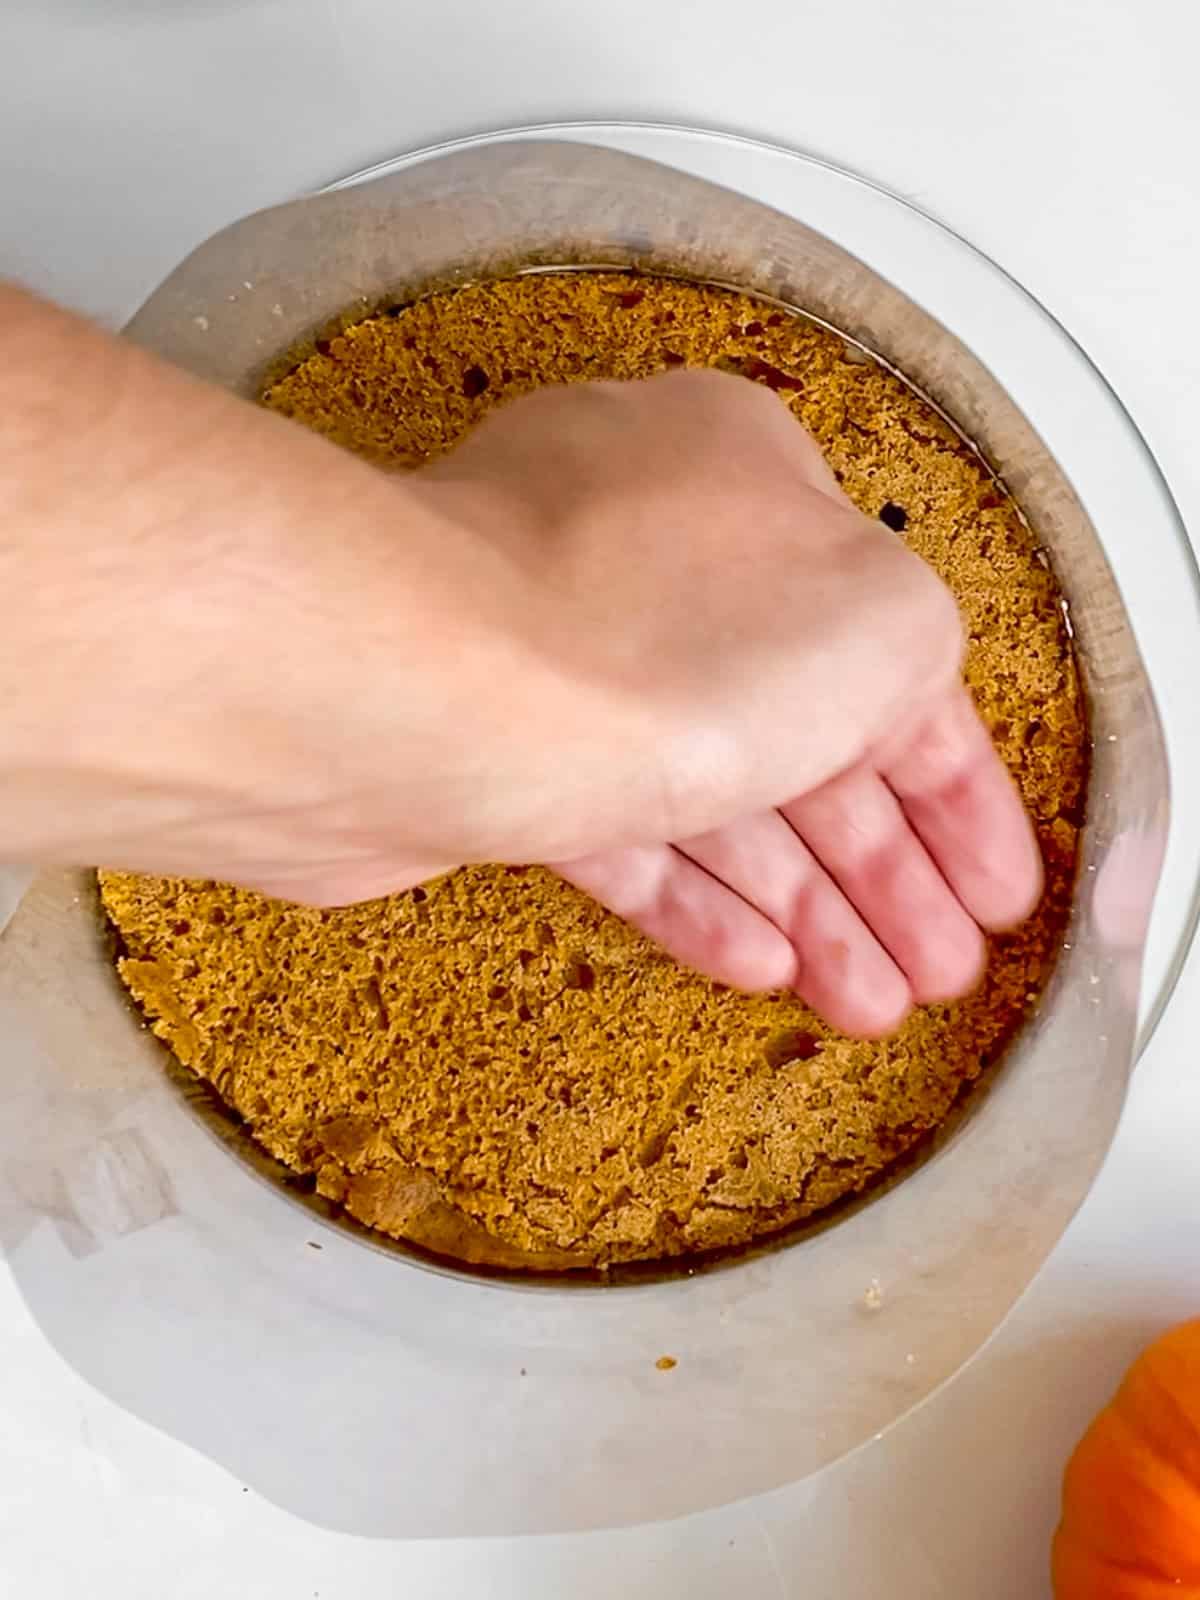
Step 8: Push your next layer into the cake ring, repeating the previous steps until you've built your pumpkin chai cake.
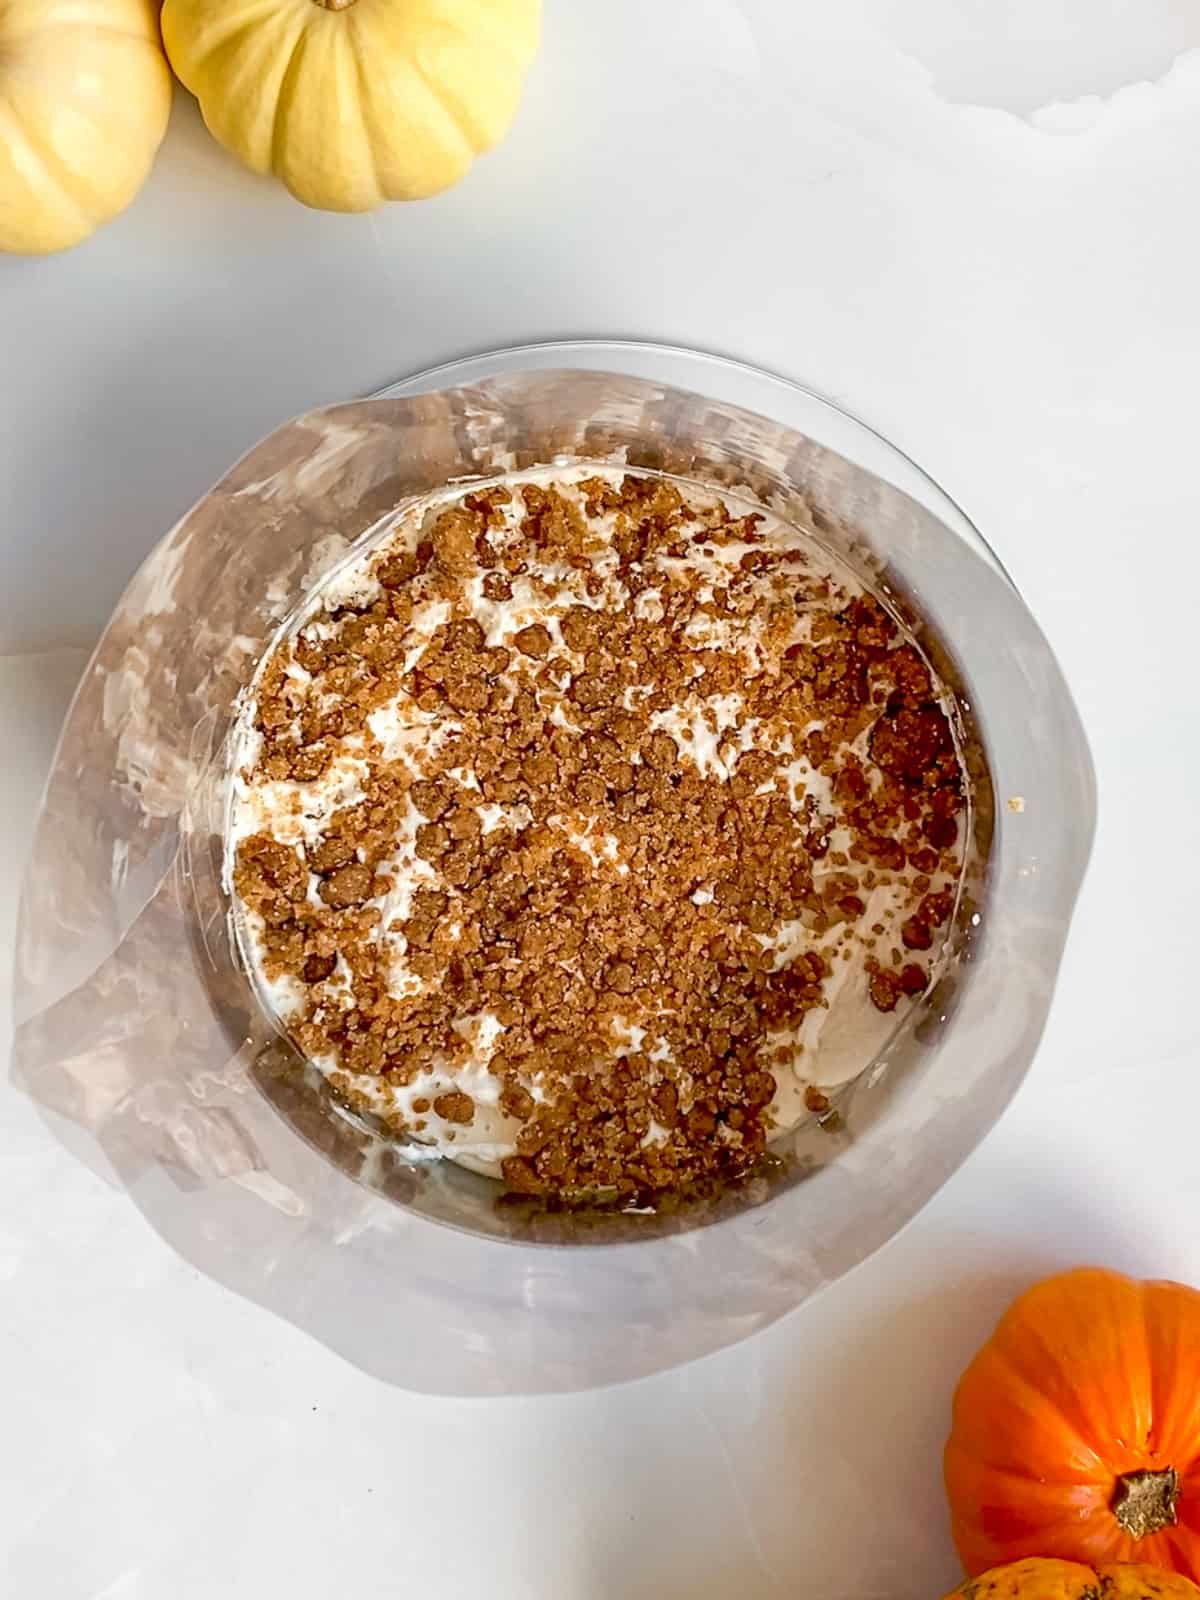
Step 9: Once your top layer is on and frosted, cover the cake and put the whole thing (ring, acetate, and all) in the freezer for at least 3 hours to set.
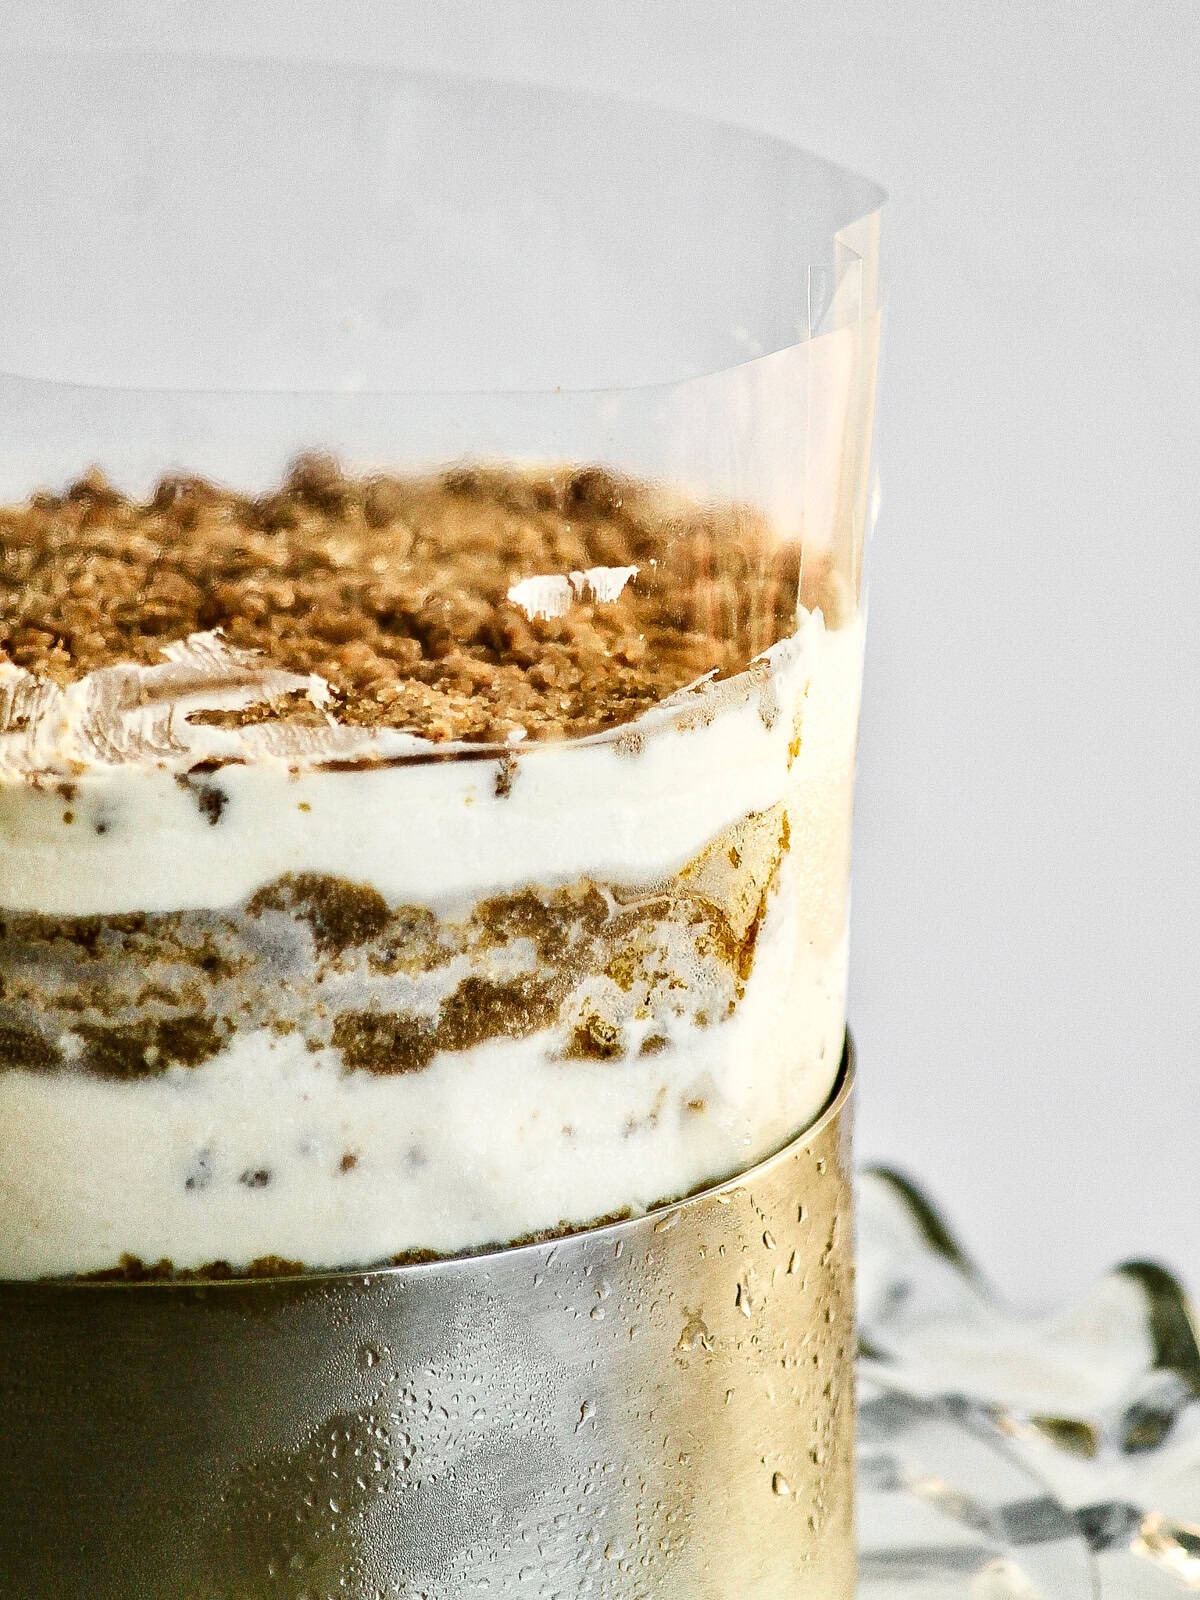
Step 10: About 3 hours before serving, pull it out, slide off the cake ring, and peel away the acetate. Transfer to a platter or cake stand and let it thaw fully.
Making the Pumpkin Design on Top
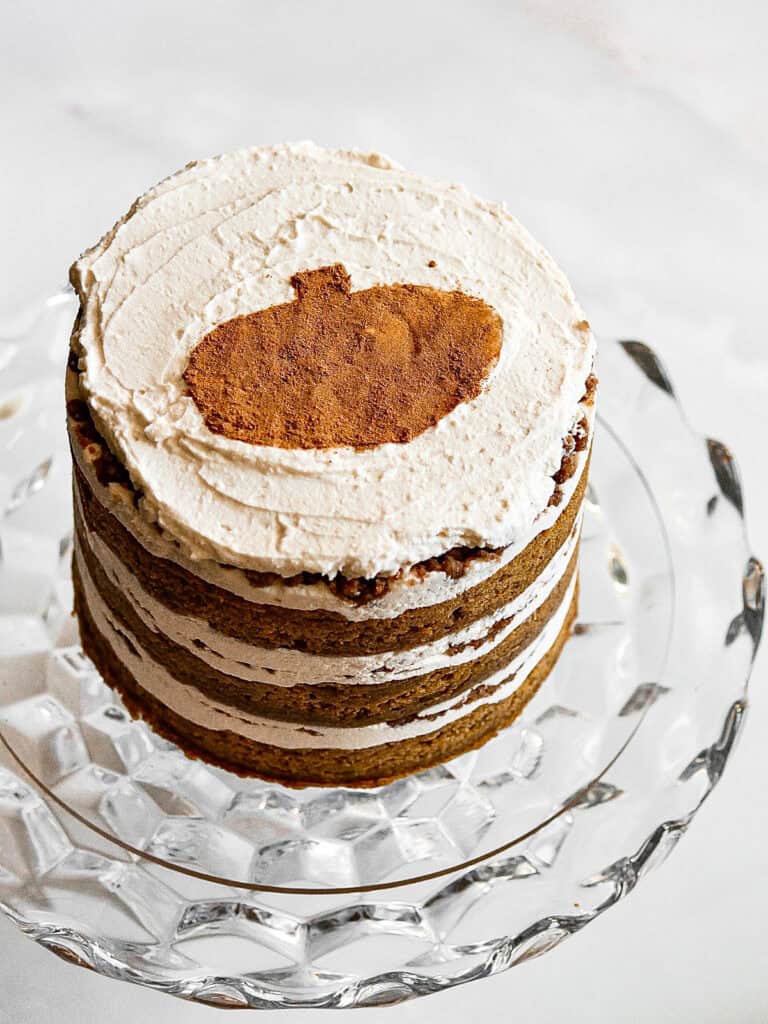
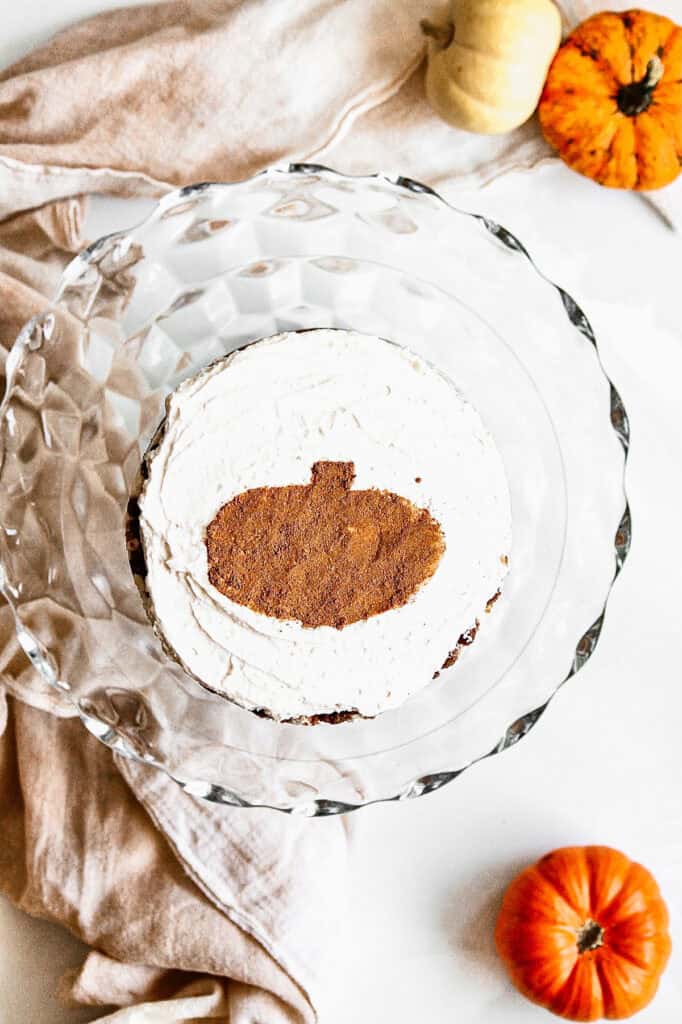
It's not necessary, but the pumpkin on top is easy and cute! Before serving your pumpkin chai cake, spread Cool Whip, homemade whipped cream, or any remaining mascarpone frosting on top.
Cut out a 6” circle on waxed paper, and draw and cut out a pumpkin design within the circle. Lightly place the cutout of your pumpkin atop your cake, and dust the top of your cake with a fall spice of your choose. Carefully remove waxed paper to reveal pumpkin design.
How Far Ahead Can You Make This Cake?
Start this cake the day before you want to serve it. It's not a hard cake to make, but it does need time to set in the freezer.
Here's how the timing pans out:
- About 90 minutes of hands-on work: crumb, sponge, frosting, and stacking
- At least 3 hours in the freezer, once it's stacked, so the layers and filling set inside the ring
- About 3 hours to thaw after you pull it out, before you serve it
That gives you about 7 and a half hours from start to finish, though much of that is waiting.
I usually split this across two days: chai crumb and cake layers one night, mascarpone frosting and assembly the next.
The cake layers can sit out at room temperature so long as they're covered well. I draped a cheesecloth over mine to keep them from drying out, but plastic wrap works too, in the fridge or on the counter.
The cake can also live in the freezer for a few days after it's stacked, which makes this a good one to build ahead of a Thanksgiving or a fall party and just pull out the morning of.
Can You Make This as Pumpkin Chai Bars or Cupcakes?
A few ways to change this up:
For pumpkin chai bars: the sponge already bakes flat in a quarter sheet pan, so you're most of the way there. Bake it as written, let it cool completely in the pan, then skip the cake ring entirely. Spread the mascarpone frosting straight across the top and scatter the Biscoff chai crumb over it. Cut into squares. You'll lose the layers, but you keep the flavor and you skip the freezing time completely. This is a great shortcut if you're low on time.
For pumpkin chai cupcakes: I haven't tested this recipe as cupcakes, but it's doable. I'd fill the liners about ⅔ full and start checking around 18 minutes. Because the mascarpone frosting is somewhat soft, it won't make stiff peaks when piped but will still hold a gentler shape.
For a standard layer cake: I've made this in three 6" cake pans at 325°F for about 40 minutes. Start checking with a toothpick around 30 minutes.
How to Store and Freeze Pumpkin Chai Cake
In the freezer: this cake gets frozen anyway, so it holds up well. Keep it in the cake ring with the acetate on, wrapped, for up to a week. Pull it out about 3 hours before you want to serve it.
In the refrigerator: once it's thawed and sliced, cover it, and it'll keep for about 3 days. There's a lot of dairy in the frosting, so don't leave this cake sitting out.
At room temperature: fine for a few hours on a cake stand while you're serving it, but I wouldn't leave it overnight.
The crumb on its own keeps in an airtight container in the refrigerator for several days. If you have any leftover, it's very good on ice cream or yogurt.
Pumpkin Chai Cake FAQs
A soak is just liquid you drizzle onto the cake layers as you stack them. It's one of the details that sets a Milk Bar cake apart from other layer cakes. Here it's about 4 tablespoons of whole milk, split between the bottom two layers. It absorbs almost immediately and keeps the sponge from drying out in the freezer. You can skip it, but I'd recommend against it, as it enhances the texture and helps prevent the freezer from drying out the layers when they're setting there.
To be true to the method, yes.
The ring allows you to stack the layers, and it's also what you use to cut your layers. The acetate lines the inside of the ring so the cake doesn't stick to the metal in the freezer; you peel away the acetate in the end. I don't love buying tools I don't use often, but I've really enjoyed making multiple cakes with this process.
That said, I have successfully baked this cake in three 6-inch pans, so that is what I would advise if you don't have a ring available to you.
Yes, and it's an easy swap. Use about 2.5 tablespoons in place of the homemade mix. I've written out my blend in the recipe card because I like the cardamom-forward version, but if you have a mix you already love, use it.
I haven't tested this one with another frosting, but cream cheese would be my first try if you want to swap.
More Fall Desserts
Pumpkin Chai Latte Cake
- Total Time: 7 hours 30 minutes
- Yield: 12 slices 1x
Description
Soft, spiced pumpkin chai cake layered with a crunchy Biscoff chai crumb and whipped mascarpone frosting. Milk Bar style, made at home!
Ingredients
Pumpkin Chai Latte Cake Spice Mix
- 4 tsp (8 g) ground cinnamon
- 1 tsp (2 g) ground cardamom
- ¾ tsp (1 g) ground ginger
- ½ tsp (1.5 g) ground nutmeg
- ½ tsp (1 g) ground cloves
- ½ tsp (1 g) allspice
OR use 2.5 tablespoons of your favorite pre-made chai spice mix*
Pumpkin Chai Latte Cake Sponge
- About 6 tablespoons (85 g) unsalted butter at room temperature
- ½ cup (125 g) granulated sugar
- ⅓ cup (50 g) light brown sugar
- 1 egg
- ⅓ cup + 2 tablespoon (110 g) buttermilk, room temperature
- 4 tsp (20 g) grapeseed oil (or other colorless, odorless oil like vegetable or canola)
- 2 tbsp (10 g) homemade chai spice mix
- 2 tsp (8 g) vanilla extract
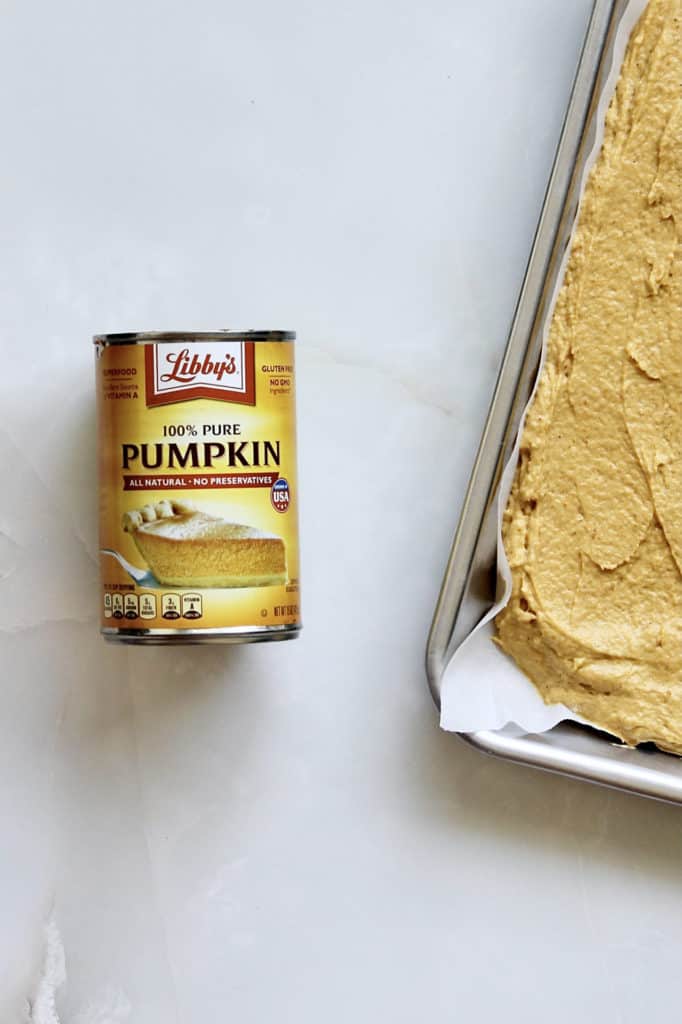
- About half (225 g) of one 16 oz. can pureed pumpkin (I use Libby’s)
- 1 and ⅔ cup (225 g) all-purpose flour
- ¾ tsp (3 g) baking powder
- ½ tsp (3 g) baking soda
- ½ tsp (2 g) kosher salt
Optional (but highly recommended) milk soak - About 4 tablespoon (57 grams) of milk to drizzle on your bottom two layers while you stack your cake*
Pumpkin Chai Latte Cake Crumb
- ⅓ cup (75 g) granulated sugar
- 2 tbsp (20 g) lightly packed light brown sugar
- ½ cup (75 g) all-purpose flour
- 5 Biscoff cookies (40 g), crumbled
- ½ tsp (2 g) baking powder
- ¼ tsp (1 g) kosher salt
- 4 tbsp (50 g) canola oil (or other clear, odorless oil like vegetable or grapeseed)
- 1 tsp (4 g) vanilla extract
- About 2 tsp (3.5 grams) of your chai spice mix
Pumpkin Chai Latte Cake’s Mascarpone Frosting
- 1 8-ounce container (226 g) mascarpone, chilled
- 1 cup (215 g) heavy cream, chilled
- ¾ cup (105 g) powdered sugar
- 1 tbsp (12g) vanilla extract
- Optional: 1 teaspoon (4g) maple extract (Highly recommend, as it adds a lovely smell and hint of maple flavor!)
Optional topping at the end for Pumpkin Chai Latte Cake
- Leftover mascarpone frosting OR ⅓ cup of Cool Whip OR ½ cup of heavy cream and 1 tablespoon powdered sugar
- 1-2 tablespoon of pumpkin pie spice, chai spice mix, cinnamon, nutmeg, or a fall spice of your choosing
- 6” round of waxed paper, cut with a pumpkin in the middle
Instructions
Pumpkin chai cake crumb
- If not using a pre-made chai mix, combine all ingredients together for your homemade chai mix in a mug or small bowl.
- Start making your crumb by preheating the oven temperature to 300°F and lining a quarter sheet pan or baking sheet with parchment paper.
- In your mixing bowl with the paddle attachment, mix all of the dry ingredients for the crumb (sugars, flour, baking powder, crumbled Biscoff cookies, salt, and chai mix) on low speed until combined. Combine oil and vanilla in a medium container or bowl and stream them into the mixer while paddling on low.
- Mix until you see small clusters of your ingredients forming, and use your hands to clump the mixture together and spread out on your baking sheet.
- Bake crumb for about 20 minutes, or until light golden brown. Let cool completely.
Pumpkin chai cake sponge
- Increase the oven's heat to 325°F, and line a quarter sheet pan with parchment paper on all sides. Butter and flour well or coat it with baking spray before setting aside.
- To a large mixing bowl, add and whisk together the following dry cake ingredients: all-purpose flour, baking powder, baking soda, kosher salt, and 2 tablespoon of your chai spice mix. Set aside.
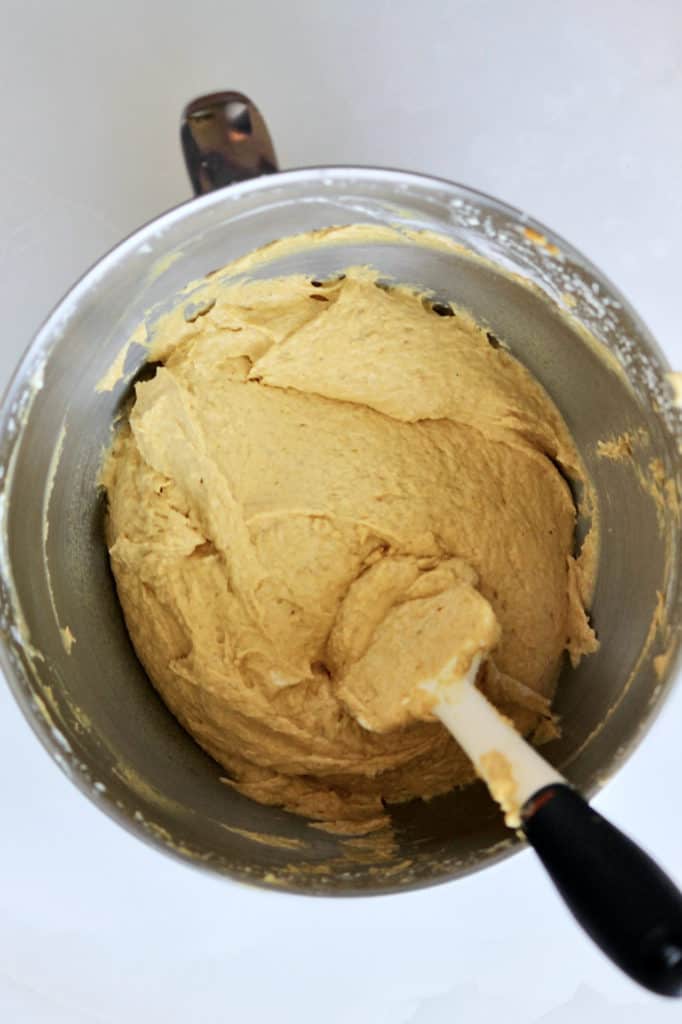
- Using the paddle attachment in the bowl of a stand mixer, cream your butter and sugars together on medium-high for 2-3 minutes. Stop mixer and scrape down the sides of the bowl. Add the egg and canned pumpkin, and mix on medium-high again for 2-3 minutes. You may need to cover your stand mixer with a towel to avoid splatter.
- Combine your buttermilk, oil, and vanilla extract together in a measuring cup or small container. Reduce the mixer to low and slowly drizzle that into the bowl. Once all ingredients are incorporated, increase the mixer’s speed to medium-high and beat for 5-6 minutes, until mixture is completely homogeneous with no streaks in the batter.
- Incorporate dry ingredients into wet for about 45 seconds with your mixer. Continue incorporating by hand with a spatula until well-combined. Scrape the bowl's sides to ensure no dry ingredients are hiding in pockets.
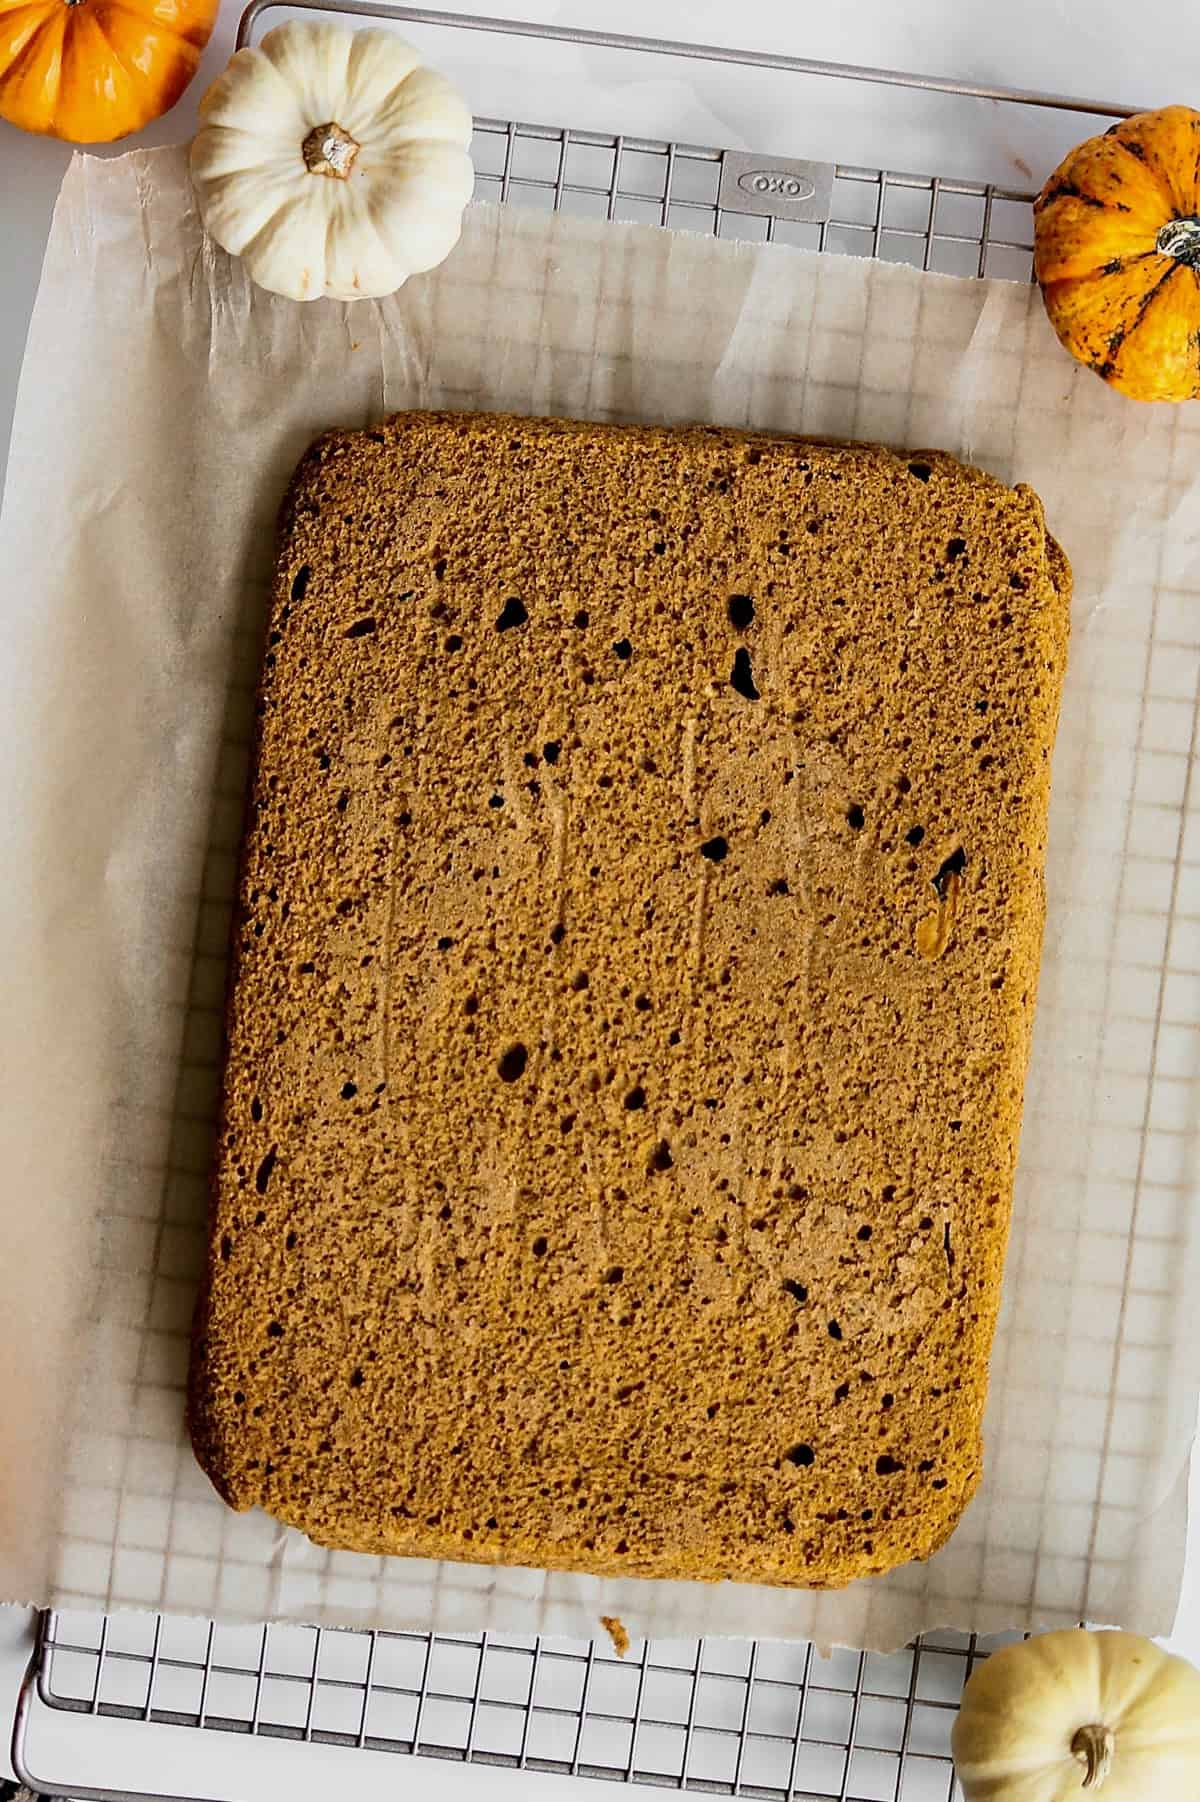
- Pour and evenly spread the batter into your prepared quarter sheet pan. Bake for 25-30 minutes, rotating halfway through baking. You’ll know your cake is done around the 25-minute mark when it appears buttery and dense but bounces back at the touch of your finger.
- Transfer to a wire rack to cool completely.
Mascarpone frosting
- Chill your stand mixer’s bowl for at least 15 minutes, then, using a whisk attachment, whip your mascarpone on medium speed for about 1 minute.
- Stop mixer to add your powdered sugar and extracts to the bowl. Return your mixer to a low speed and slowly pour in your heavy cream. Once powders and extracts are incorporated, bump up your mixer to medium high speed and continue whipping until all ingredients are combined, about one more minute. Closely watch bowl to avoid over-mixing, as it will cause the frosting to develop lumps and curdle.
- Transfer frosting to a piping bag fit with a large round tip.
Cake Assembly
- Use your metal 6-inch cake ring to stamp out two circles from the cake and two smaller half circles. The half-circles will form the bottom layer.
- Build your cake on a cake circle OR clean piece of parchment on a baking pan that will fit in your freezer.
- Line the ring with one 5-6” tall acetate strip. Place cake scraps inside ring and use the back of your hand to press them into a flat, even layer.
- If using the milk soak, drizzle half of it onto the bottom layer of your cake, which will quickly absorb it.
- Pipe roughly ¼ of your frosting on top of the bottom layer and sprinkle about ⅓ of your chai crumb. Again use your hands to gently press the crumb into the frosting so it sticks to it. Add another coat of frosting on top to hold the crumb in place.
- Repeat steps with next two layers of cake, except skipping the milk soak for the top layer. To create the pumpkin stencil, reserve some frosting for a thin layer for the cake's top.
- Place cake in freezer for a minimum of 3 hours to set the cake and filling.
- At least 3 hours ahead of serving the cake, pull it from the freezer and slide off the cake ring. Gently remove acetate and transfer cake to platter or cake stand. Let fully thaw, then serve!
Optional pumpkin stencil:
- Spread Cool Whip, remaining mascarpone frosting, OR homemade whipped cream on top of your cake.
- Cut out a 6” circle on waxed paper, and draw and cut out a pumpkin design within the circle. Place the cutout of your pumpkin atop your cake, and lightly dust the top of your cake with the spice. Remove waxed paper to reveal pumpkin design.
Notes
- Plan ahead to make this cake. The hands-on work is about 90 minutes, but the cake needs a minimum of 3 hours in the freezer to set, and then about 3 hours to thaw before you serve it. I usually make the crumb and the cake layers one night and finish the rest the next day.
- Prep Time: 30 minutes
- Assembly Time: 30 minutes
- Cook Time: 30 minutes
- Category: Dessert
- Cuisine: American


Leave a Reply