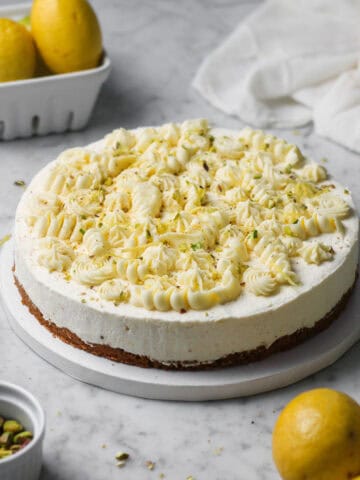
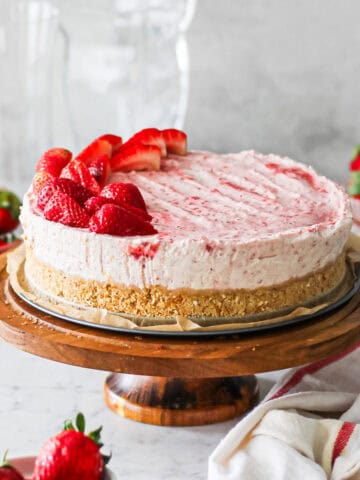
This no bake mascarpone cheesecake is creamy, rich, and comes together in about 30 minutes of active prep without ever turning on the oven. The filling uses mascarpone instead of American cream cheese, which gives it a silkier, more luxurious texture. For the base, a spiced Biscoff cookie crust adds warmth and crunch you won’t get from your average graham cracker crust. After whipping together the filling ingredients, spread it into the crust to let it chill in the refrigerator for at least 4 hours. No gelatin or stabilizers needed. It’s the kind of recipe that looks impressive but is genuinely easy to pull off.
If mascarpone is new to you, get excited! This Italian cream cheese provides a really smooth, luxurious texture for some of my favorite no-bake desserts as well as baked goods.
It's my go-to ingredient when I want something that seems fancy but is actually quite easy to use.
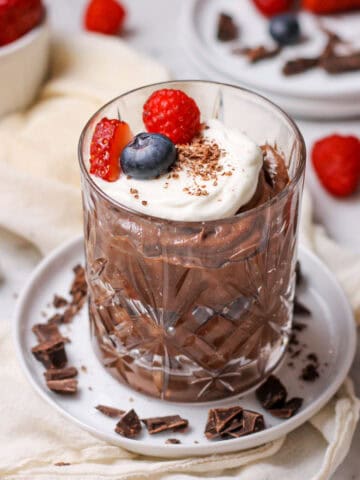
I use it in a chocolate mascarpone mousse, no-bake strawberry cheesecake, and these mascarpone cookies with pumpkin.
Jump to:
- 📋 What You Need for No Bake Mascarpone Cheesecake
- 📖 How to Make the No Bake Biscoff Cookie Crust
- 💡 Why Mascarpone Splits (and How to Prevent It)
- 📝 How to Make No Bake Cheesecake Filling Without Gelatin
- ❓FAQ and Troubleshooting
- ⭐️ Tips for Storing and Serving Mascarpone Cheesecake
- More No Bake Dessert Recipes
- No Bake Mascarpone Cheesecake with Biscoff Crust
📋 What You Need for No Bake Mascarpone Cheesecake
The full list of ingredients is in the recipe card below. Here are some highlights:
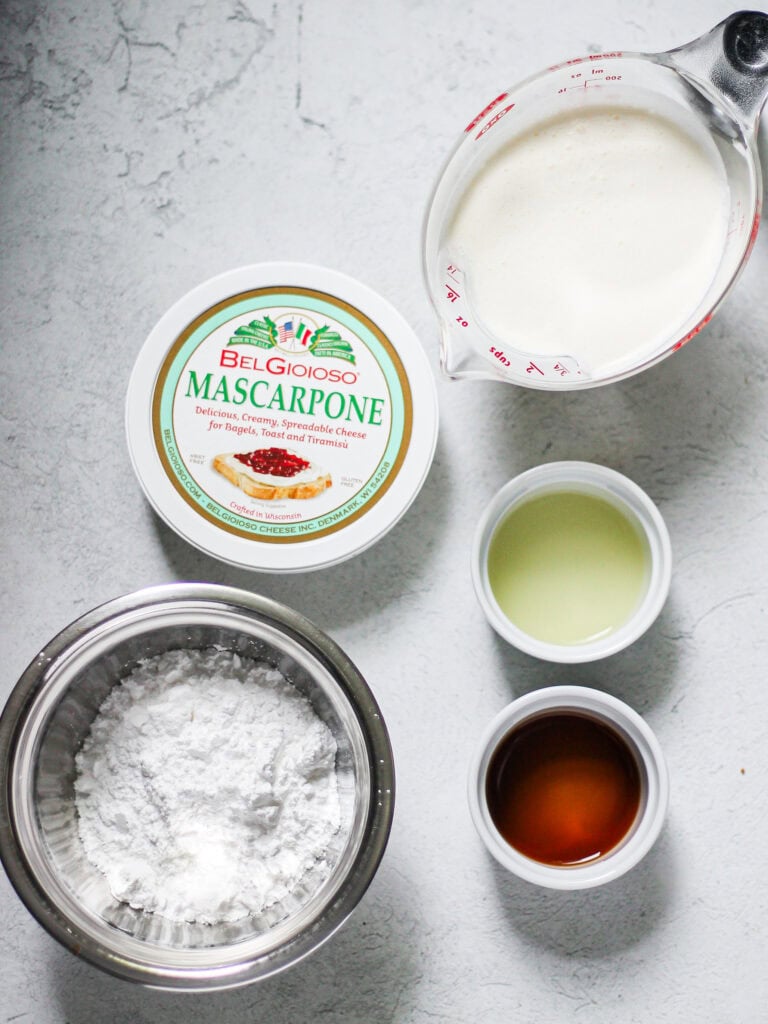
- Mascarpone - This Italian cream cheese is high-fat, with a smooth, creamy texture. It's somewhat similar to American cream cheese but noticeably softer and less tangy. While it's a key ingredient in this cheesecake recipe, mascarpone is interesting in that it can play a role in both sweet and savory dishes. It's perhaps best known for being the creamy indulgence you find in classic tiramisu recipes. I have used both the Trader Joe's brand of mascarpone as well as what Belgioioso makes.
- Heavy whipping cream - Some no-bake cheesecakes rely on gelatin to thicken the filling and help it set up. Instead, this recipe uses whipped cream. When beaten so that stiff peaks form, this ingredient adds volume and airiness to the filling. It also makes the cheesecake more firm as it chills in the refrigerator.
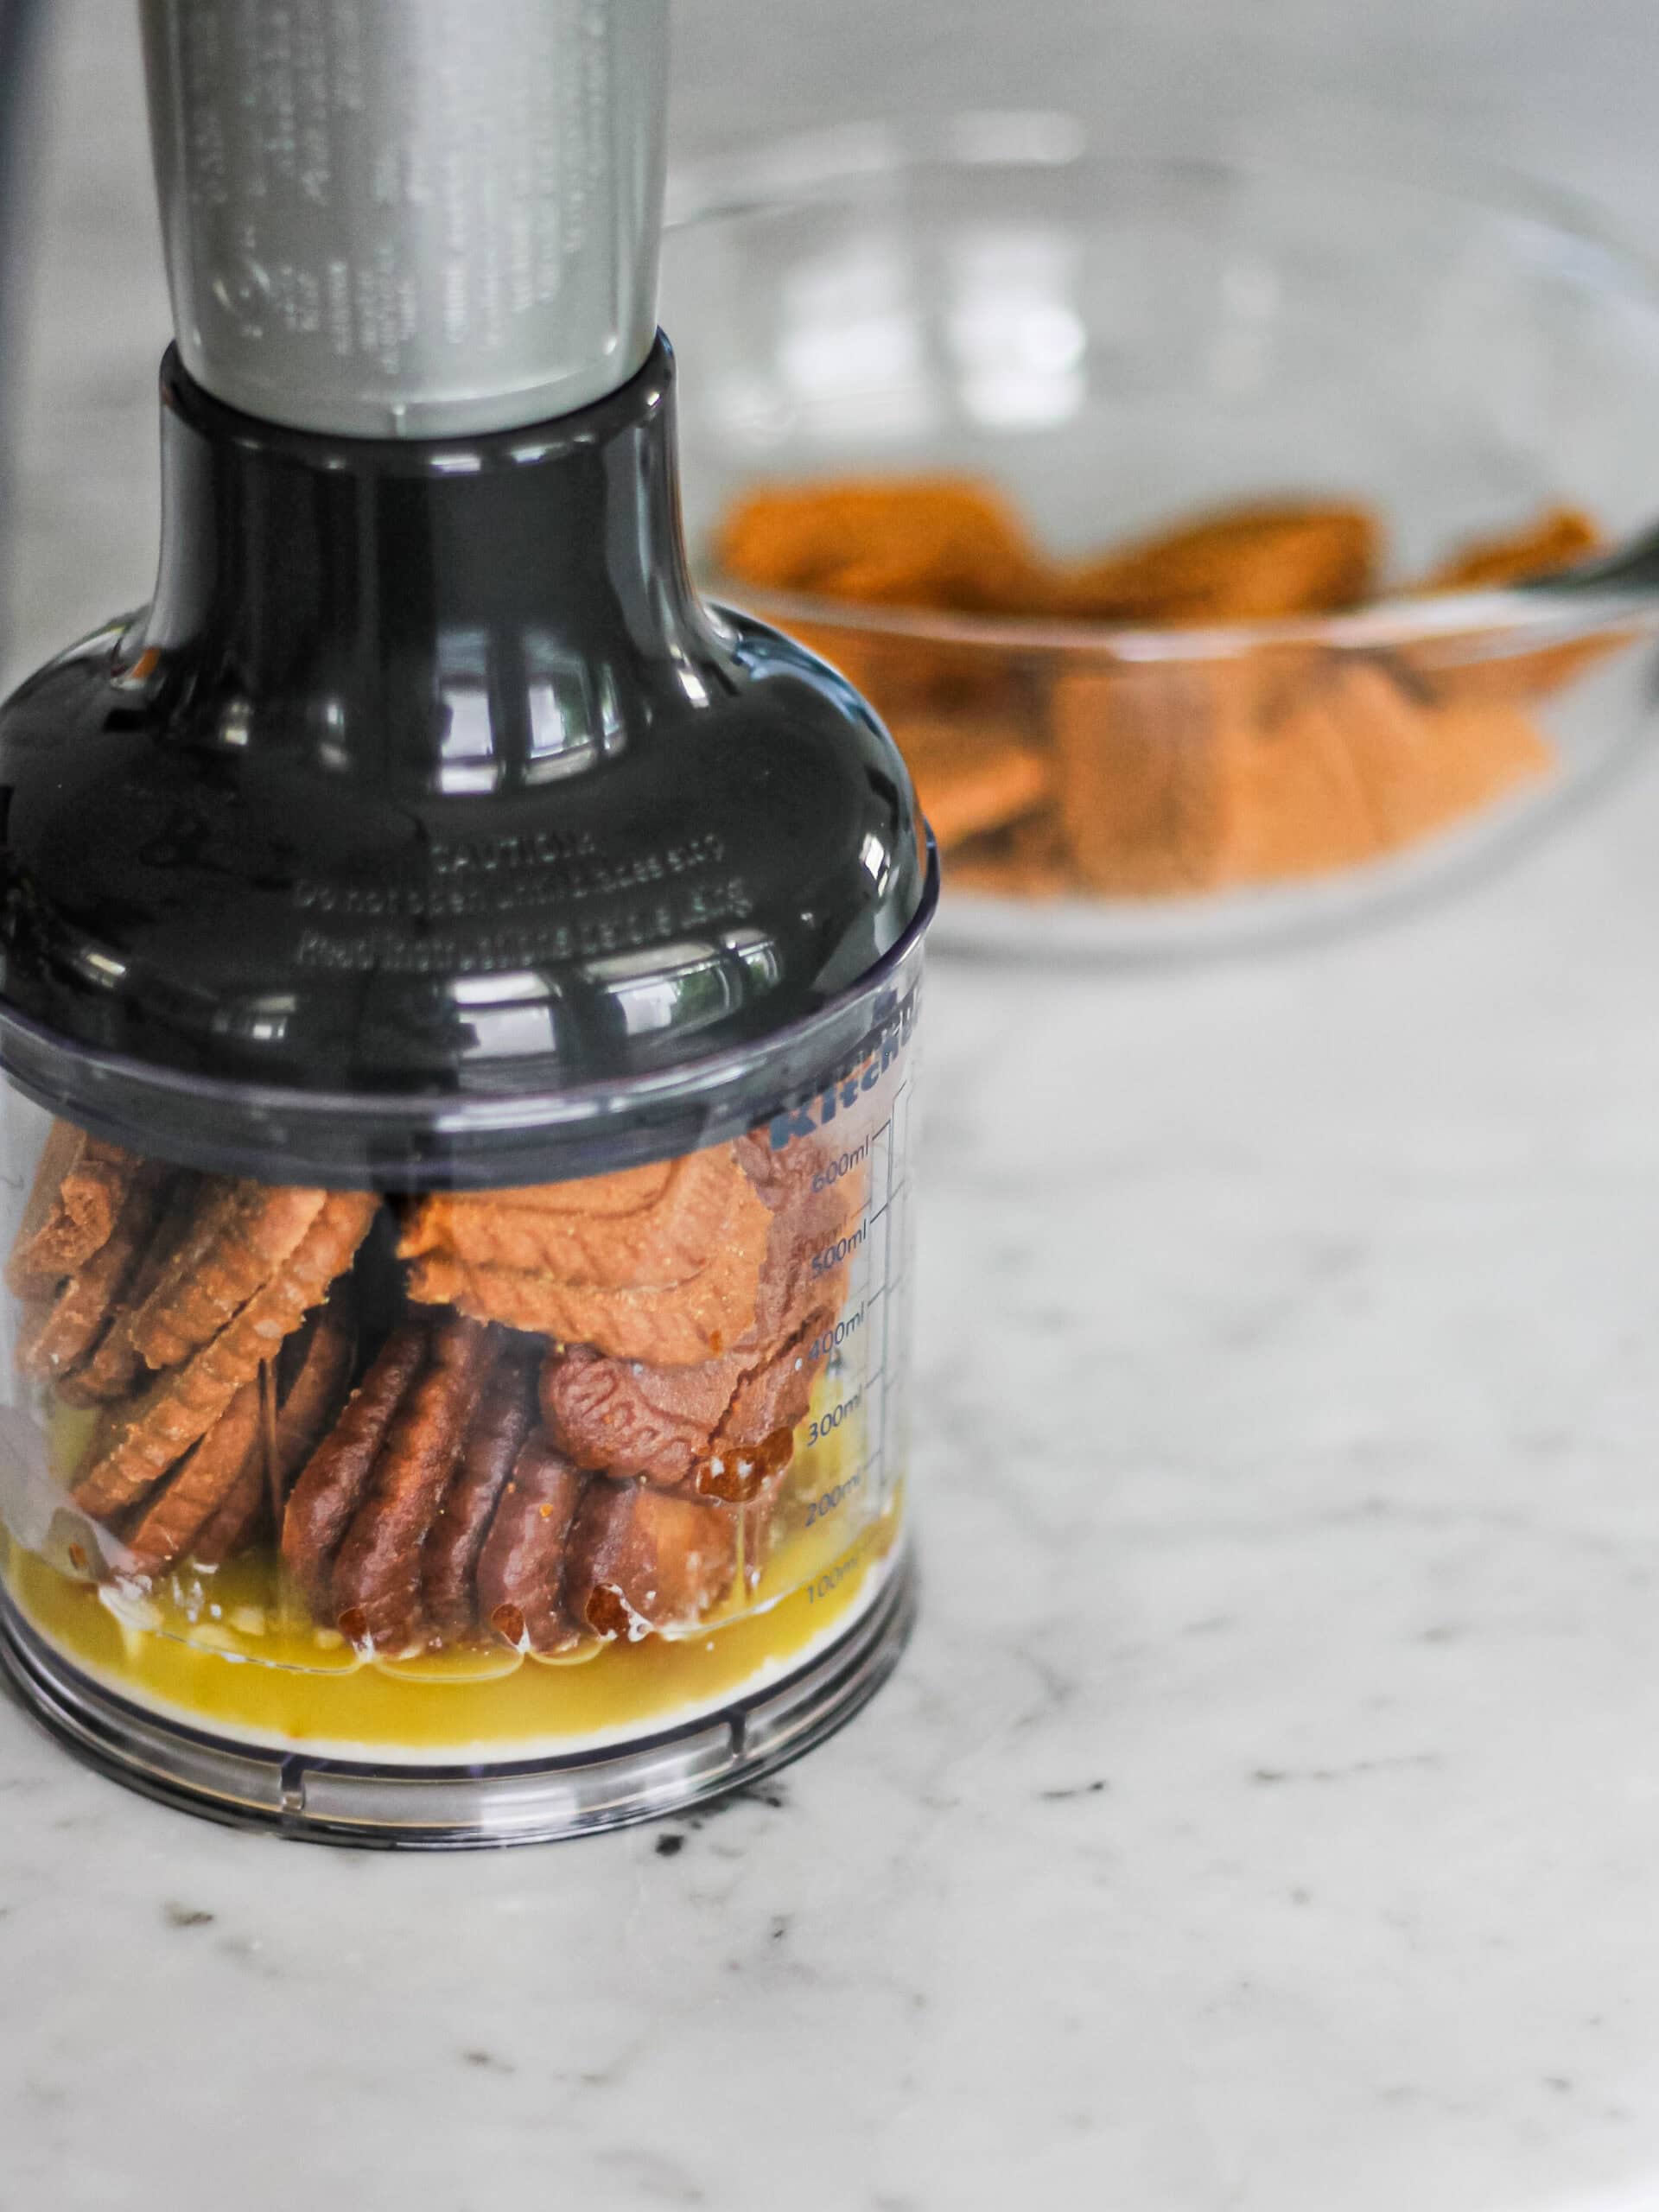
- Biscoff cookie crumbs - Well-known as a sweet treat to enjoy during a flight, Biscoff cookies have a distinctive flavor, thanks to the unique blend of cinnamon and other spices in them. The crumbs create the crust of this cheesecake because when combined with melted butter, they form a sturdy base to hold the filling. I provide steps for grinding up the cookies, which is a super easy process. However, in researching this recipe, I learned that Biscoff cookie crumbs are so popular in recipes like this that the brand has started selling pre-made Biscoff cookie crusts for convenience!
- Lemon juice - Adding lemon juice to the filling is key. It balances the richness of the mascarpone and the sweetness of the Biscoff crust.
📖 How to Make the No Bake Biscoff Cookie Crust
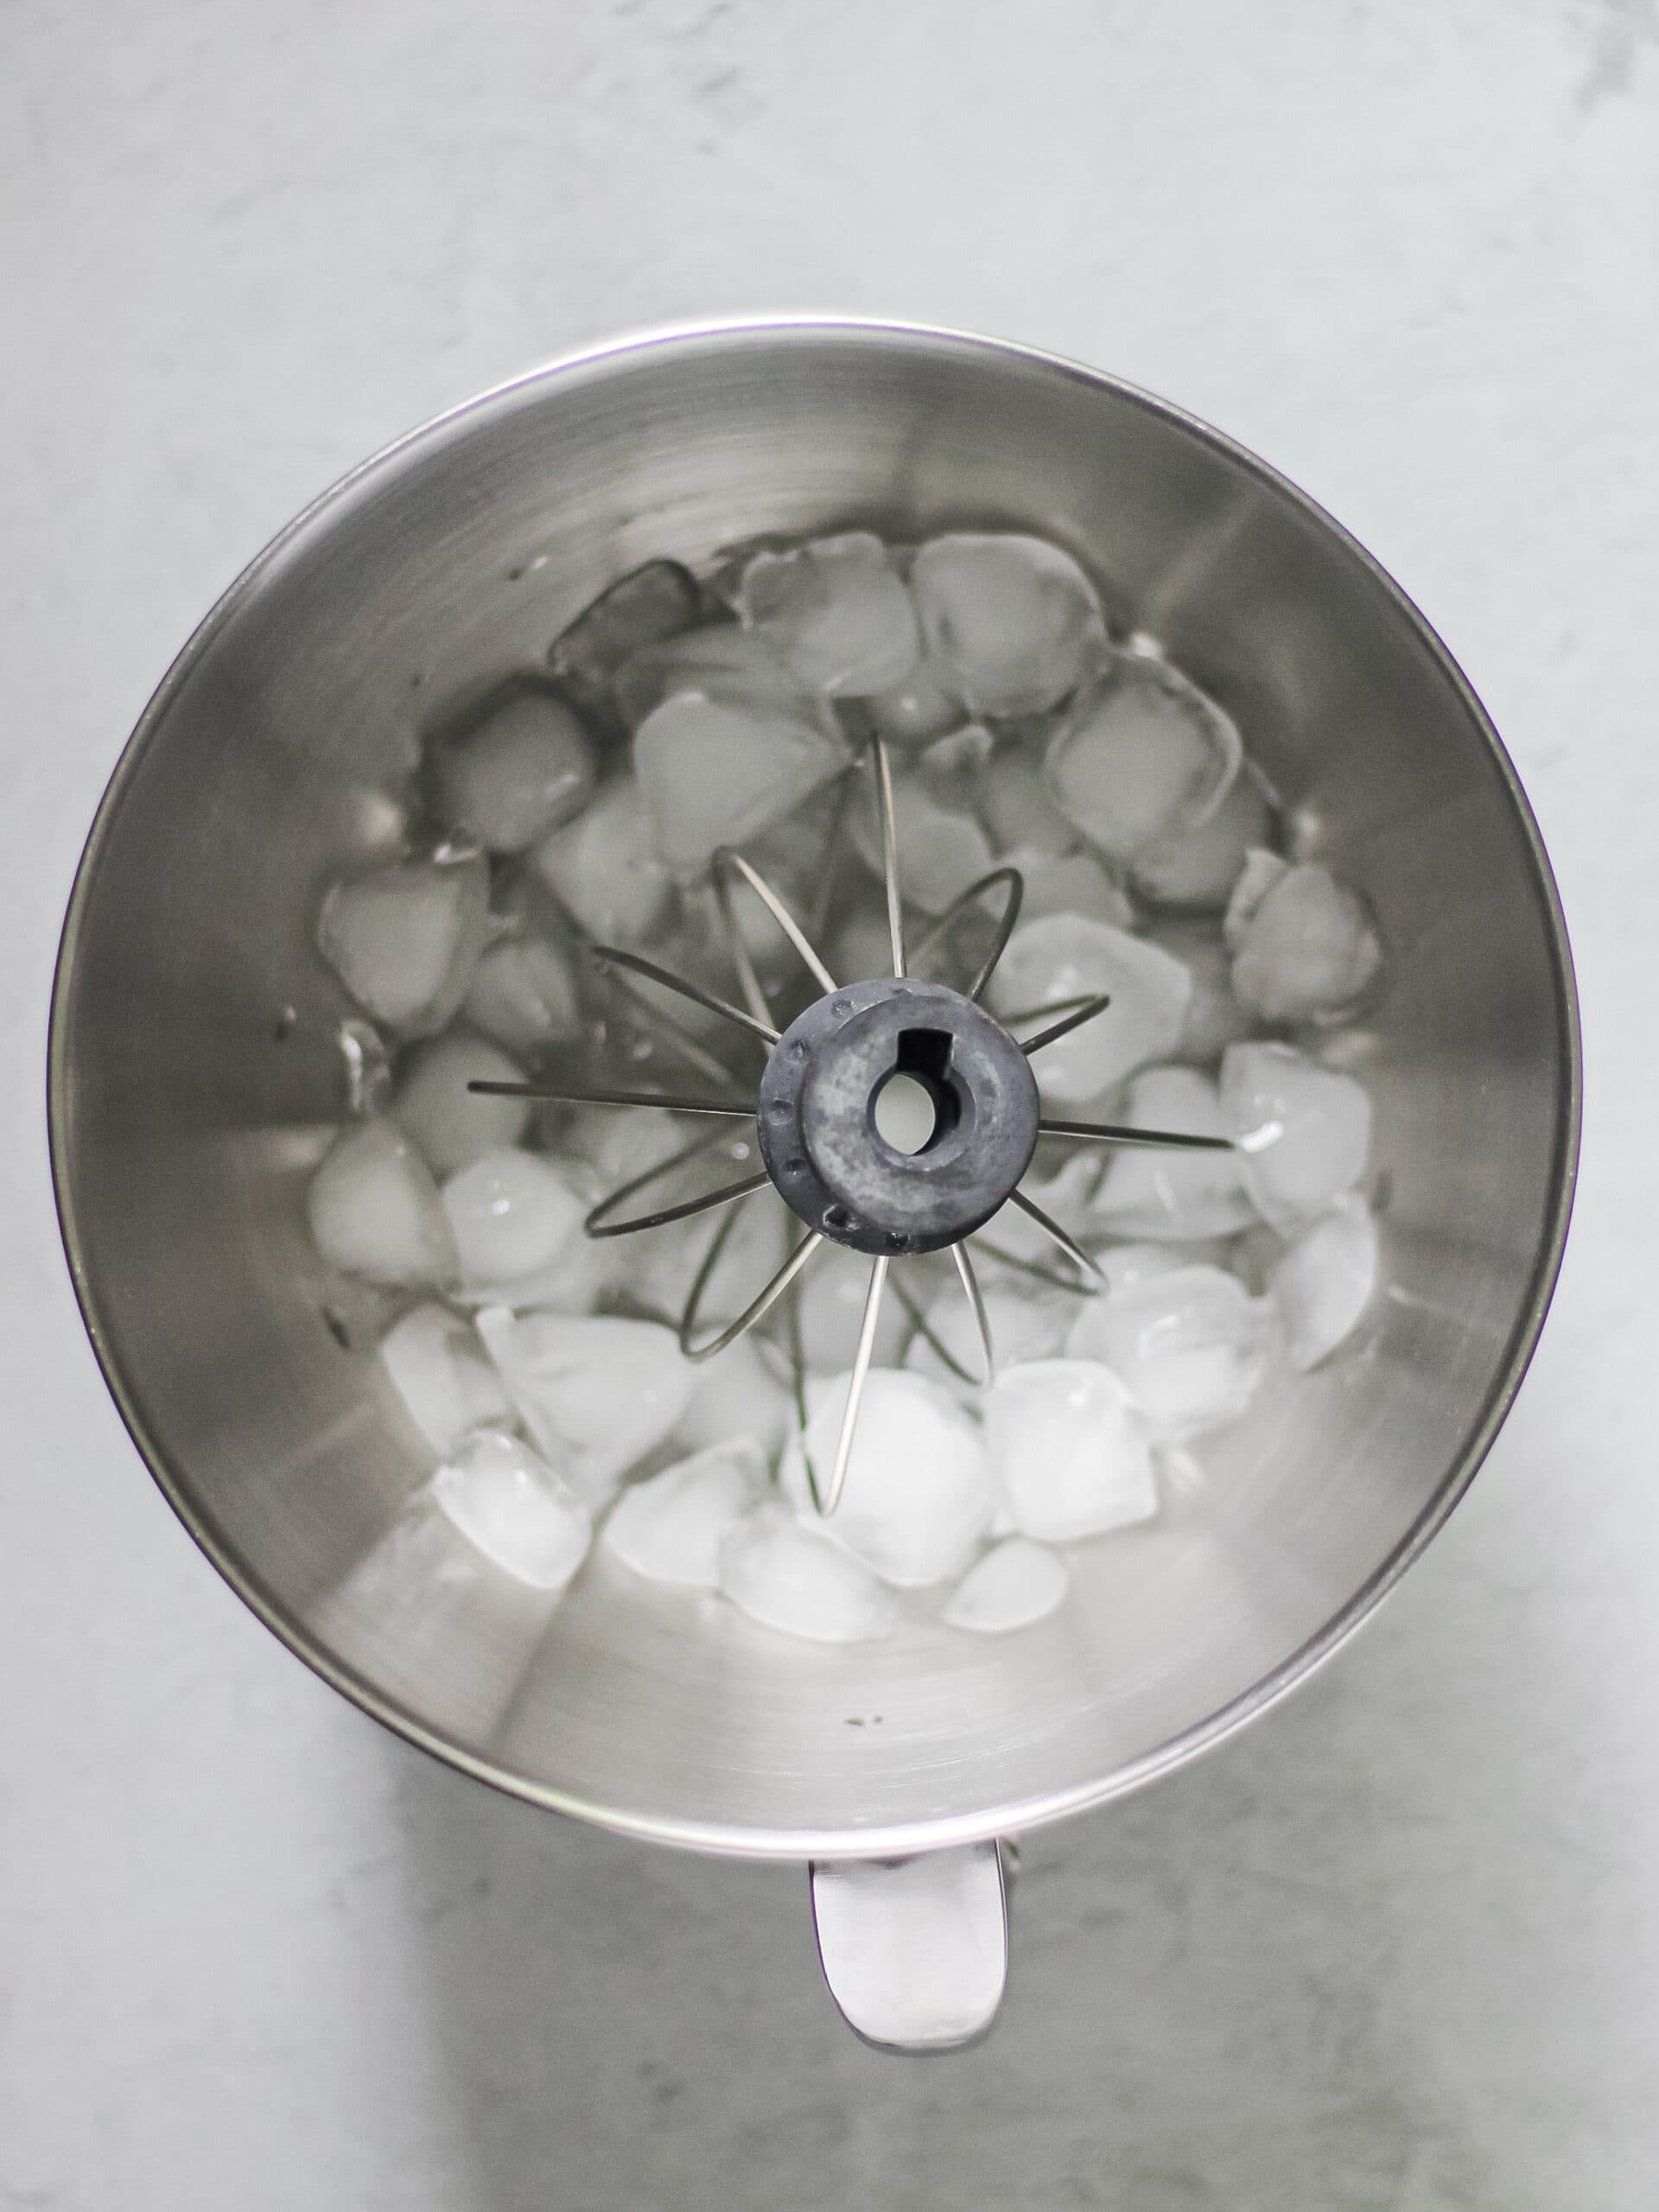
While making the crust, chill the stand mixer bowl for the filling. Place the bowl of your stand mixer in the refrigerator for about 15 minutes to chill, or fill it with ice while you prep ingredients. Empty and dry it before using for the filling of your no bake cheesecake with mascarpone.
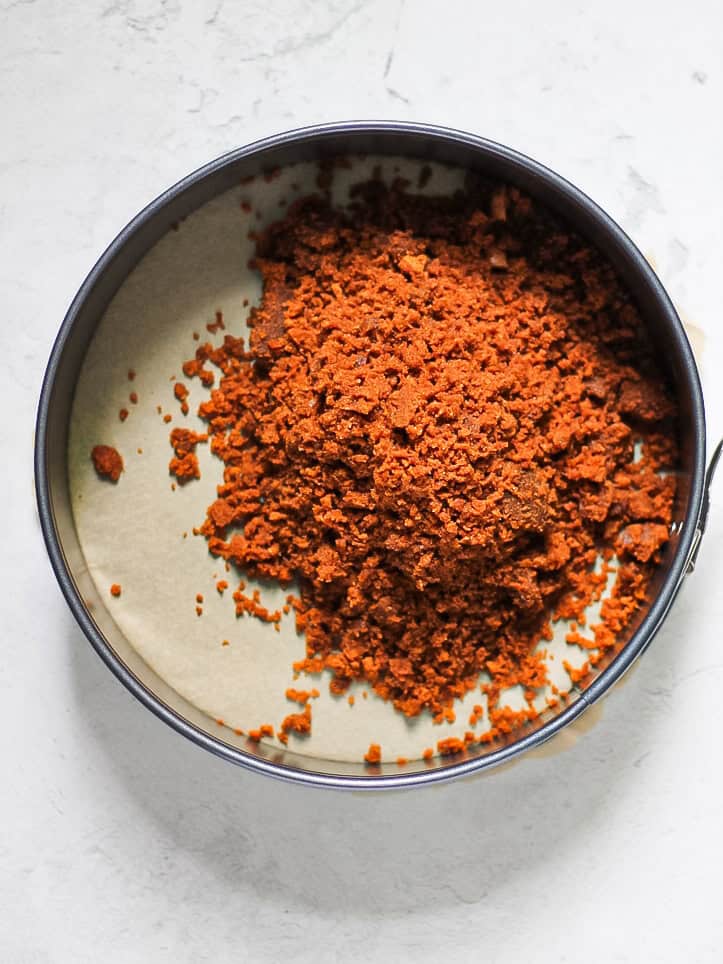
Process the crust ingredients. In a food processor, combine the Biscoff cookies, brown sugar, salt, and melted butter. Pulse until the mixture is finely ground and resembles wet sand.
Tip: If your processor is small, work in two batches.
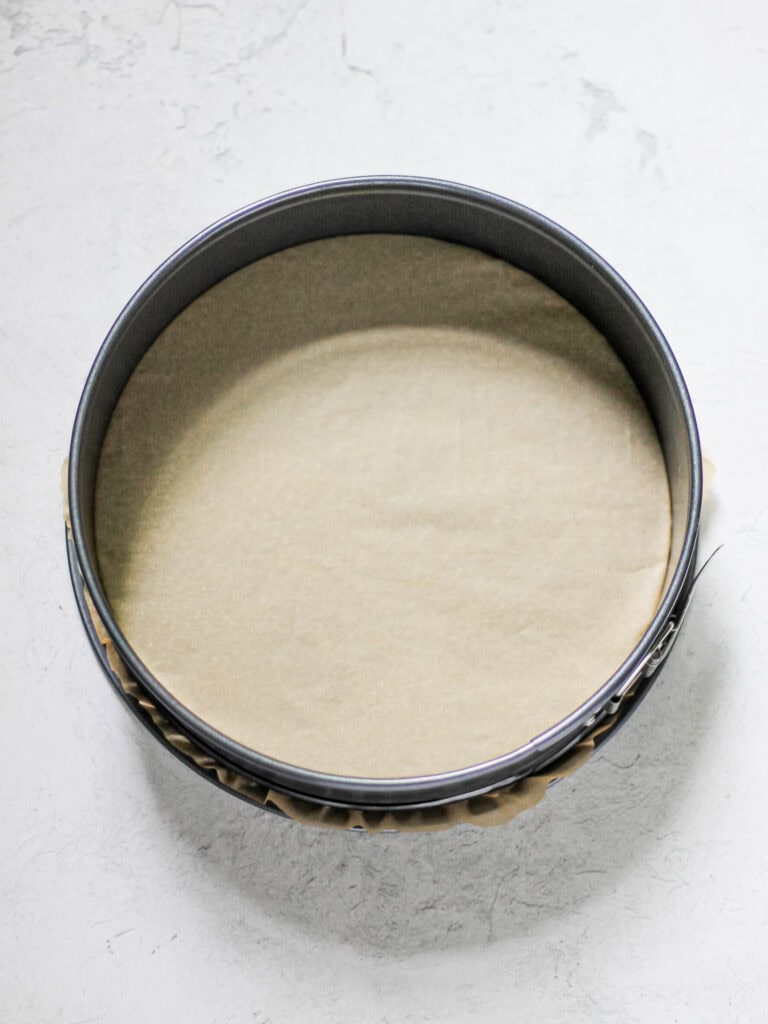
Prepare the pan. Line the bottom of a 9-inch springform pan with a round of parchment paper for easy release. You'll want it to have slight overhang for easier removal later.
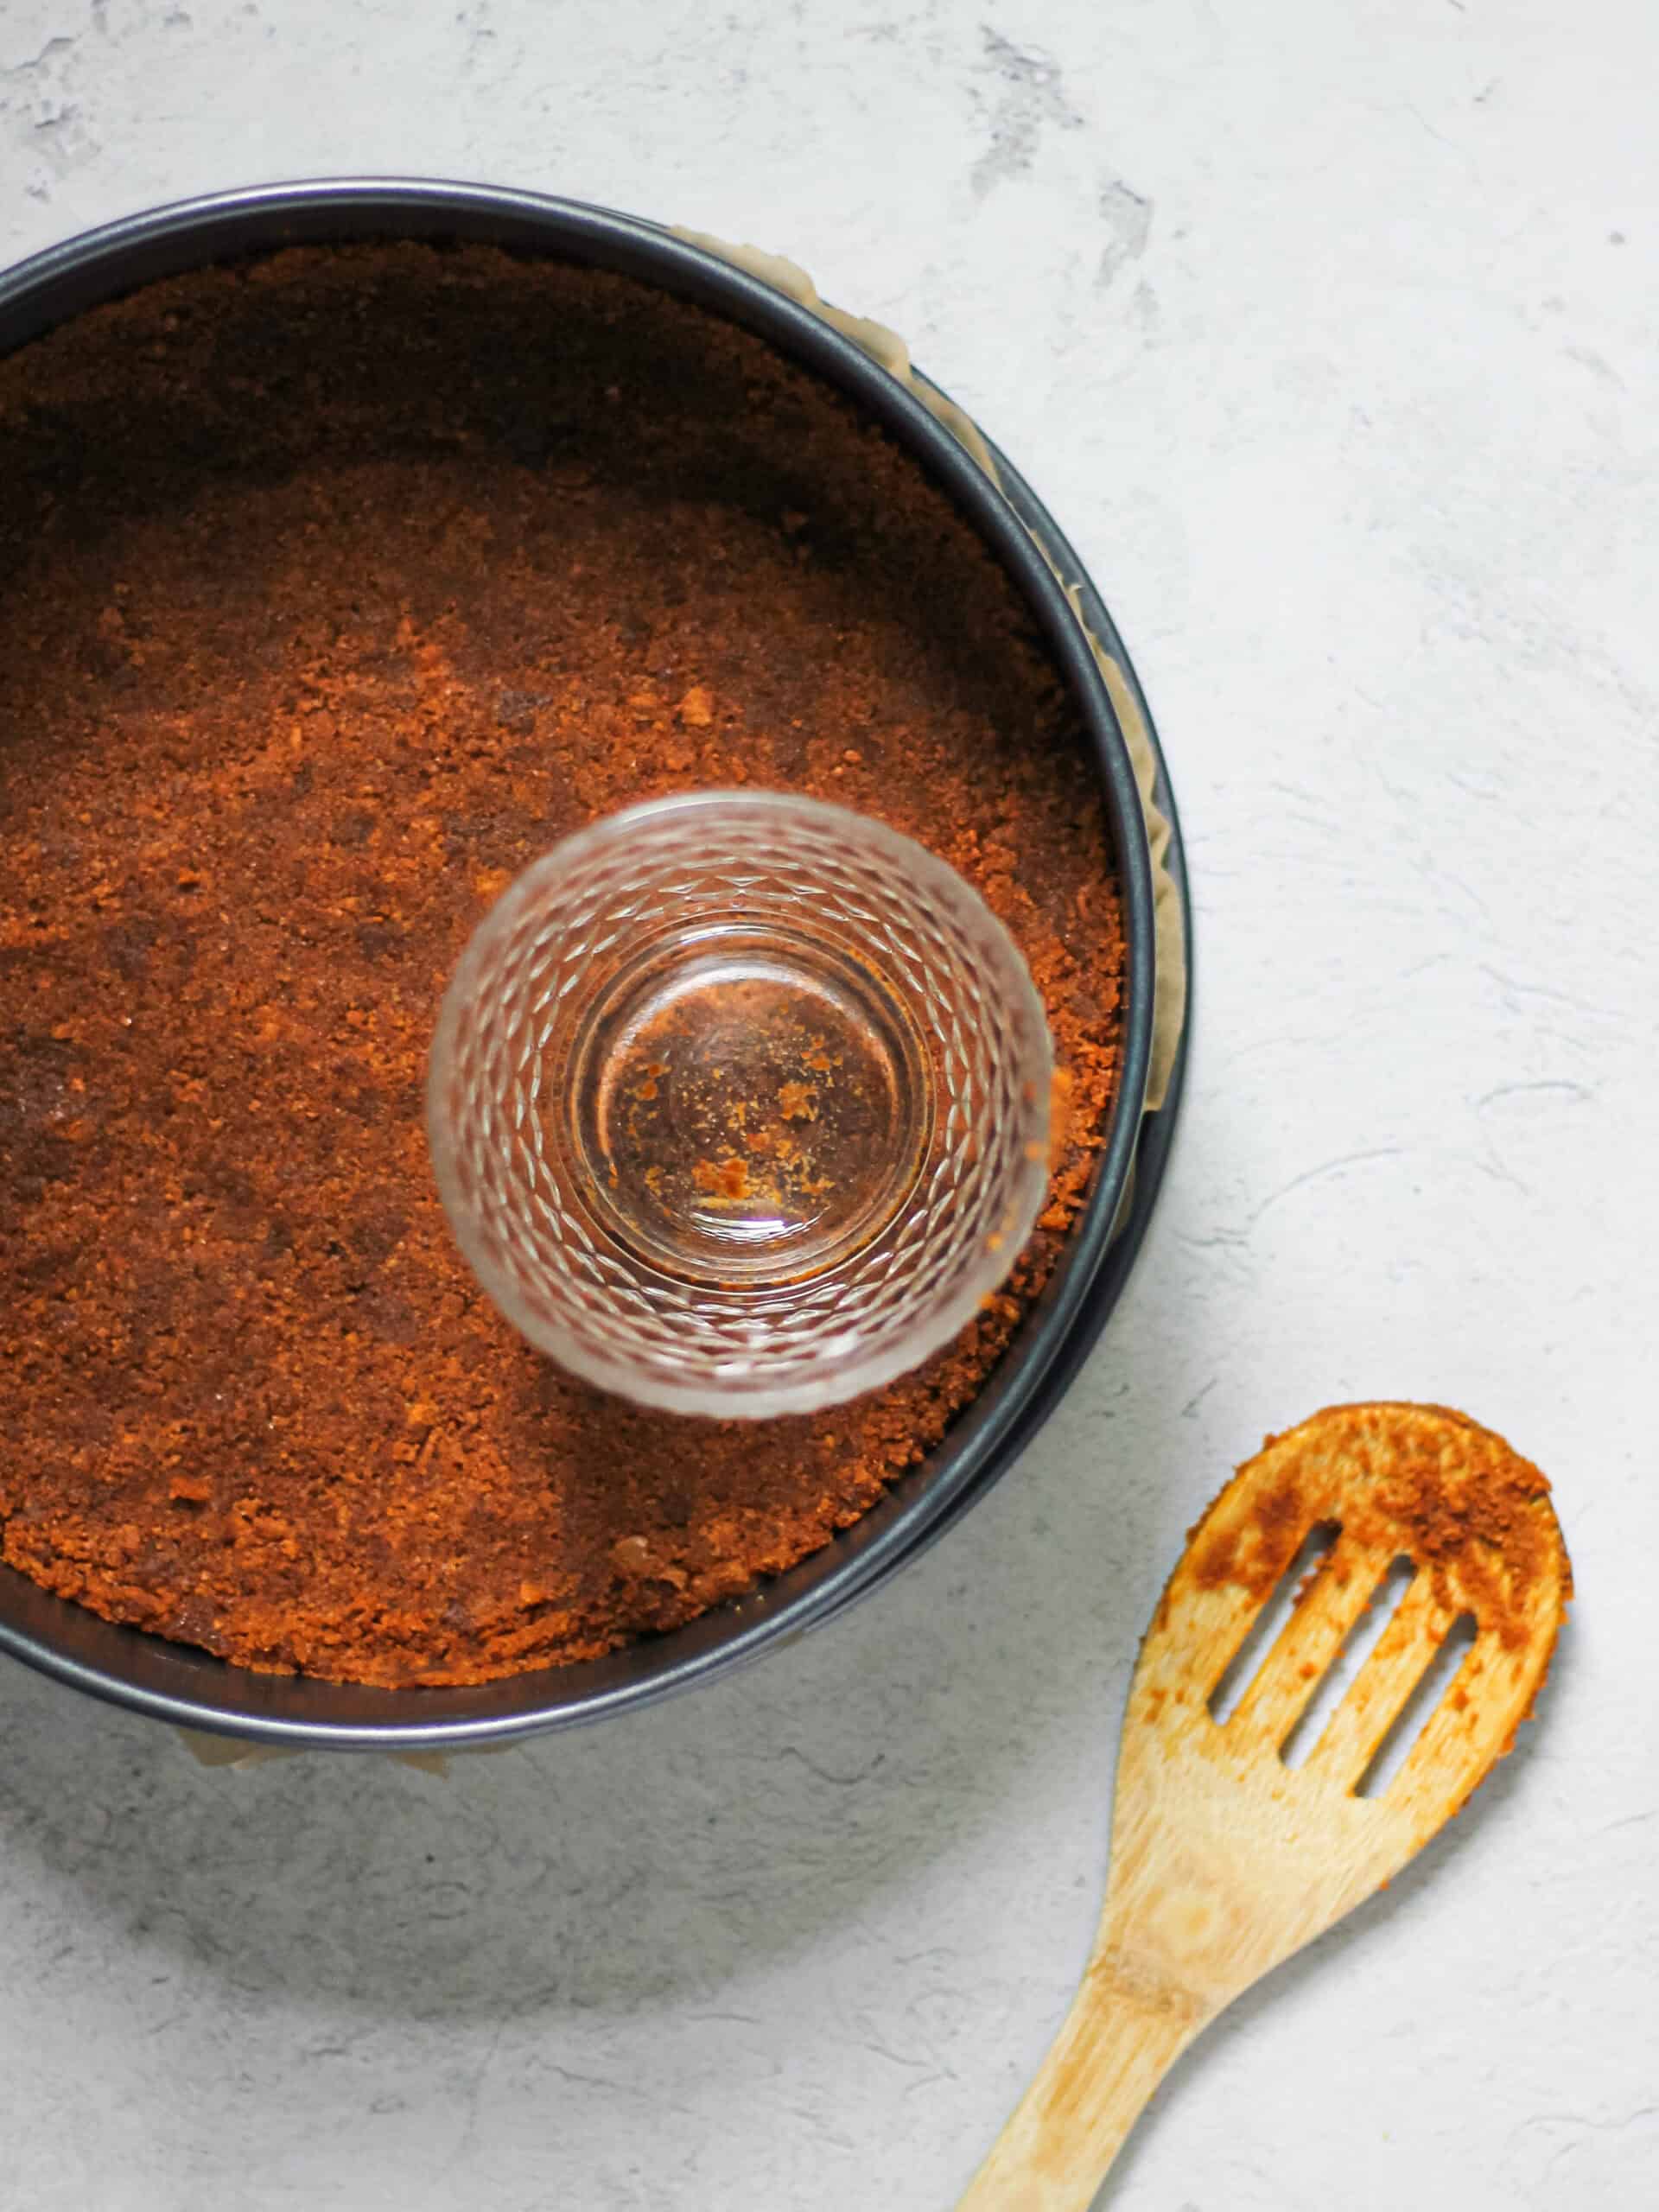
Press the crumbs. Pour the crumb mixture into the pan and press it evenly across the bottom and slightly up the sides. Use the bottom of a rounded glass to help spread and compact the crumbs.
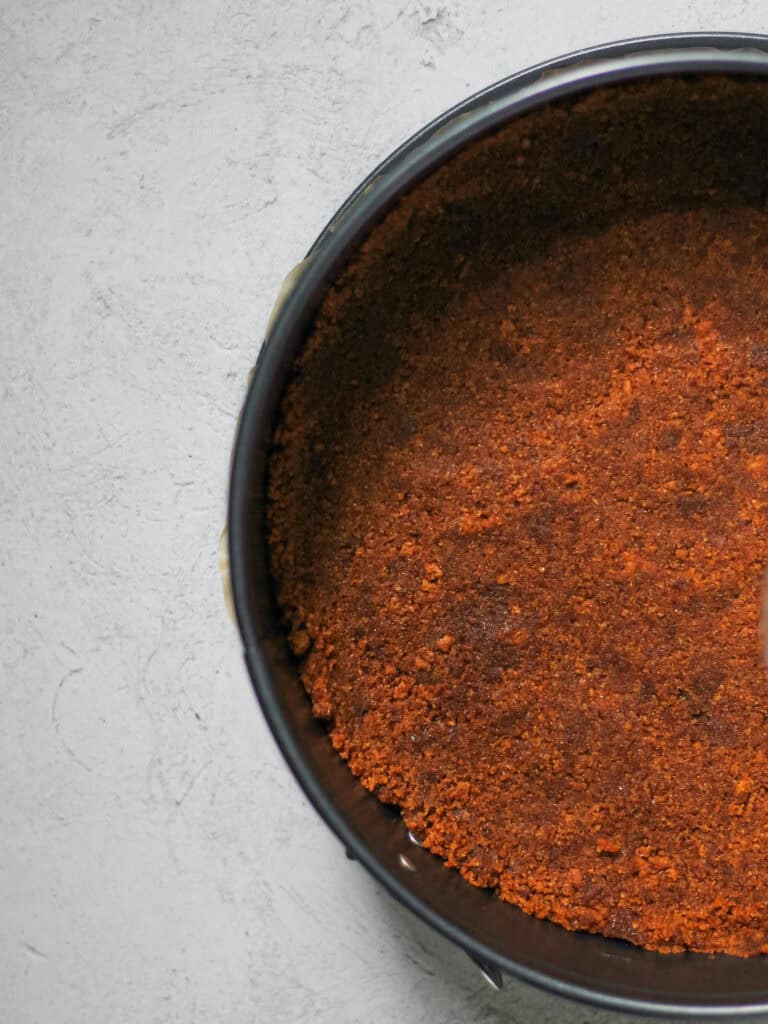
Chill the crust. Place the pan in the refrigerator or freezer to firm up while you make the filling.
💡 Why Mascarpone Splits (and How to Prevent It)
Mascarpone has a tendency to split when mixed with other ingredients that are different temperature. If your mascarpone is very cold and heavy cream is room temperature, or vice versa, your mixture could split. Carefully follow the steps of the recipe whenever determining the temperature you should use for combining ingredients with mascarpone.
As a result, I worked with cold mascarpone and cold heavy cream in this recipe, ensuring they'd combine nicely.
📝 How to Make No Bake Cheesecake Filling Without Gelatin
Prepare the bowl. Retrieve your chilled mixer bowl from the refrigerator, or empty out the ice and dry the bowl completely.
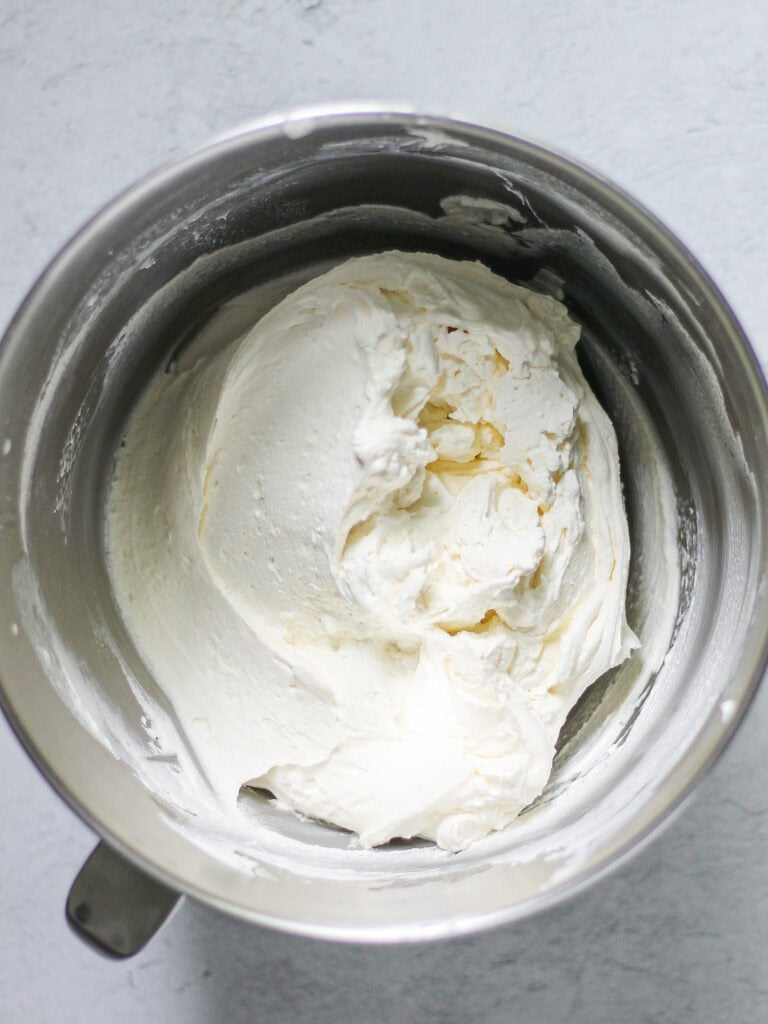
Beat mascarpone mixture. Add the cold mascarpone cheese, cold heavy cream, powdered sugar, and vanilla extract to the bowl. Beat on low speed for 1 minute to incorporate, then increase to medium-high speed for 2 minutes.
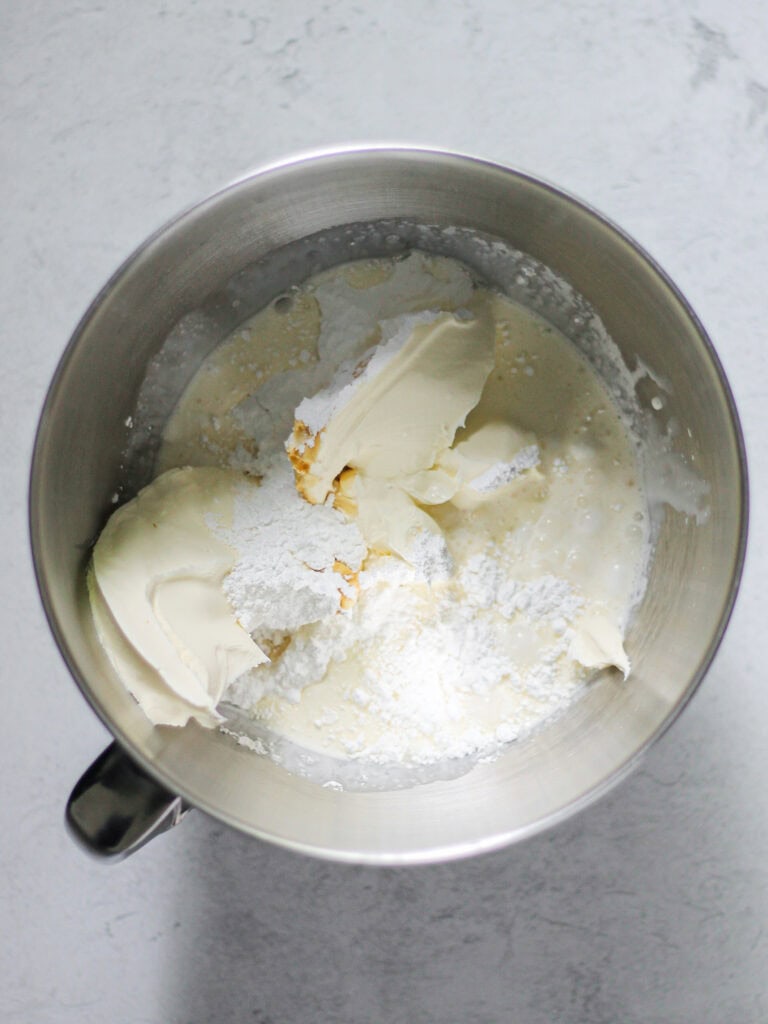
Add lemon juice. Pour in the lemon juice and beat on medium-high speed for another 30 seconds.
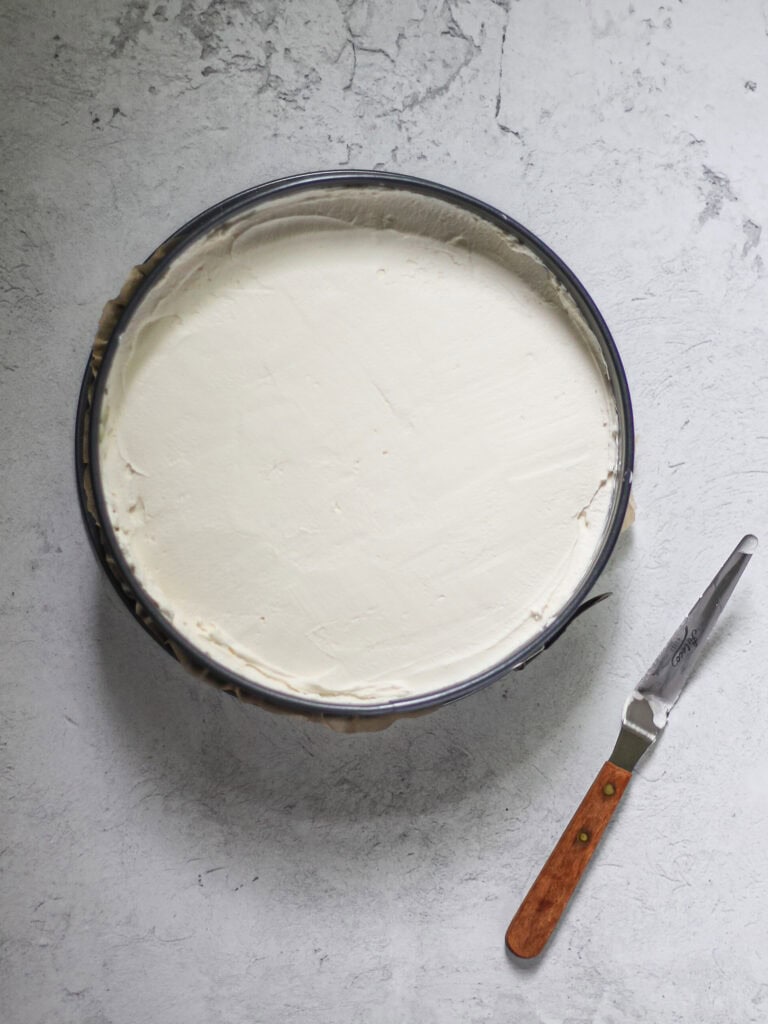
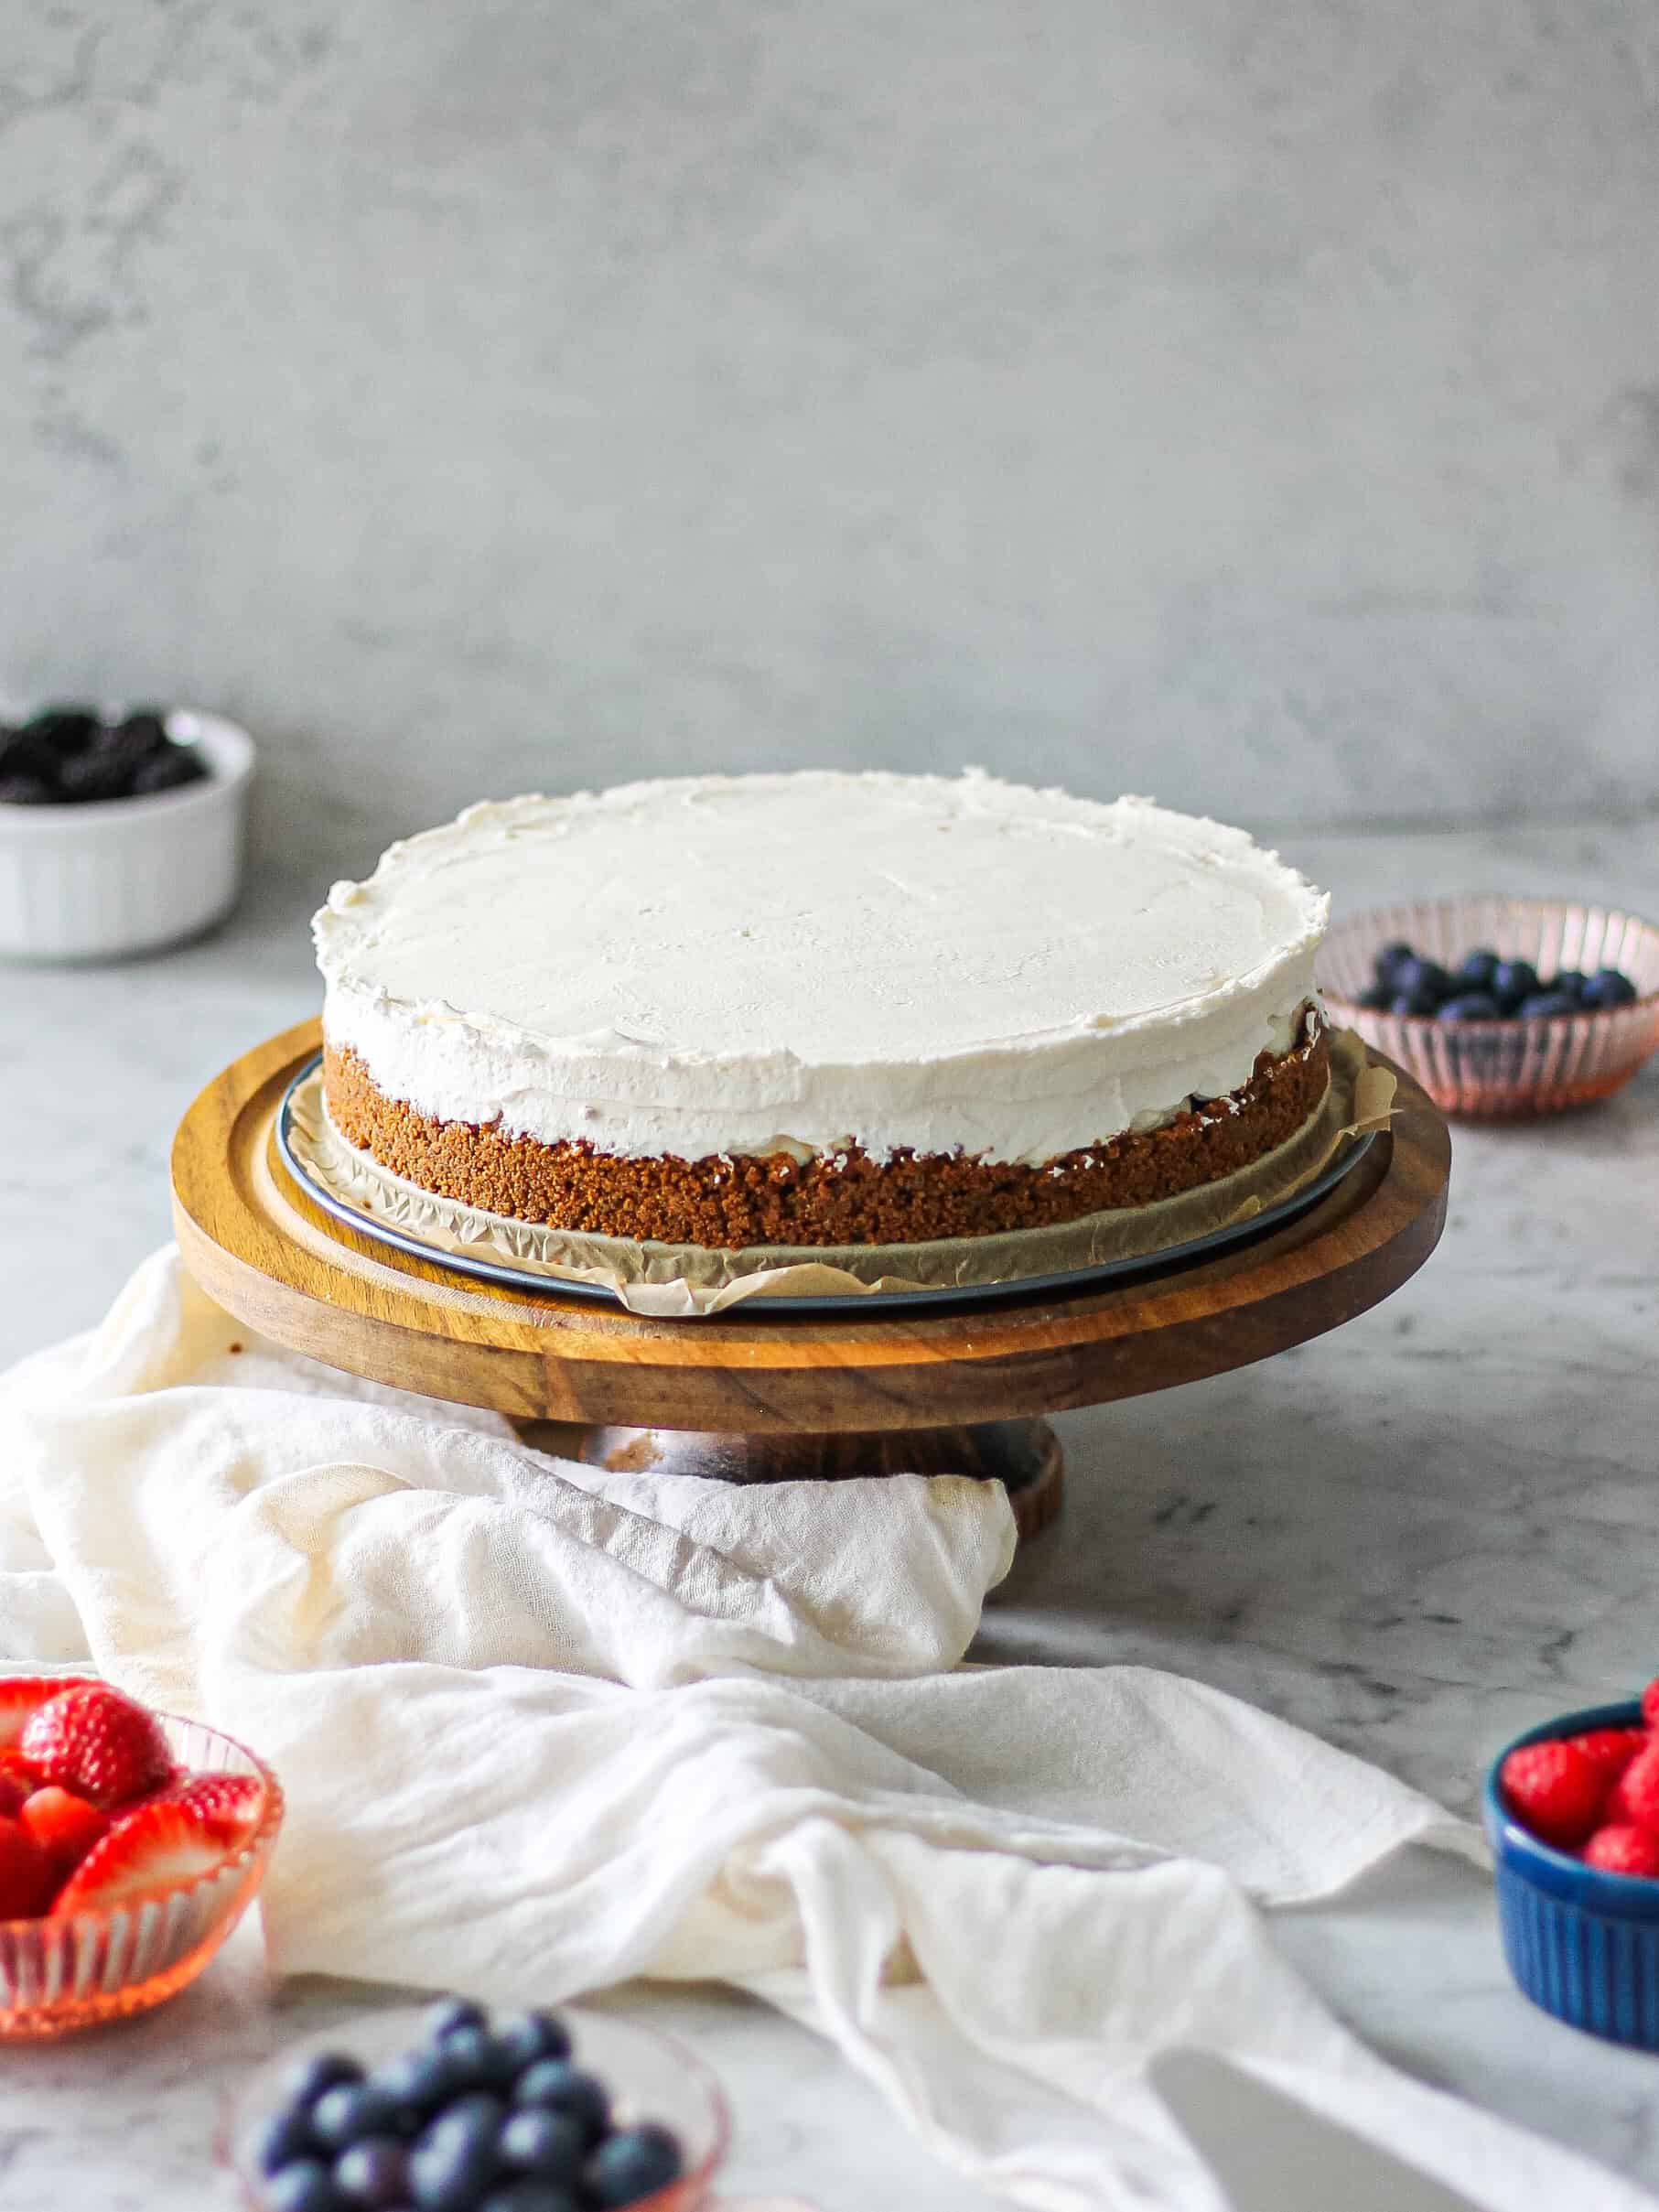
Fill the crust. Spread the cheesecake filling evenly into the prepared crust, smoothing the top with a spatula.
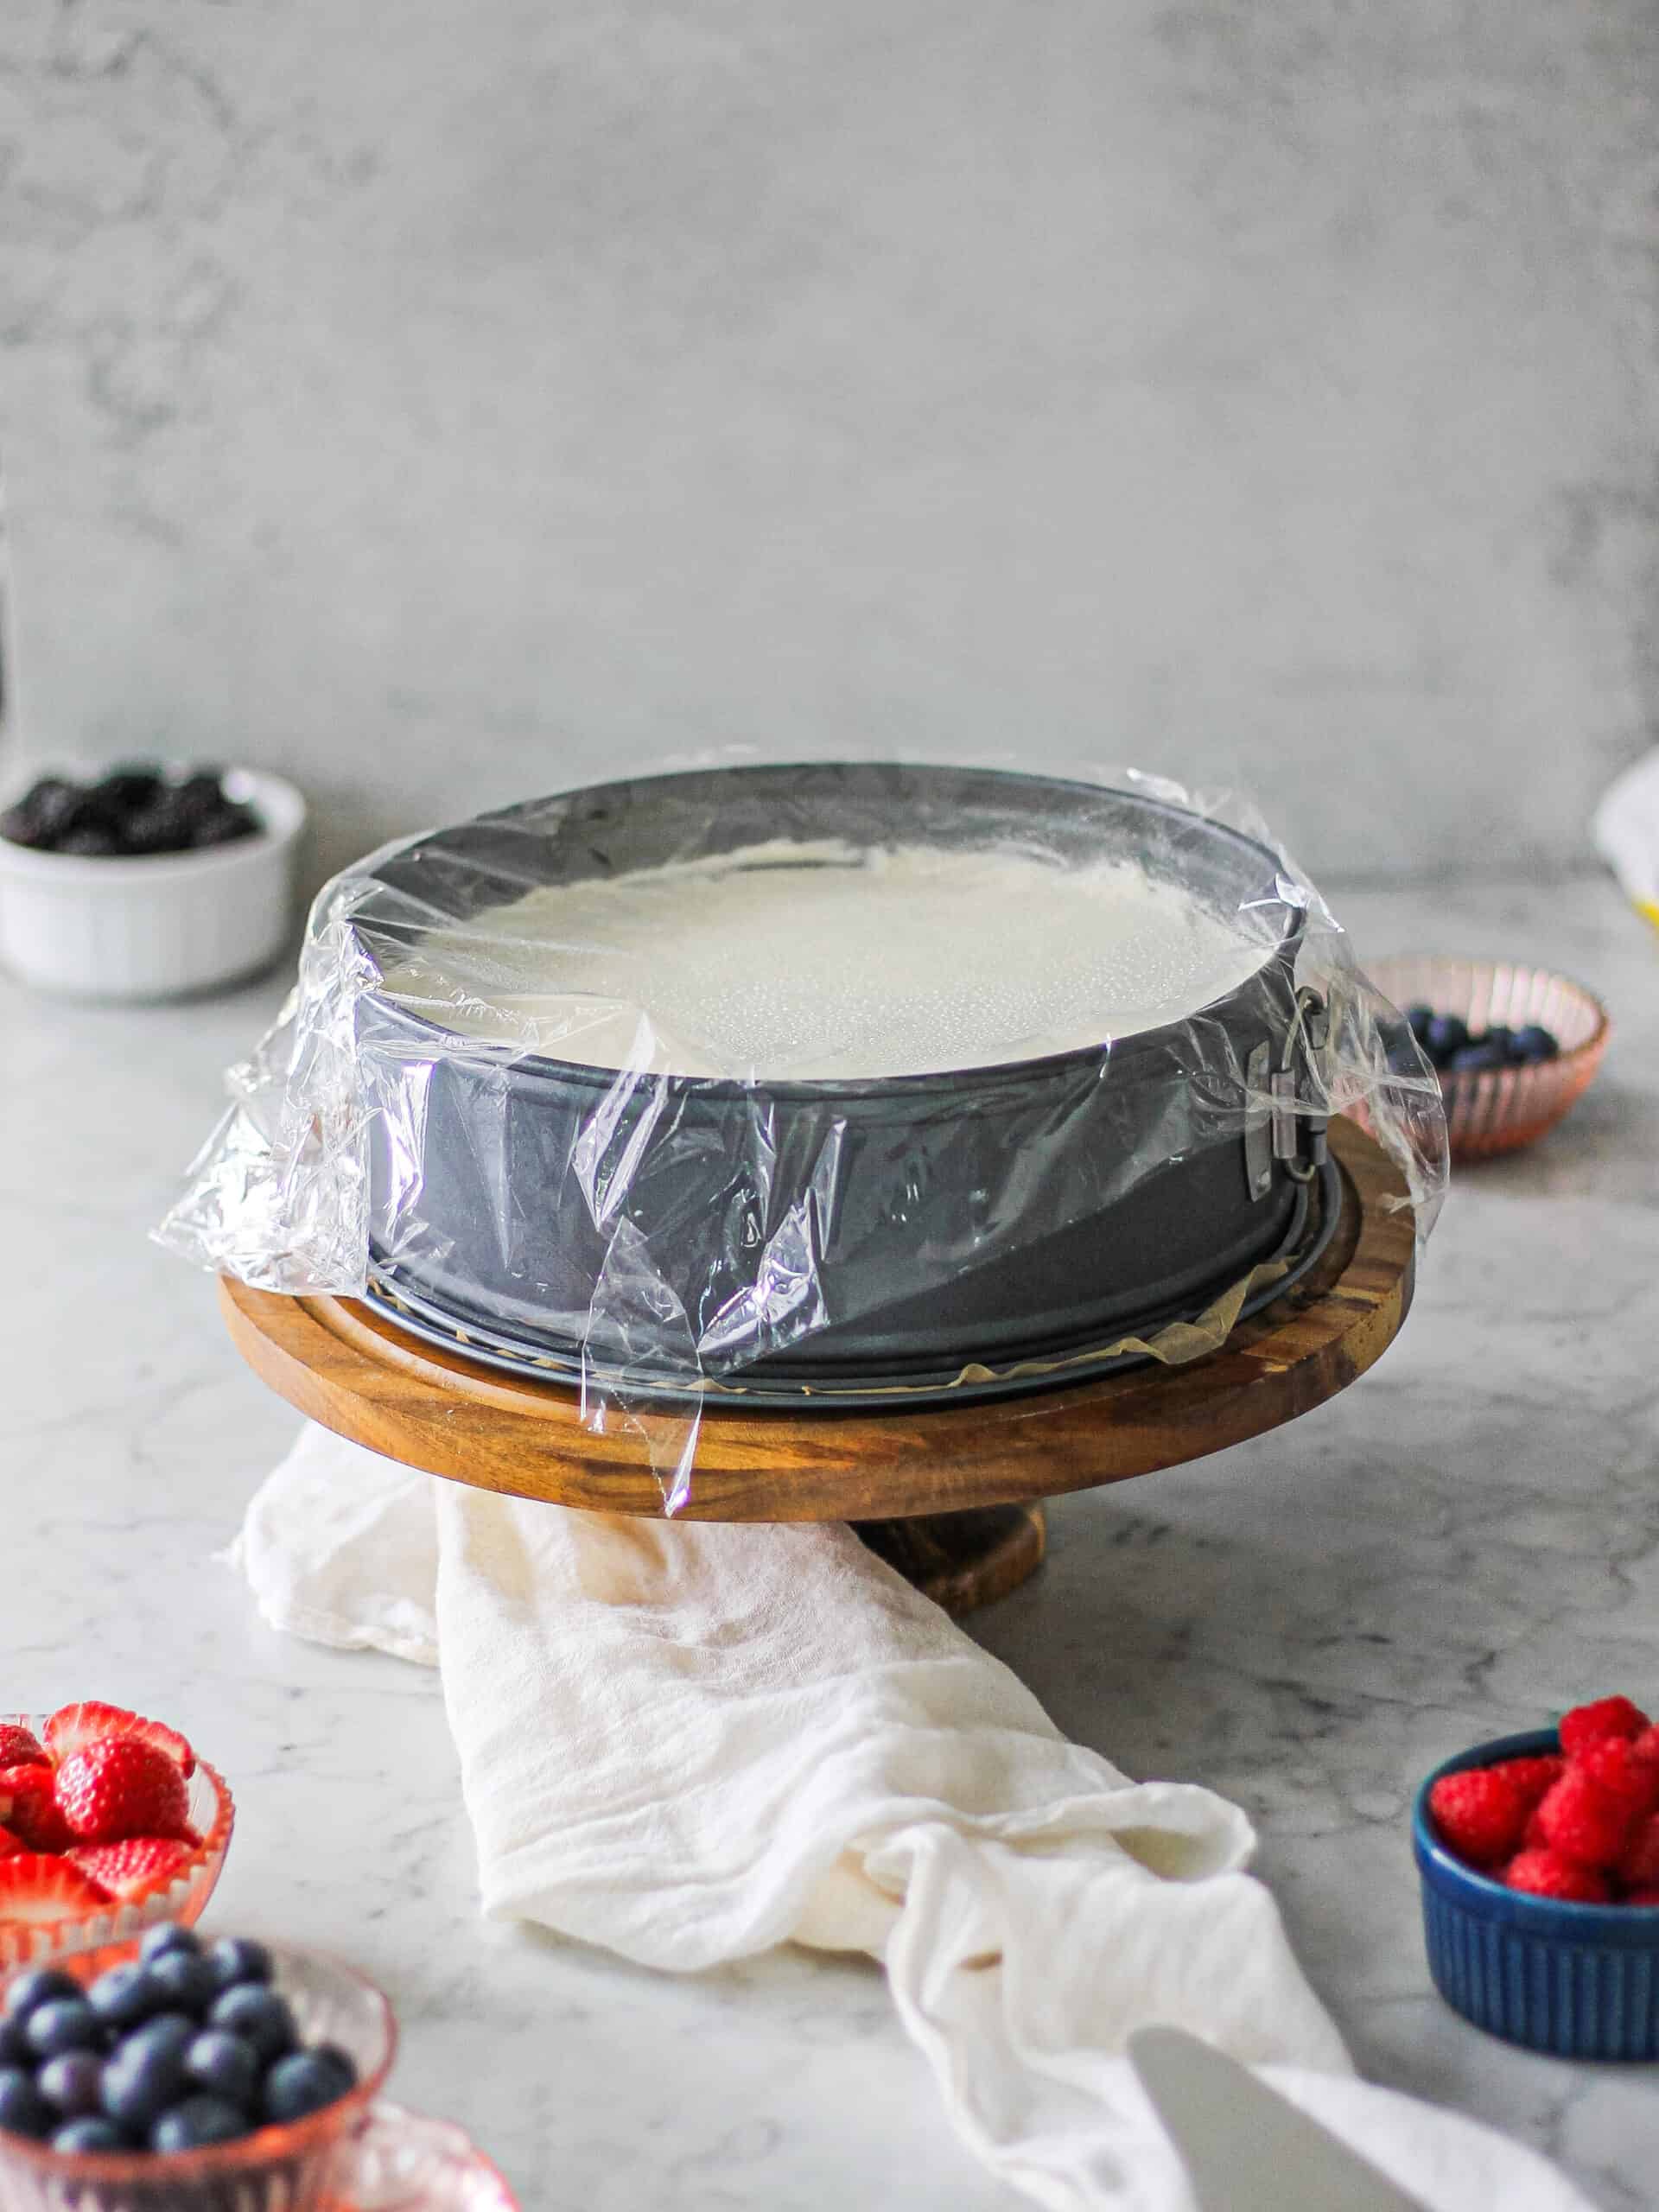
Chill to set. Cover the top with plastic wrap (this is to keep your cheesecake from picking up other odors in your refrigerator), and refrigerate for at least 4 hours, or until firm. The filling will already be somewhat thick when spread, but resting time in the fridge helps it set fully and deepen in flavor. For best results, chill overnight.
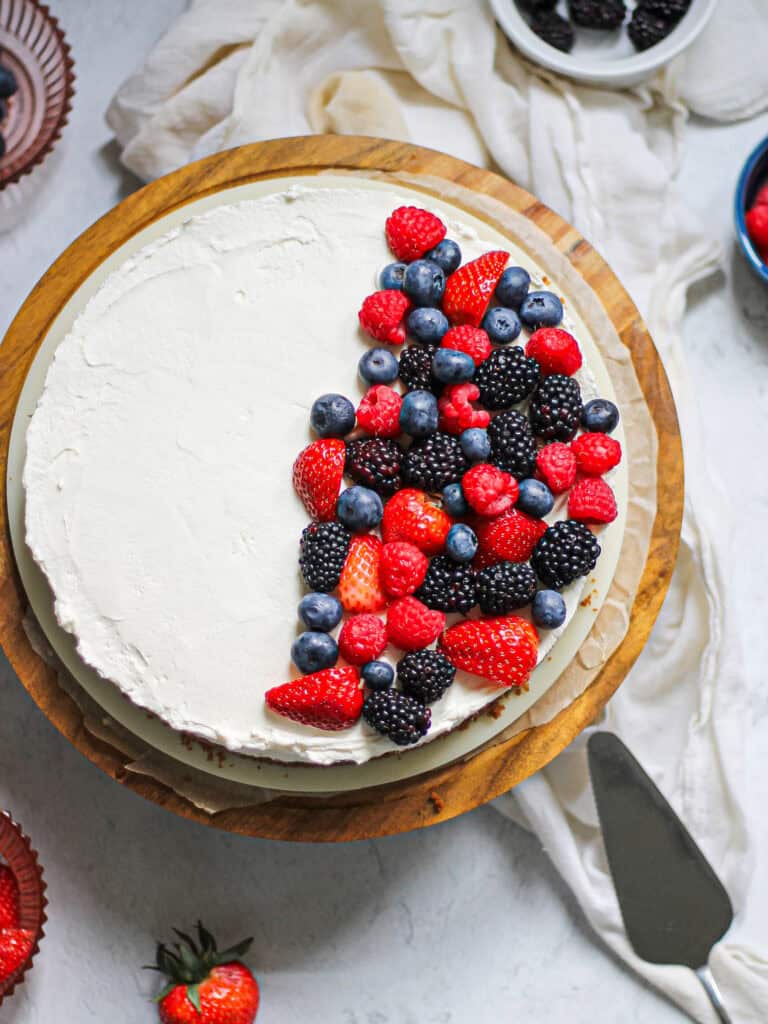
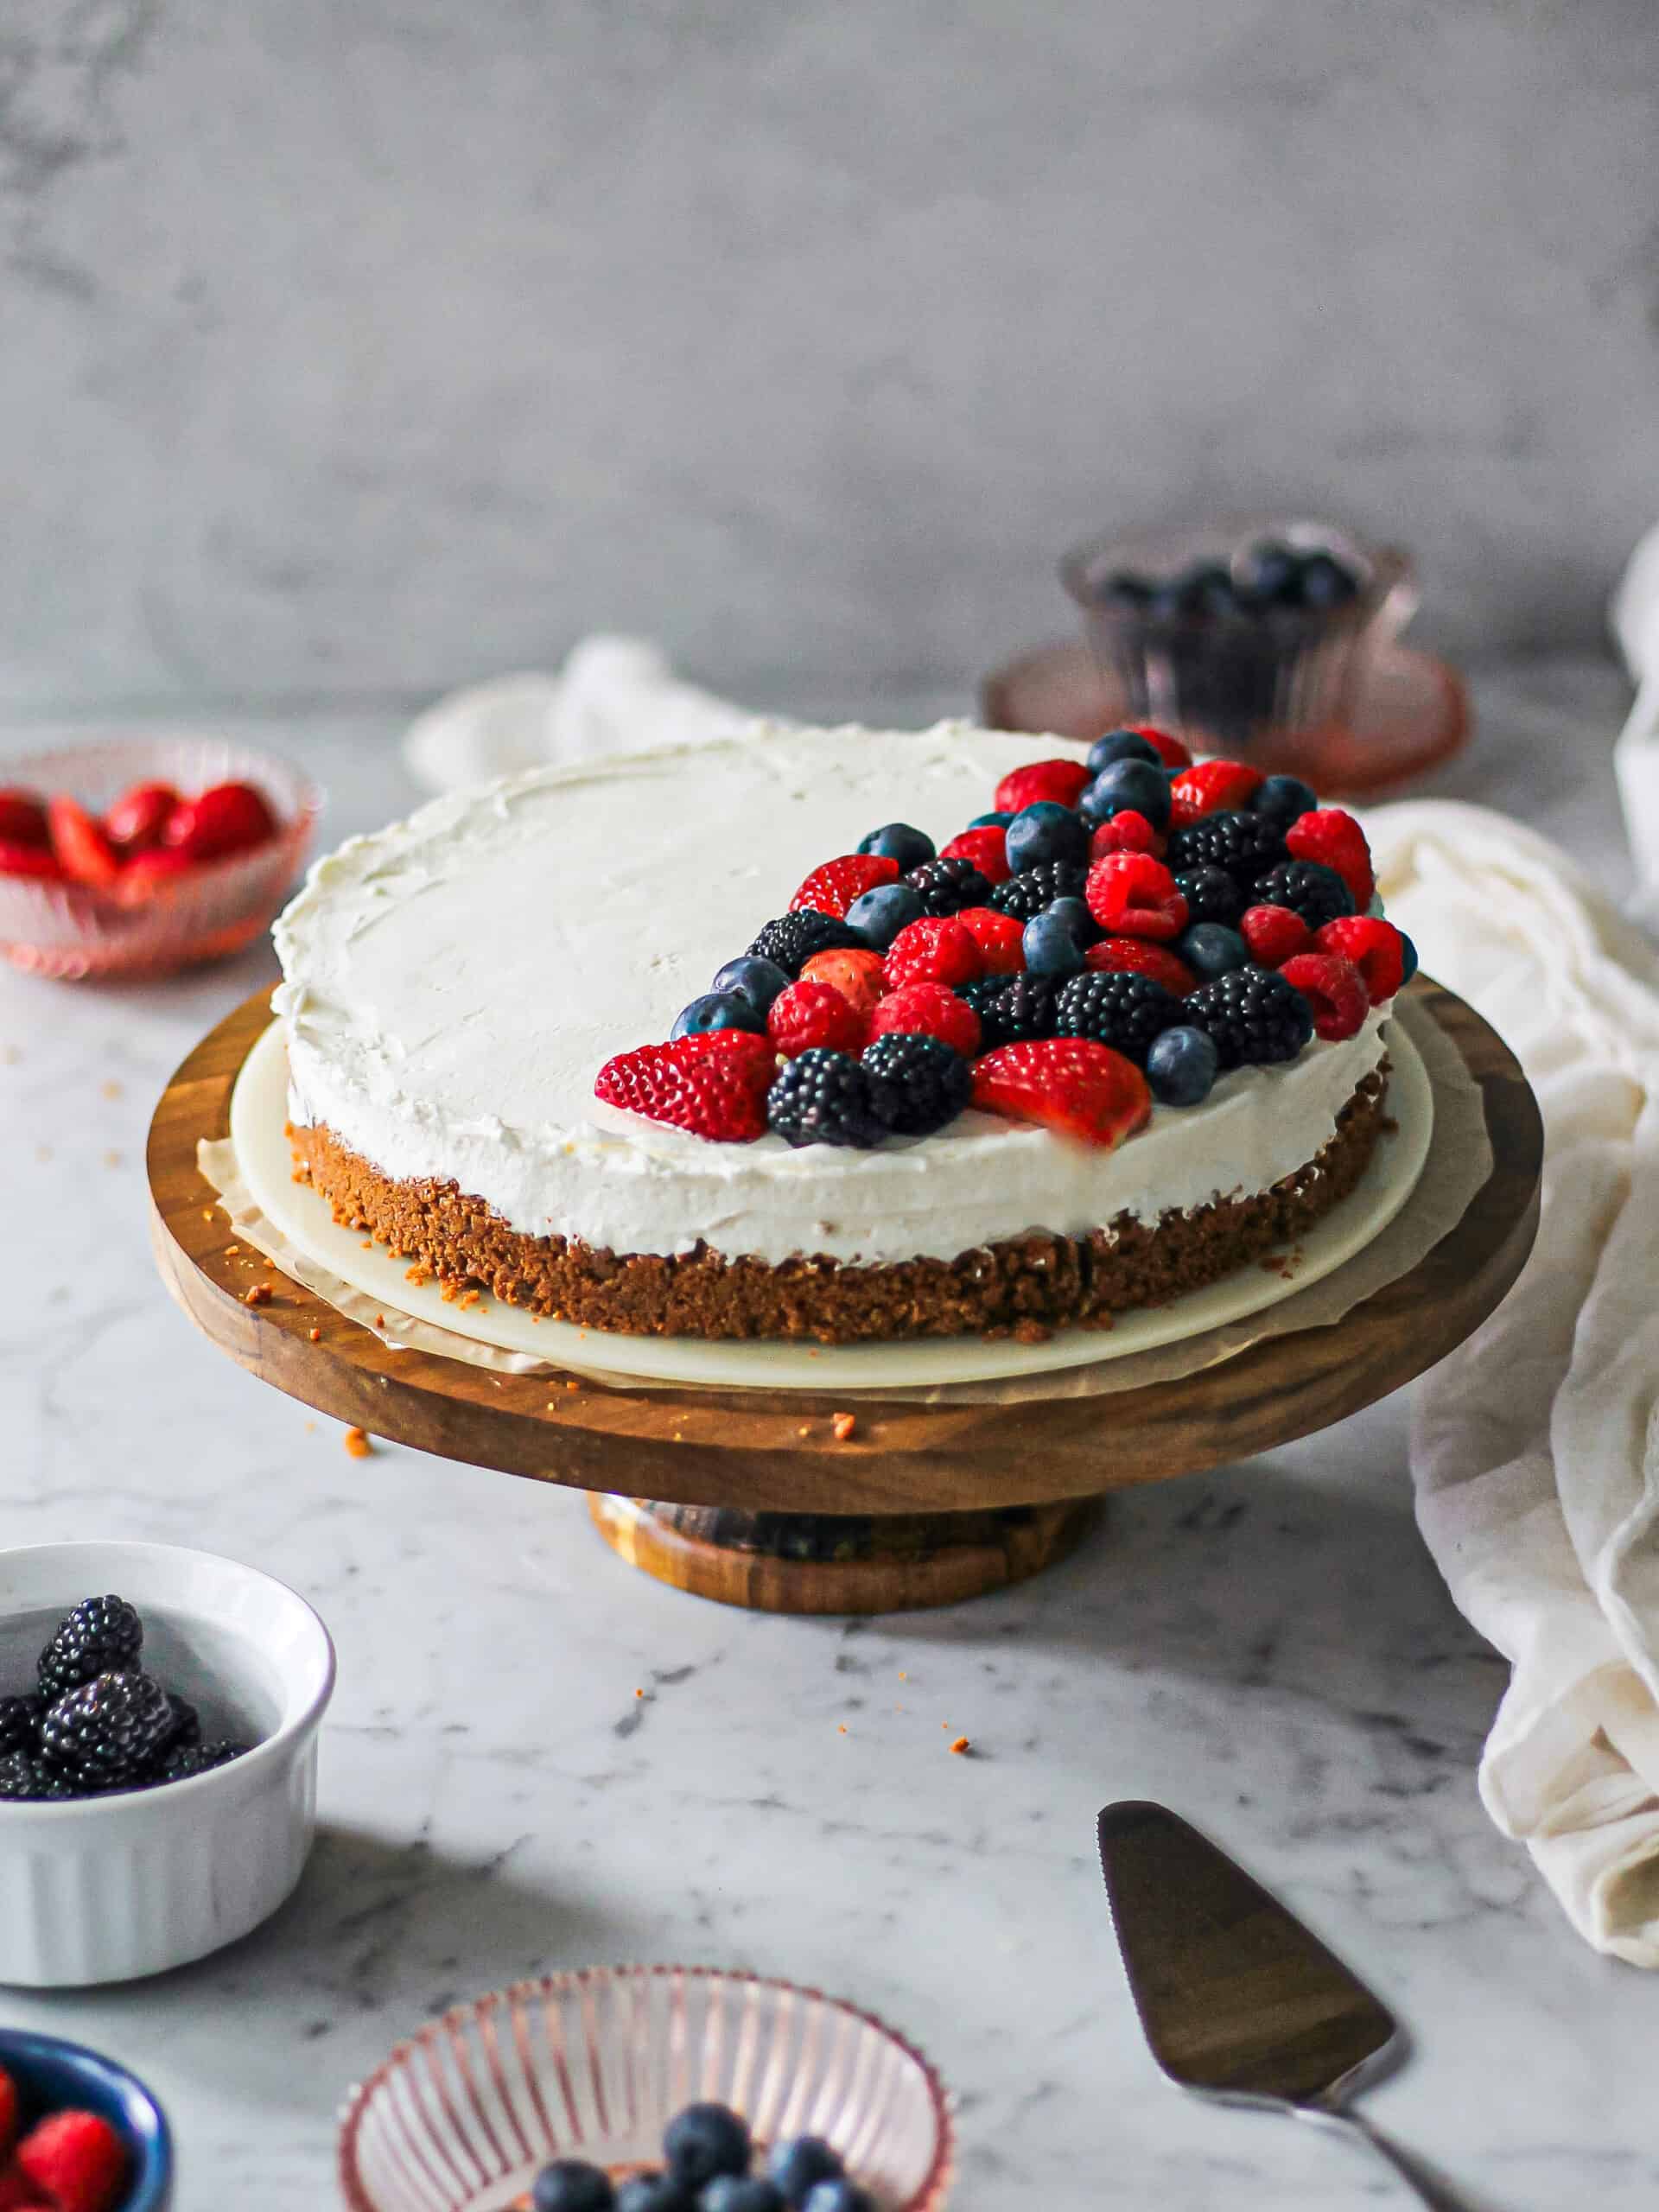
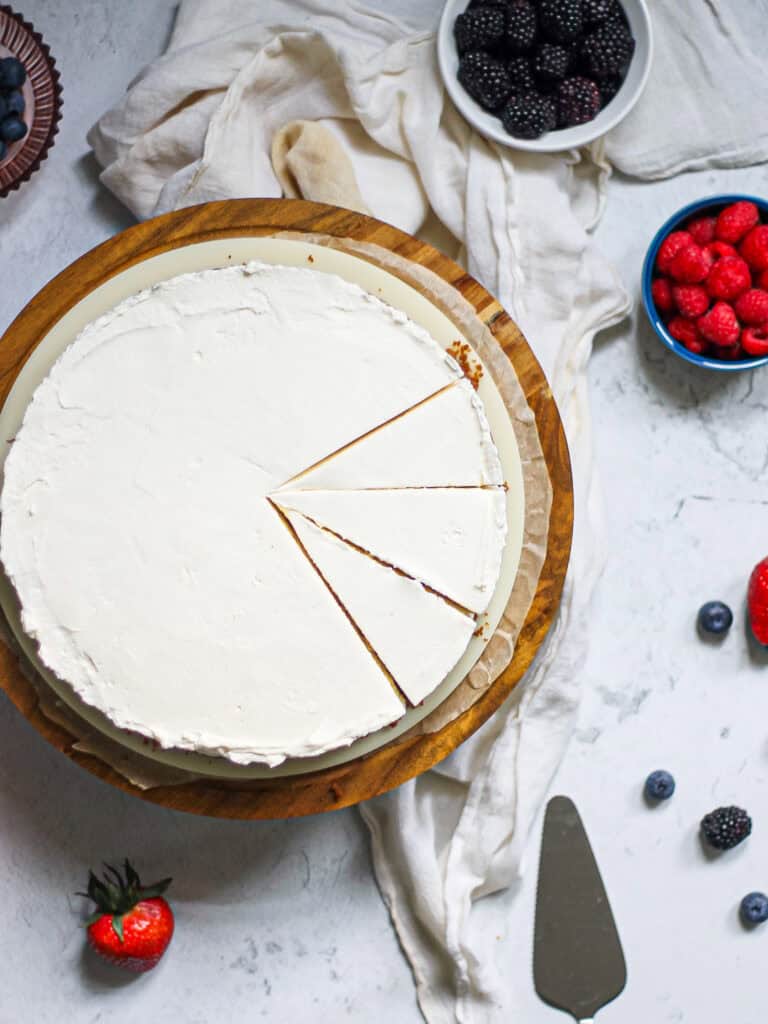
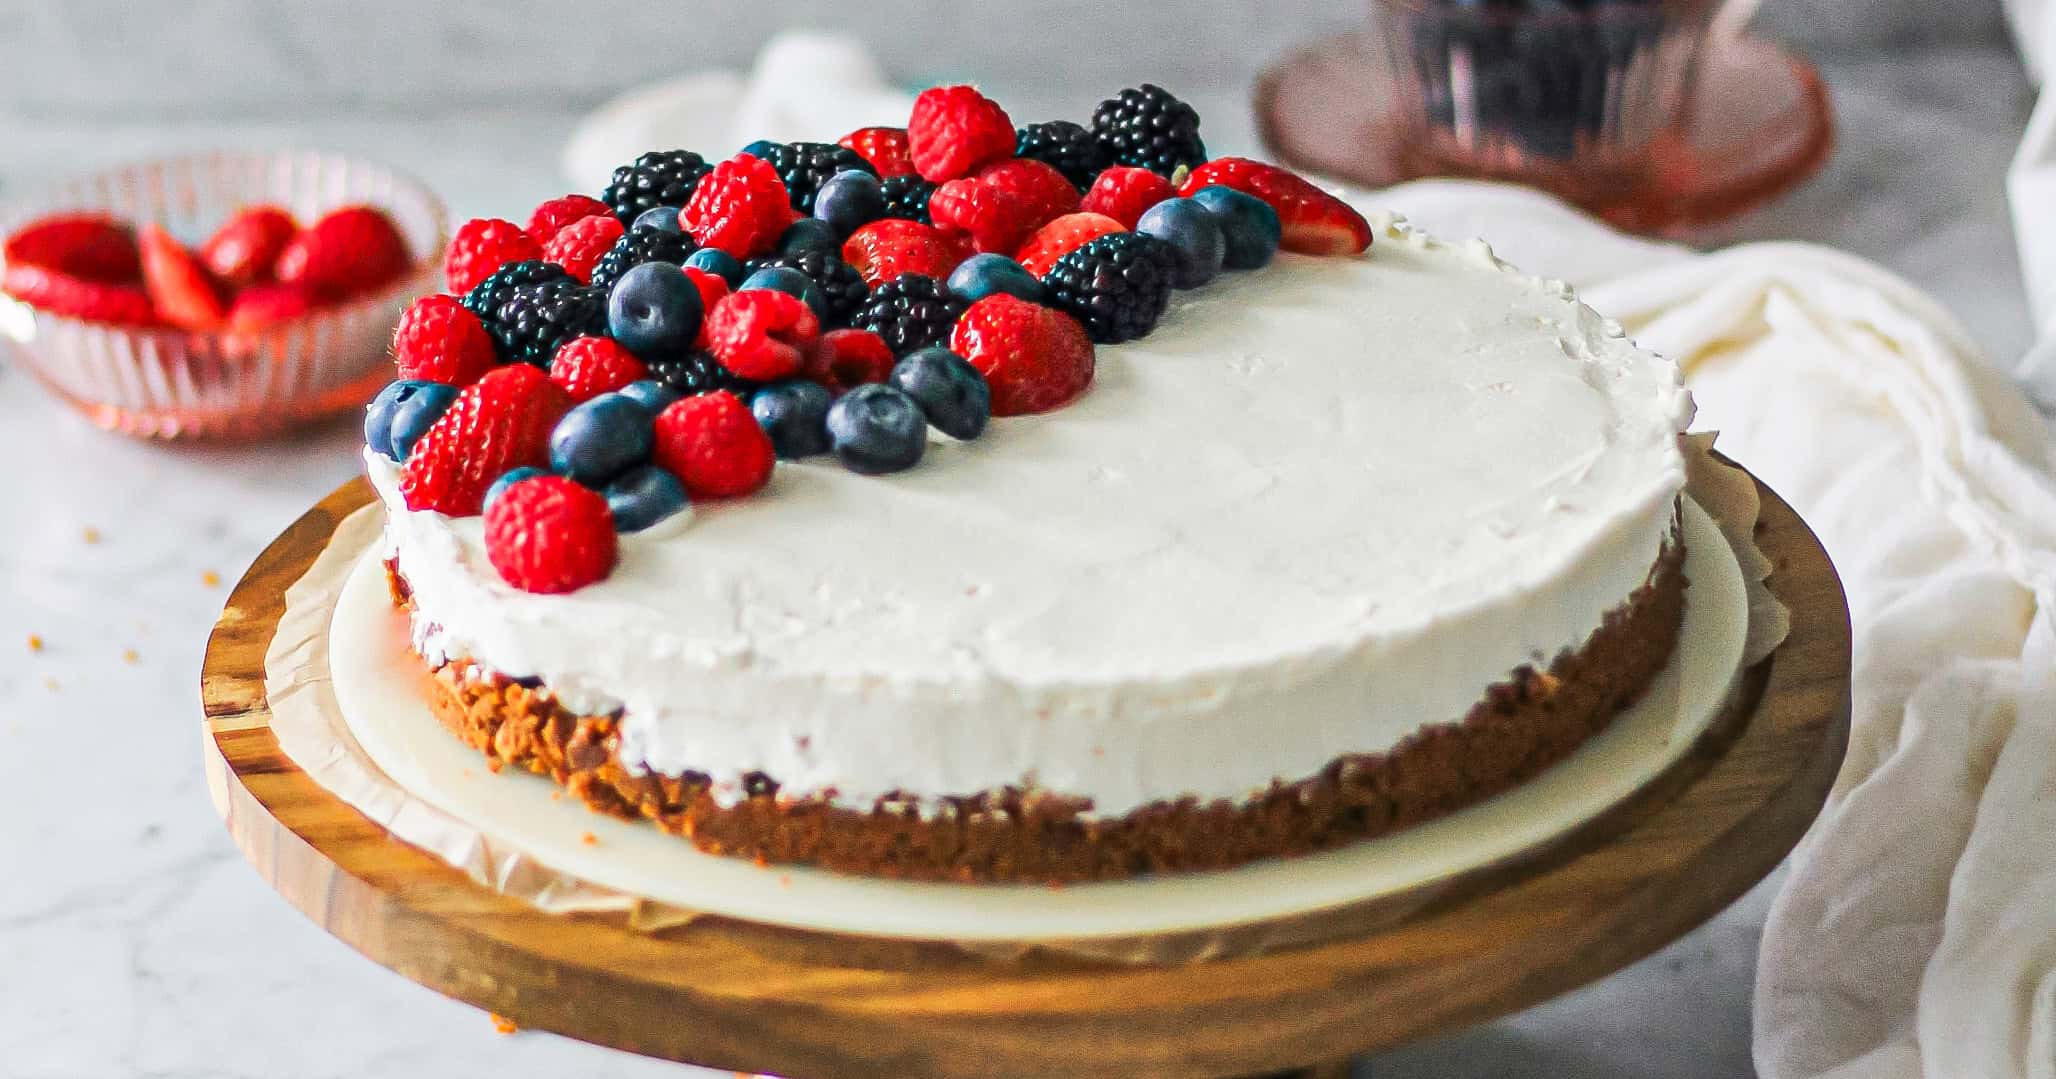
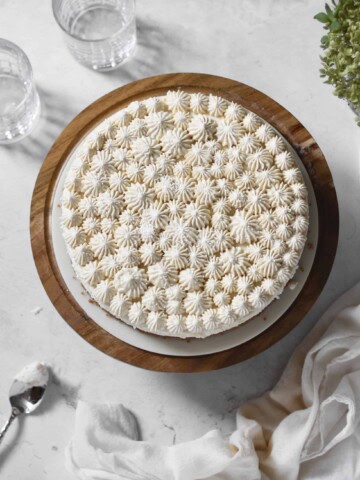
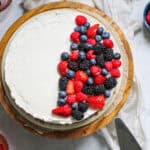
Release and garnish. Once set, remove the cheesecake from the refrigerator and release it from the springform pan. Garnish with cocoa powder, spices, fresh fruit, whipped cream, or cookie crumbs if desired.
❓FAQ and Troubleshooting
You can, but the texture and flavor will change. Mascarpone is softer and richer than American cream cheese, with a less tangy flavor.
If you substitute cream cheese, the filling will be denser and tangier, more like a traditional no-bake cheesecake. For a middle ground, try using half mascarpone and half cream cheese.
I don't recommend putting this no-bake cheesecake in the freezer to speed up the setting process. Mascarpone can develop an unusual texture when frozen. It's still edible but may not maintain that smooth and creamy mouthfeel taste.
This recipe uses whipped heavy cream as the stabilizer instead of gelatin. When beaten to stiff peaks, the cream adds volume and airiness to the filling. As it chills in the refrigerator, both the whipped cream and the mascarpone naturally firm up, giving the cheesecake a sliceable, creamy texture.
Just make sure you chill it for at least 4 hours, though overnight is even better.
⭐️ Tips for Storing and Serving Mascarpone Cheesecake
- Use a springform pan: This kind of pan allows you to easily remove the cheesecake from the pan without disturbing the crust or filling.
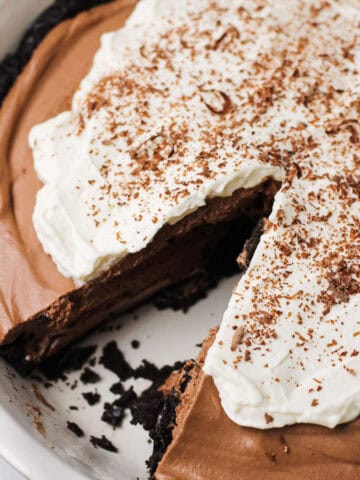
- Choose a sturdy crust: The Biscoff pie crust is a tasty component in this recipe, and it's sturdy enough to hold up the filling. You could go a different route by buying a graham cracker crust or making your own. Also, ground Oreo cookies (with the filling removed) make a great base for cheesecakes. I use a similar approach in my no-bake chocolate cream pie and Oreo pie with coffee and mascarpone. Use melted butter to hold your crust of choice together. If you're using a sweet cookie like Oreos, you can nix the sugar.
- Dress it up: Once cheesecake has set, add whatever toppings you'd like! Fresh fruit was my garnish of choice, but a little whipped cream or chocolate shavings would be nice alternatives, too.
- Cheesecake storage: This dessert will keep well in the refrigerator for about 5 days. Put it in a covered container so it doesn't absorb the smell of other foods in your refrigerator. You can even freeze it to enjoy later, though the texture will be a bit different. Let it come to room temperature before serving for softer mouthfeel.
More No Bake Dessert Recipes

No Bake Mascarpone Cheesecake with Biscoff Crust
- Total Time: 4 hours, 30 minutes
- Yield: 1 9-inch cheesecake 1x
Description
This no bake cheesecake with mascarpone is an easy dessert. Pour the creamy filling into a Biscoff cookie crust and top with fresh berries.
Ingredients
Crust
- 1 sleeve (240 grams) of Biscoff cookies
- 6 tablespoons (85 grams) unsalted butter, melted
- 1 tablespoon brown sugar
- ¼ teaspoon kosher salt
Mascarpone Cheesecake Filling
- 16 oz (450 grams) mascarpone cheese, cold
- 1 ½ cups (350 grams) heavy cream, cold
- 1 cup (125 grams) powdered sugar
- 4 teaspoons fresh lemon juice
- 2 ½ teaspoons vanilla extract
Instructions
Crust
- Add your Biscoff cookies, brown sugar, salt, and melted butter to your food processor. Grind cookies [in two batches if needed for a smaller food processor] into a fine, crumb-like texture, which will resemble wet sand.
- Line your springform pan with a 9-inch round of parchment paper before using the base of a round glass to evenly press the crumb mixture into the bottom and slightly up the sides of the pan.
- Place in the freezer or refrigerator to firm up as you make the filling.
Mascarpone Filling
- Using a chilled mixing bowl, beat cold mascarpone cheese, cold heavy cream, powdered sugar, and vanilla extract on a slow speed initially for 1 minute. Then once everything is incorporated, increase to medium-high speed for 2 minutes.
- Pause mixer to add lemon juice to bowl and beat on medium-high speed (4 on my mixer) for another 30 seconds.
- Evenly spread the cheesecake filling into the prepared crust and smooth the top with a spatula.
- Refrigerate the cheesecake for at least 4 hours, or until set.*
- Once the cheesecake has set, remove it from the refrigerator and release it from the springform pan. If desired, garnish the cheesecake with a dusting of your favorite spice or cocoa powder, fresh fruit, whipped cream, or additional cookie crumbs.
Notes
- Because you're working with cold ingredients from the beginning with the filling, it'll be somewhat firm as soon as it goes into the pan. But it does become thicker with a few hours in the refrigerator.
- That steps also gives the flavors time to meld. I found this no bake mascarpone cheesecake had better tanginess and vanilla flavor on the second day. Letting this dessert set in your refrigerator overnight would be ideal but not necessary.
Please note that the nutritional information is an estimate and based on one slice of this cheesecake, which would yield approximately 12 servings.
- Prep Time: 30 minutes
- Refrigerator Time: 4 hours
- Category: Dessert
Nutrition
- Serving Size: 1 slice
- Calories: 454
- Sugar: 18.37 g
- Sodium: 194.15 mg
- Fat: 36.54 g
- Saturated Fat: 22.8 g
- Unsaturated Fat: 11.28 g
- Trans Fat: 1.23 g
- Carbohydrates: 27.55 g
- Fiber: 0.1 g
- Protein: 2.95 g
- Cholesterol: 92.31 mg

Megan P
I love that this is no bake dessert. Super easy to follow through 🙂 Thanks so much for the recipe!
Susan
No-bake desserts are so nice! I'm a fan, too, and glad you enjoyed this recipe!
psyconut
would mixing flavoured mousse n mascarpone work as a filling?
Susan
Hi! If you mean mixing some kind of flavored extract into the mascarpone here to give it a different taste, that could work! Lemon, coconut, almond, and raspberry are a few extracts that come to mind, but you could really customize this however you'd like as far as the flavor. Good luck!