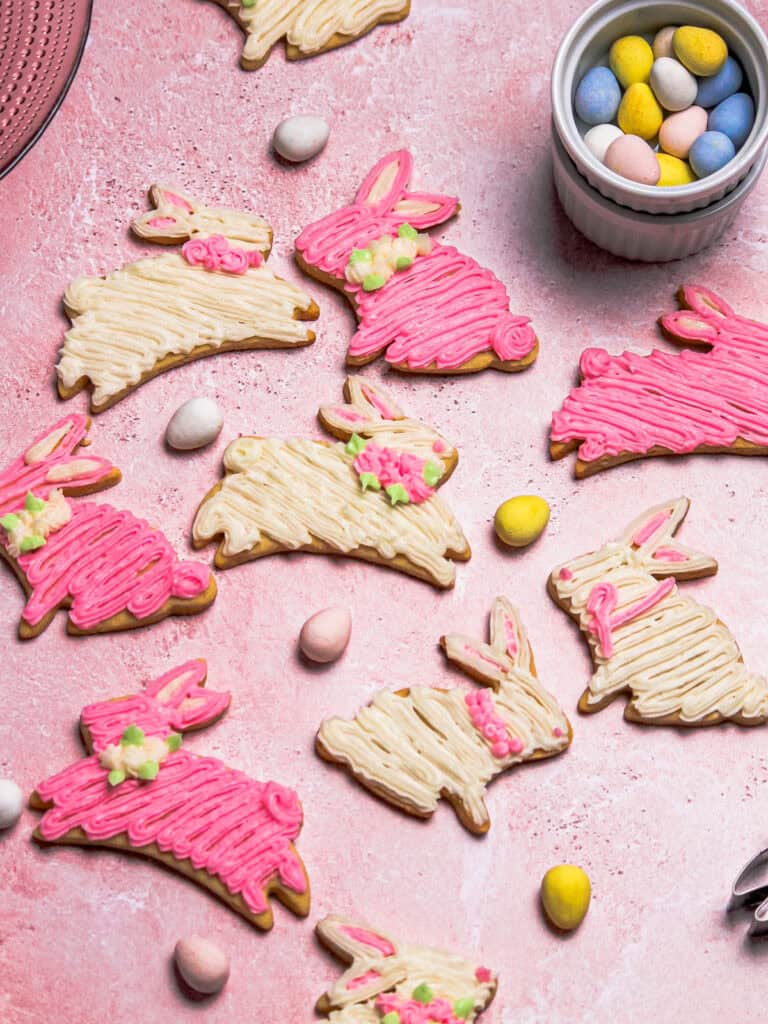
These Easter bunny sugar cookies are my go-to when I want something festive and springy. Made with a no-chill dough, these sugar cookies are decorated with homemade buttercream instead of royal icing for quick, soft cookies with simpler, shorter steps. The dough comes together fast, and the buttercream frosting pipes well, crusts for stacking, and makes this recipe a fun spring project—especially if you’re baking with kids or short on time.
🌸 Want more spring baking ideas while you're here? I've got you covered — try my mini carrot Bundt cakes, bite-sized carrot cakes, strawberry sandwich cookies, or browse all of my spring and summer recipes for more cute (and doable) desserts.
And for a fun alternative base cookie to this recipe, my cut out chocolate chip cookies are SO good! Chocolate chips in a sugar cookie are a very welcome surprise in my book.
Jump to:
- 🩷 Why You'll Love this Sugar Cookie Recipe
- Buttercream vs. Royal Icing Bunny Cookies
- 🎥 Video for Decorating with Buttercream
- Ingredients and Tools You'll Need for Easter Bunny Sugar Cookies
- How to Make Bunny Cookies Without a Cutter
- 📖 Prep and Baking Instructions
- Best Results: Baking in Grams
- 🧁 Buttercream Instructions for the Cutest Easter Cookies
- Step-by-Step Decorating Instructions
- Cookie Storage and Freezing Instructions
- 🧺 Packaging Bunny Cookies for Baskets
- Recipe FAQ
- More Cookies to Try
- Easter Bunny Sugar Cookies with Buttercream
🩷 Why You'll Love this Sugar Cookie Recipe
- Comes together quickly with no-chill dough: This sugar cookie recipe is great because it uses a no-chill dough. That means you can decorate and eat these cookies sooner rather than later.
- Soft, chewy cookies: The ratio of butter to flour and sugars here leaves you with deliciously melt-in-your mouth cookies. Plus, decorating these cookies with a buttercream instead of royal icing, which can be a harder coating, makes them tender.
- Easy-to-make buttercream: The almond buttercream frosting here is simple but full of flavor. It also isn't overly sweet (thanks to adding a bit of lemon juice to offset sugar overload). Plus, when stored at room temperature, it crusts. With some wax paper, you can stack these adorable Easter treats atop each other without smudging the designs.
- Lots of ways to decorate: I use white, pink, and green buttercream, but you can certainly make these your own. Have fun choosing different pastel shades of frosting or taking these in a different direction with color. Prefer not to use food coloring? You can also keep these cute cookies white and simple.
Buttercream vs. Royal Icing Bunny Cookies
Many decorated sugar cookies use royal icing, which requires flooding, drying time, and a bit of patience.
Here, we decorate these bunny sugar cookies with a homemade buttercream frosting instead. Not only is this a faster method, the cookies also don't have a hard royal icing shell. I prefer this method for faster, softer cookies that are easier to decorate, particularly if you’re baking with kids or short on time.
🎥 Video for Decorating with Buttercream
Ingredients and Tools You'll Need for Easter Bunny Sugar Cookies
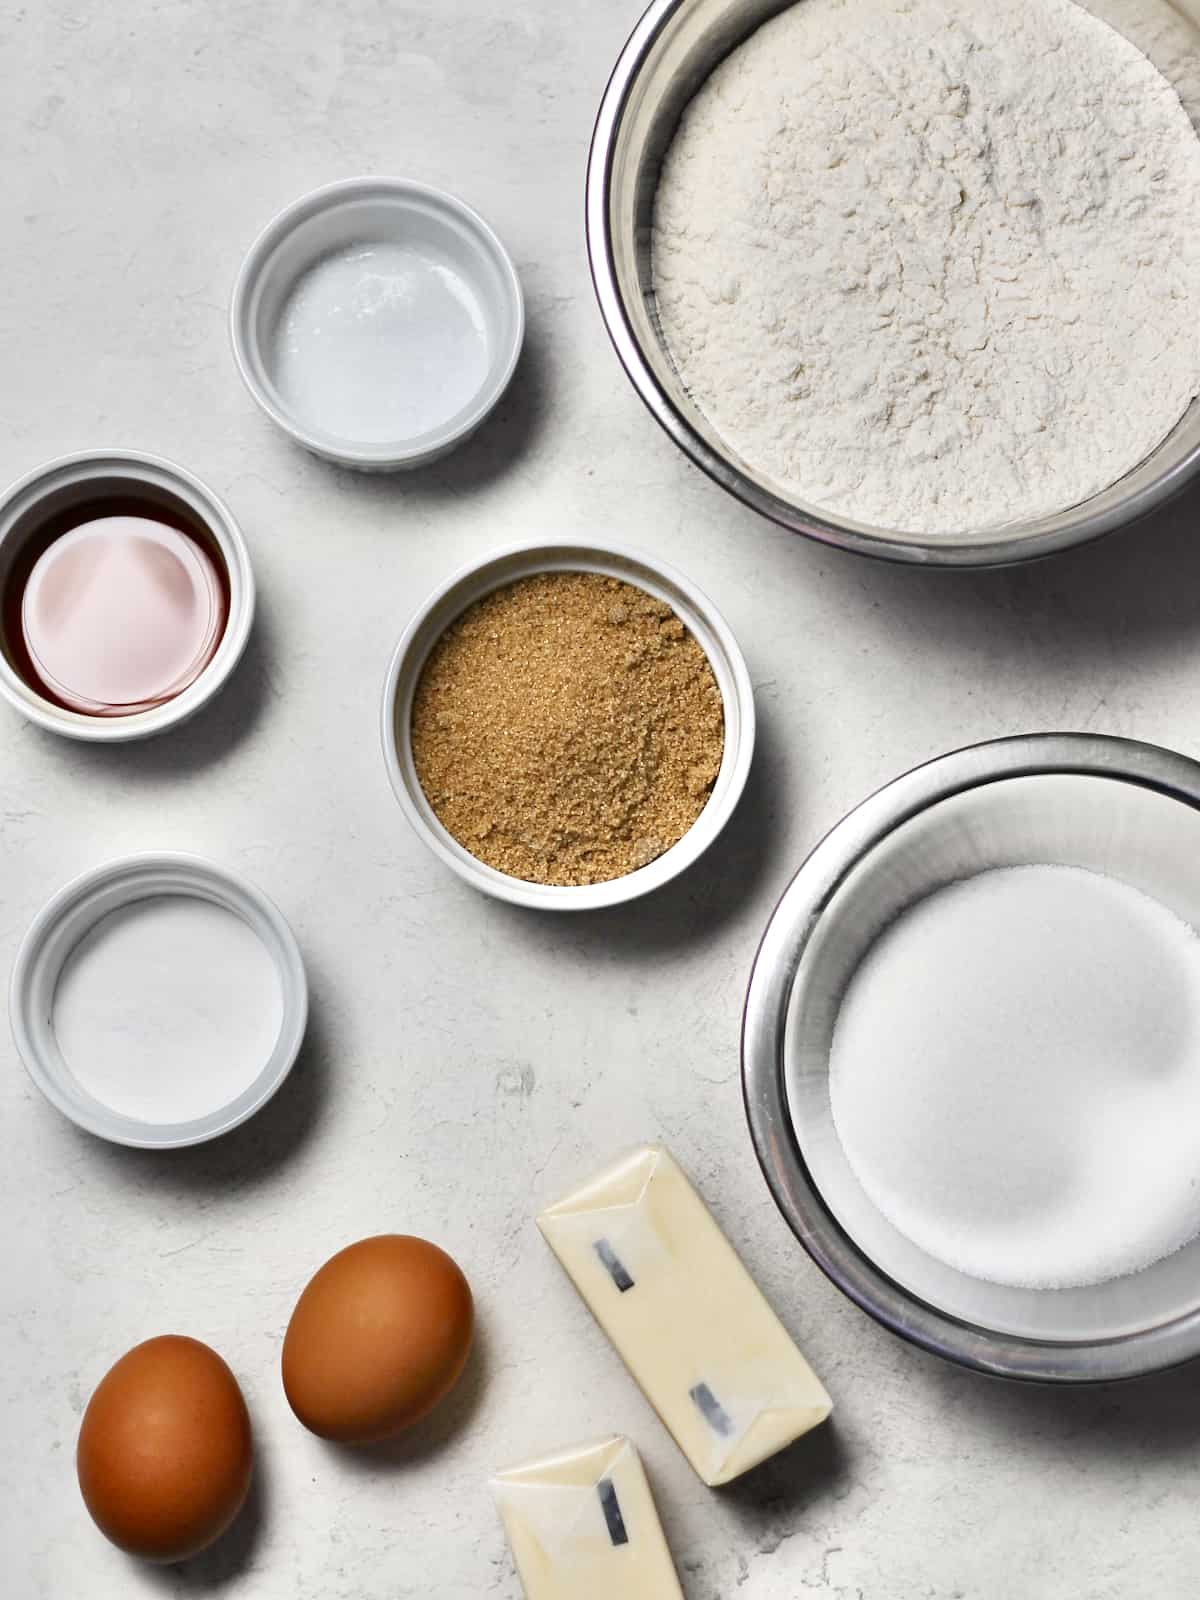
The recipe card contains all the steps and full recipe for making these fun Easter cookies, but below are ingredient highlights, as well as some special tools:
- Piping tip and bag - You'll need these tools to make decorated cookies. I recommend a small open star tip like #14 or #16 for piping the textured fur onto these little bunnies, but any small round tip close to that size will do just fine.
- Bunny-shaped cookie cutter - A two-inch or three-inch-sized bunny cookie cutter works well.
- Pure vanilla extract or vanilla bean paste – Vanilla adds a sweet taste and aroma here. Know that you don’t need expensive vanilla extract for good flavor. I never taste much difference between pricier extracts and cheaper varieties.
- Almond extract – This extract brings a warm and nutty flavor of almond to these basic sugar cookies.
- Buttercream frosting - Instead of using a royal icing recipe, we decorate these adorable Easter bunny sugar cookies with buttercream. Piping that on top of these cookies adds texture.
- Food gel coloring - If you want to dye your frosting, you'll need gel food coloring. The Wilton brand is normally available in grocery stores. Americolor and Chef Master also make high-quality food gels and are easy to order online.
How to Make Bunny Cookies Without a Cutter
I use my bunny cookie cutter every spring, and for just a few dollars, it's really affordable and worth having. But if you don't have one, you can follow these steps:
- Print (or draw) a simple bunny outline on paper
- Cut it out as a template
- Trace around it with a paring knife (be careful if you have baking mats or pans beneath it!) onto rolled dough
📖 Prep and Baking Instructions
Preheat your oven to 350°F, and dive into the steps here.
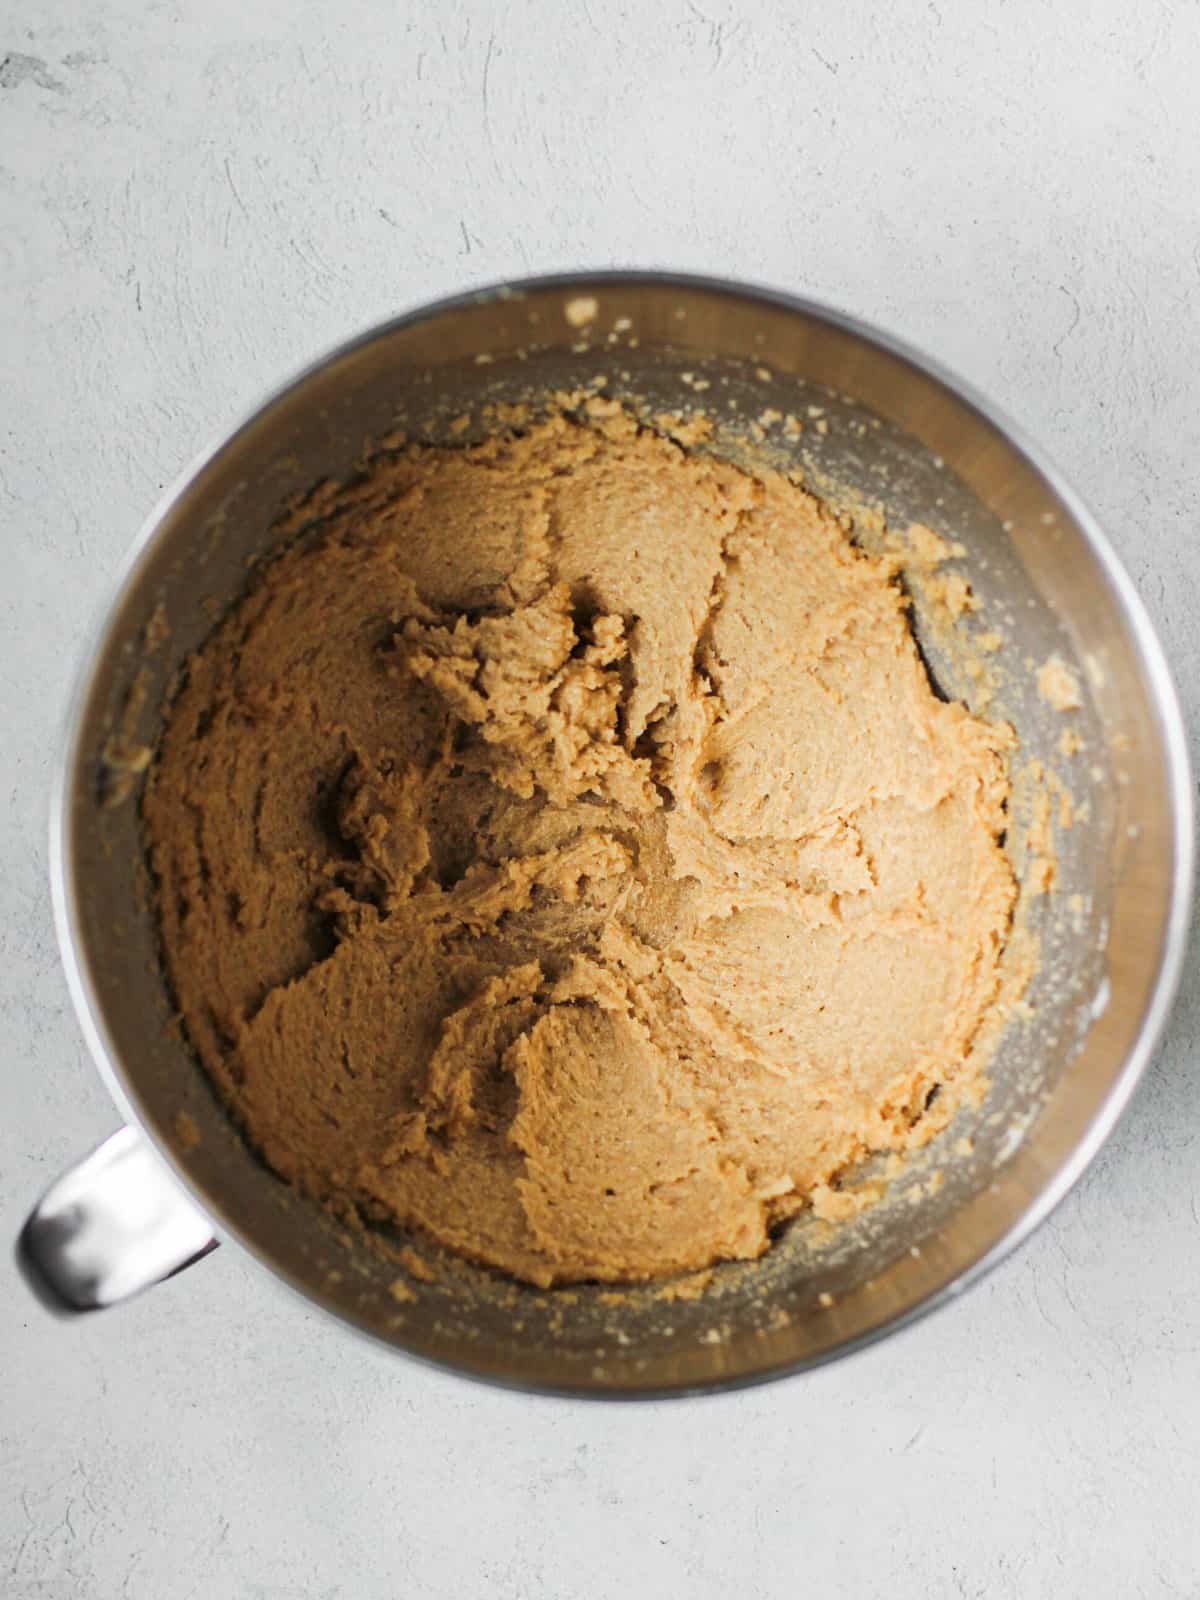
Cream butter and sugars: Cream unsalted butter, vanilla and almond extract, and sugars together in your mixing bowl for 3 minutes.
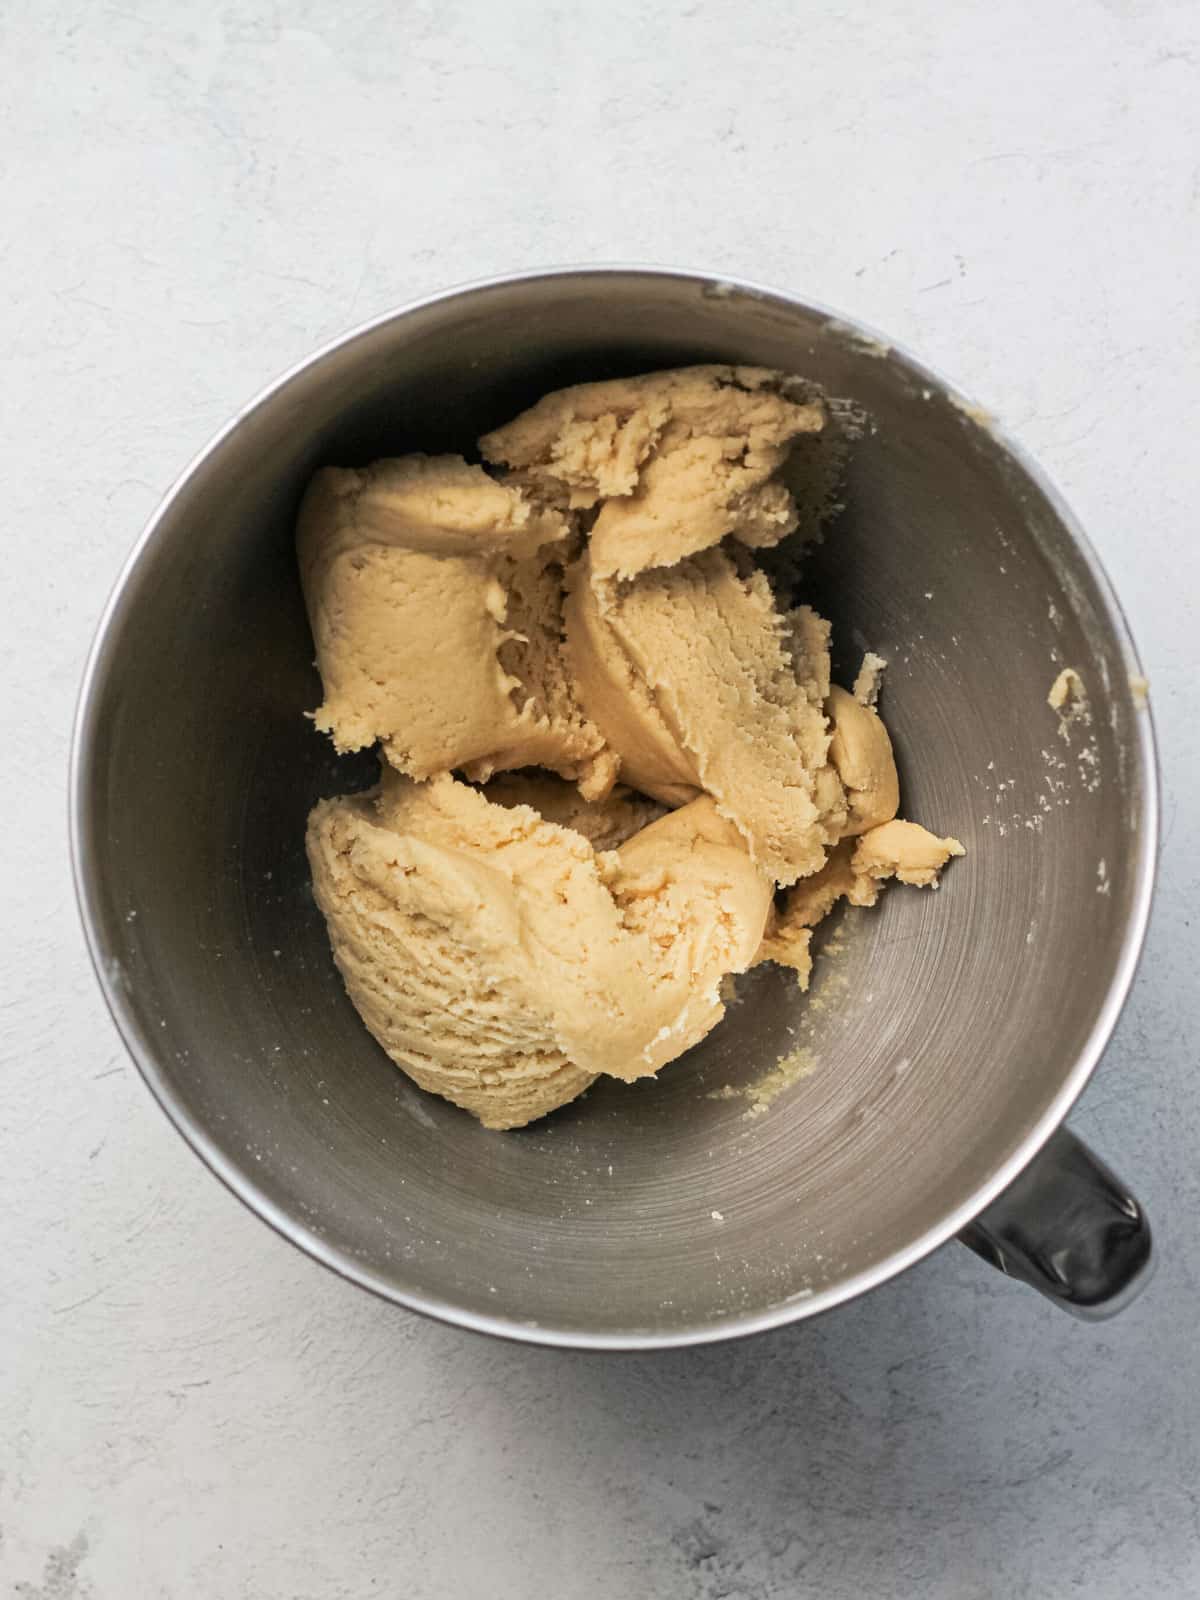
Mix in dry ingredients and eggs: Stop the mixer and scrape down the bowl. Add salt, baking powder, eggs, and flour. Mix for 2 minutes on medium speed until the dough comes together. It will initially look crumbly - keep going!
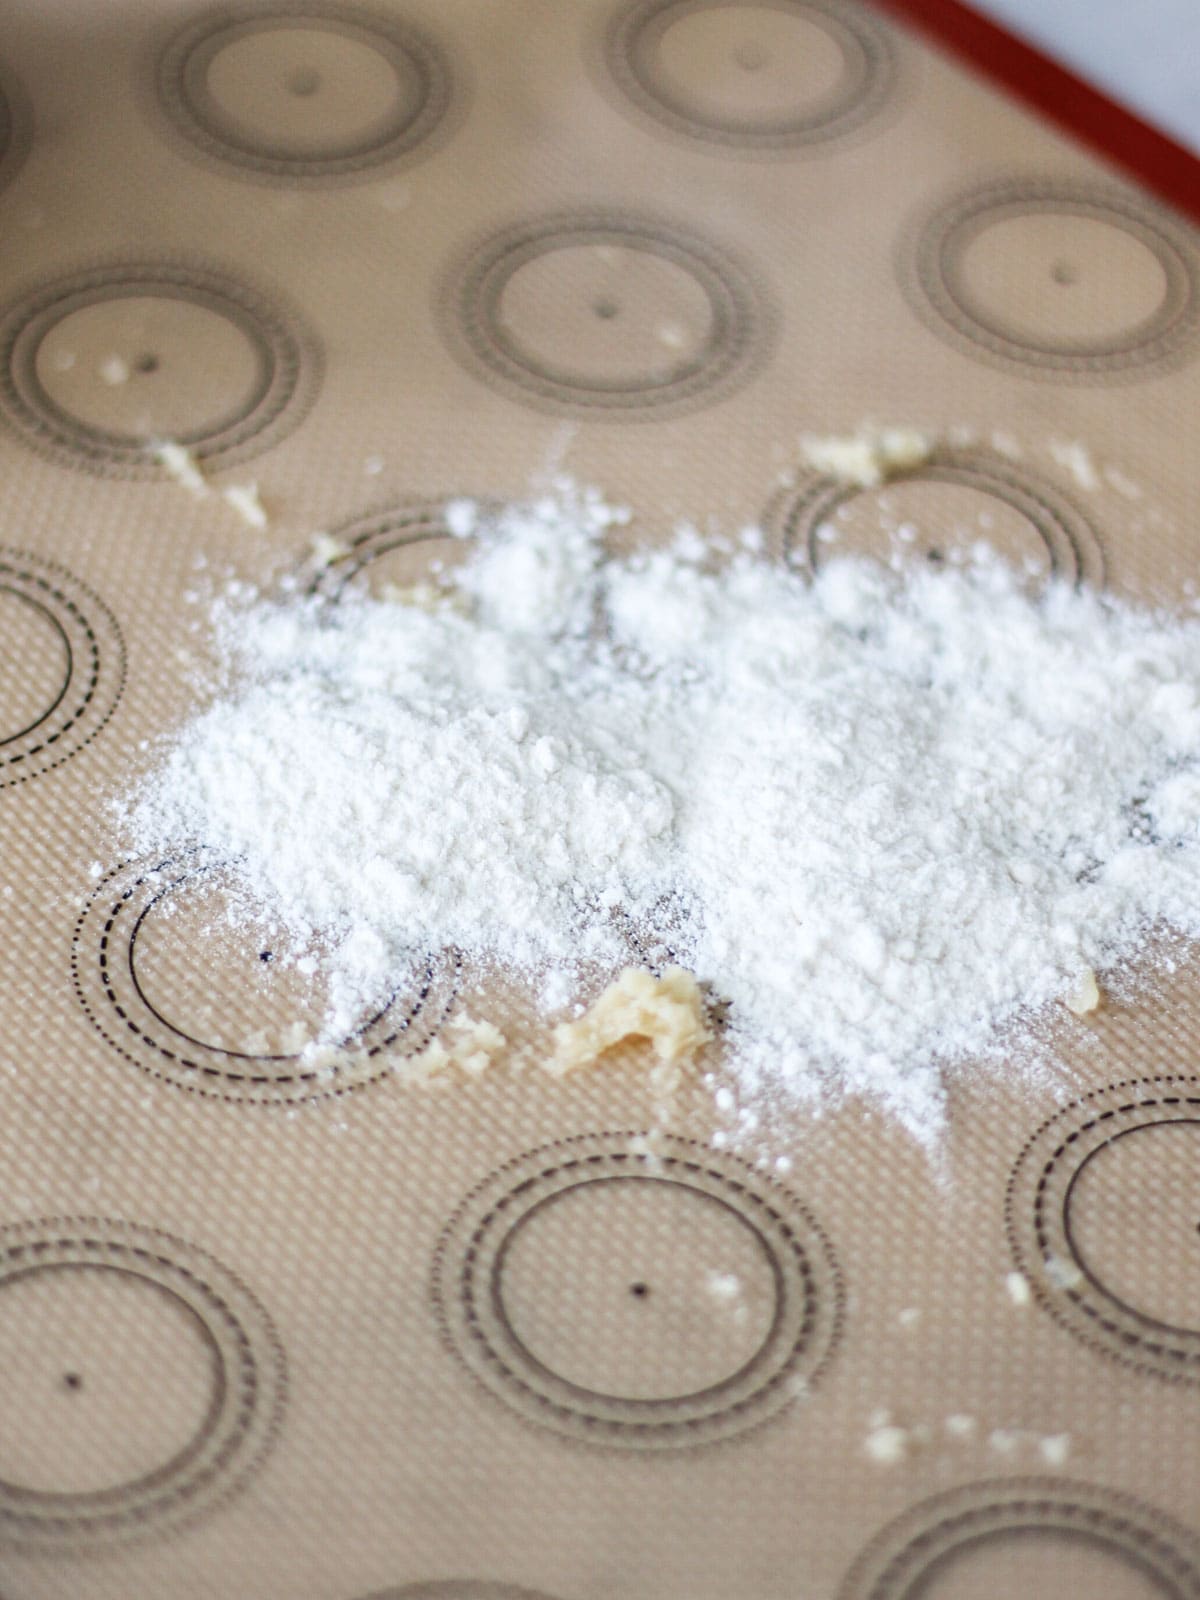
Prepare your work surface: Flour a silicone mat or your counter for rolling out the dough. Work in smaller portions, dividing the dough into halves or thirds.

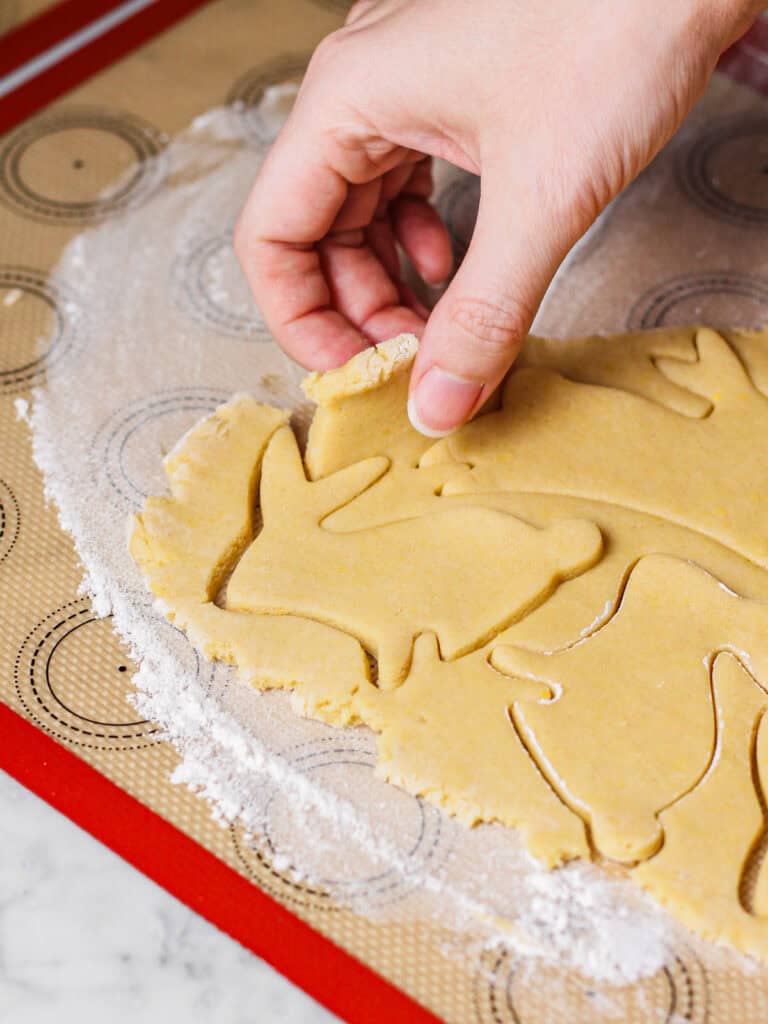
Roll cookie dough: Use a rolling pin to roll dough to ¼ inch thickness.

Cut cookies: Once the sugar cookie dough is flattened and roughly a quarter of an inch thick, press the cookie cutter into it to form your bunny shape. Peel away the excess, adding it back to your bowl of dough.

Transfer cookies to sheet pan: Use a spatula to lift cookies onto an ungreased or silicone-lined baking sheet, spacing them 2 inches apart.
If you don't have baking mats, no need to line baking pans. Placing cookies onto ungreased cookie sheets works perfectly.

Bake cookies and cool: Bake for 11–15 minutes (shorter time for smaller cookies, longer for larger ones). Let them cool on the cookie sheet and reach room temperature before transferring them to a cooling rack.
Repeat for remaining dough: Repeat the rolling, cutting, and baking process until all the dough is used.
Best Results: Baking in Grams
If you’re not already, use a kitchen scale for accuracy in baking.
While I include cups and grams in my recipe cards, weighing your ingredients and writing or following a recipe using a standard metric like grams ensures consistency.
I highly recommend investing $30 or less in a kitchen scale.
🧁 Buttercream Instructions for the Cutest Easter Cookies

Mix the buttercream base: In the bowl of a stand mixer or with a handheld electric mixer, combine unsalted butter, powdered sugar, vanilla extract, heavy cream, and salt. Start mixing on low to prevent a sugar cloud, then beat on high for about 3 minutes. Taste test here; add a splash of lemon juice to reduce sweetness until flavor is to your liking.

Smooth the buttercream: Use a spatula to drag from the center to the sides of the bowl, smoothing out any air bubbles or tears. Repeat for 3–4 minutes to achieve the right consistency. It should be creamy and fairly easy to spread.
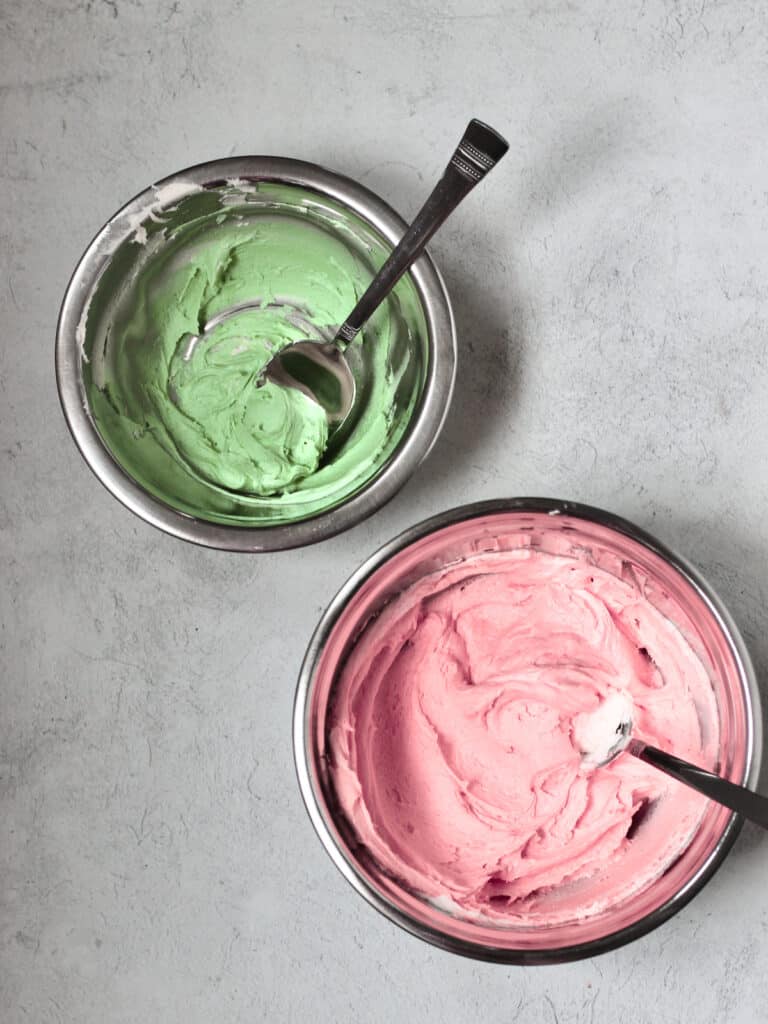
Divide and color the frosting: Place the buttercream into separate bowls. I set aside a small amount for some green accents on the bunnies, knowing that I would primarily use pink and white.
Step-by-Step Decorating Instructions
If you like decorating with buttercream (same!🙋🏻♀️), you might also love these step-by-step posts for Christmas tree sugar cookies, Christmas wreath sugar cookies, and my pumpkin sugar cookie tutorial. Same beginner-friendly vibes, just different seasons.
Prepare to Pipe onto Unfrosted Cookies: Once cookies have cooled on a wire rack, fit a piping bag with an open star tip (like Wilton 14 or 16) for textured frosting.
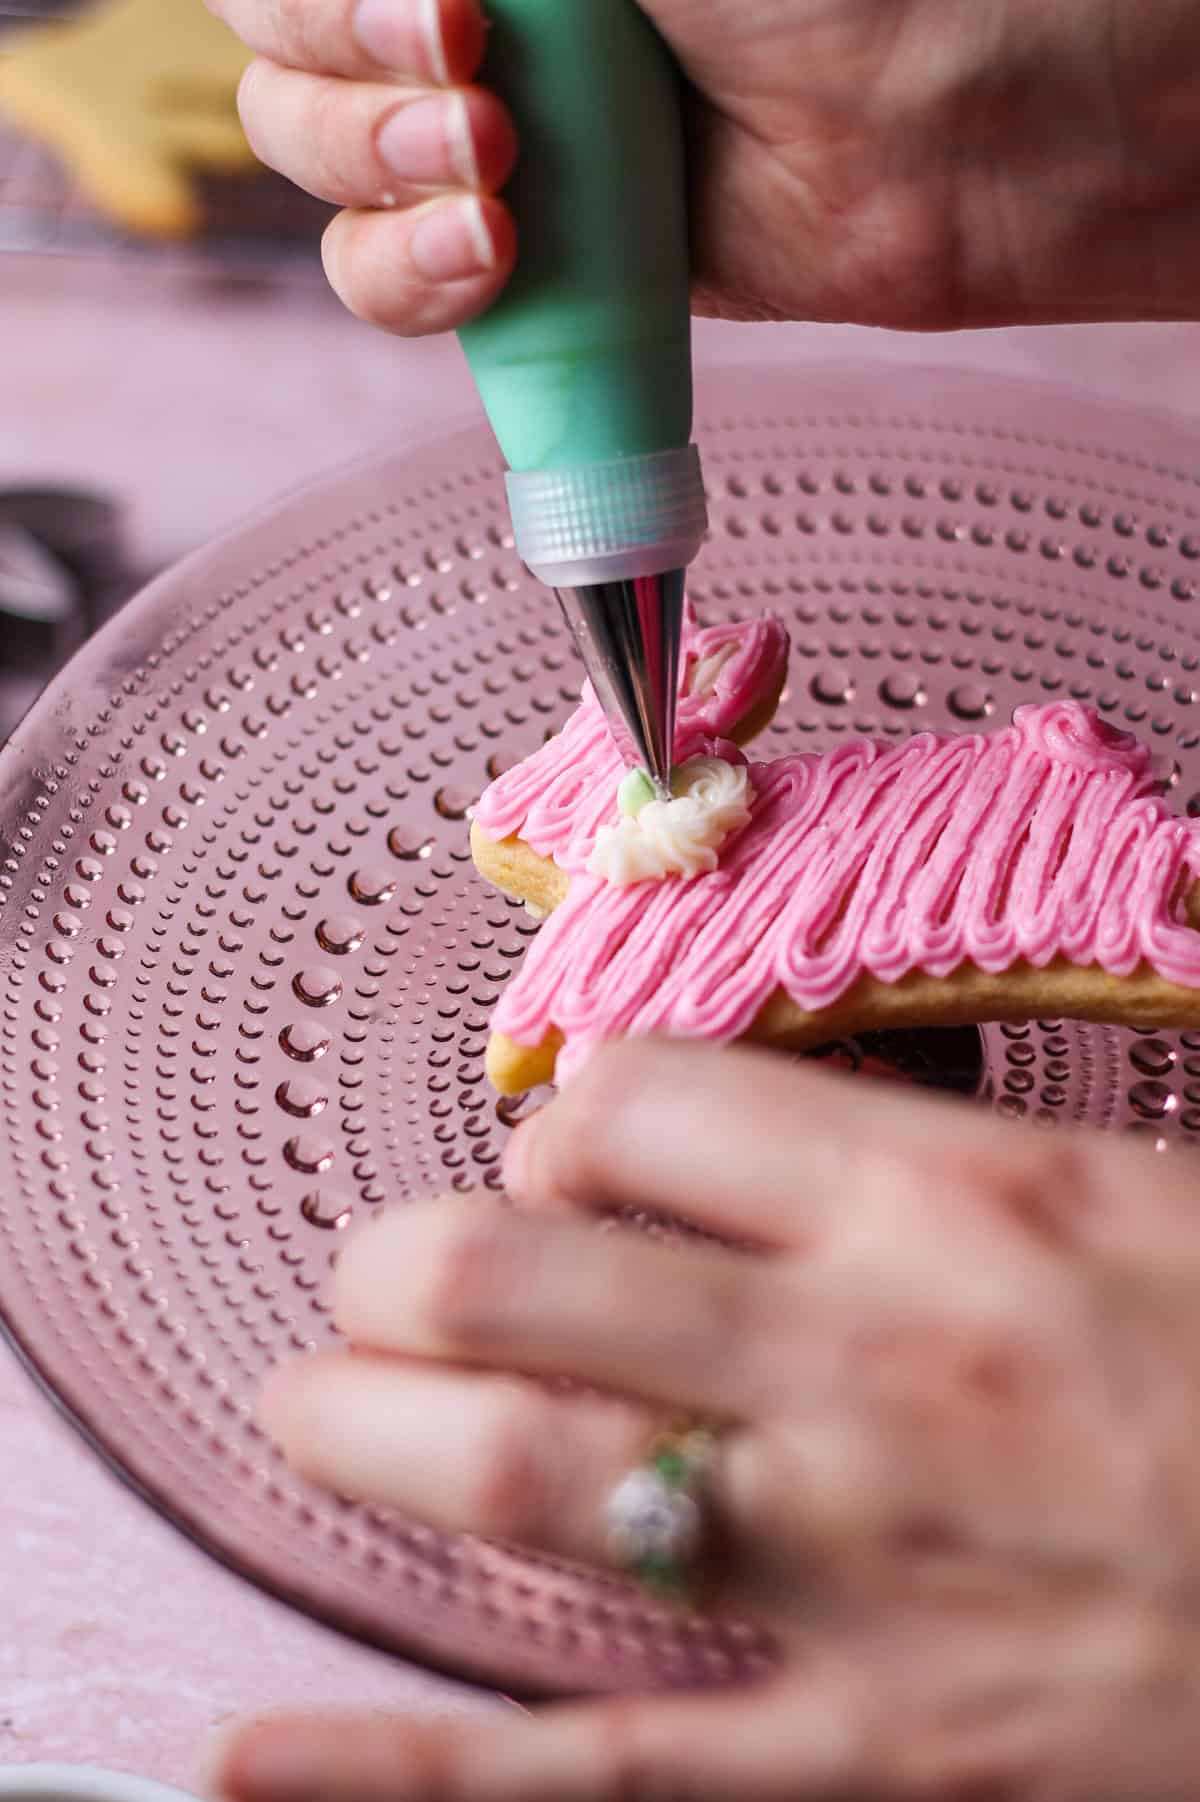
Pipe the Frosting: Start from the bunny ears and pipe a thin line of pink frosting to make the underside of their ears.

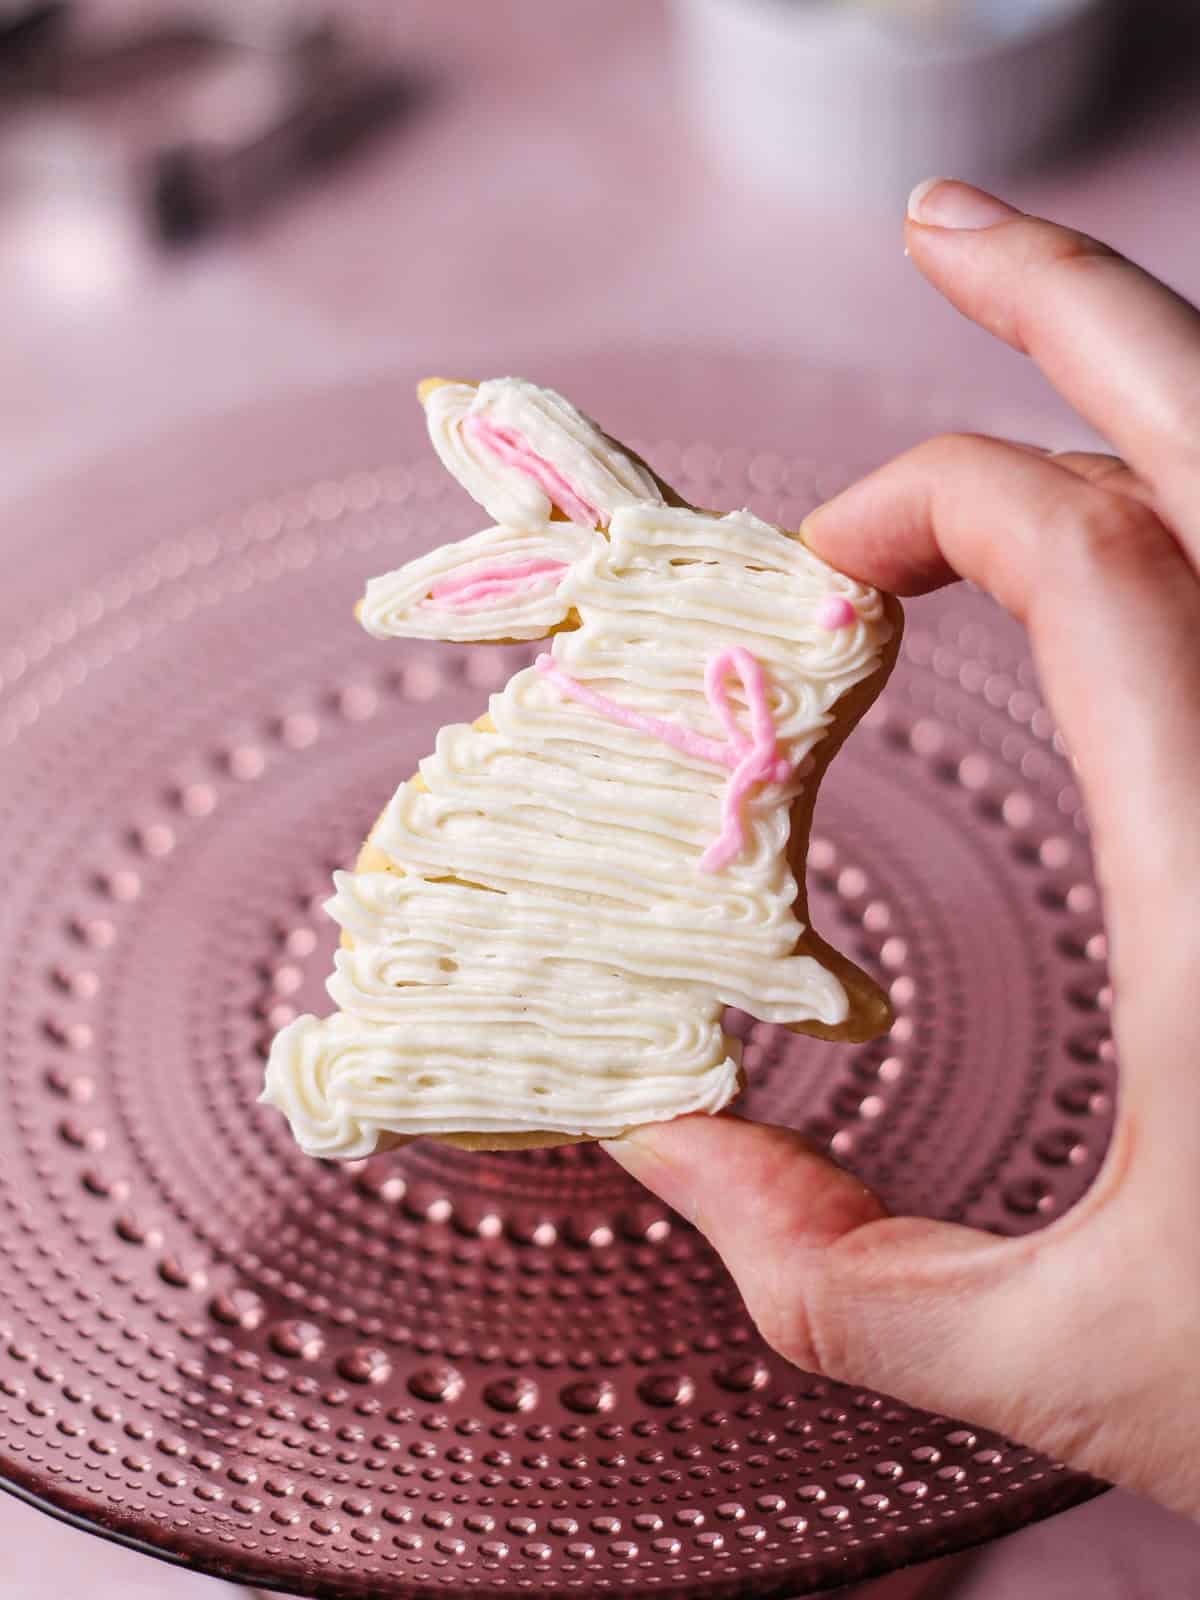
Switch Up the Colors: Take your bag of white frosting fitted with another small piping tip. Trace around the pink sections of the ears, outlining them with your white buttercream. Then it’s super easy: pipe quick back-and-forth lines across each cookie to create the “fuzzy” texture. That’s it!


Add the Finishing Touches: Feel free to pipe little dots of frosting across their necklines to create wreaths or bows! You can also use a leaf tip like #352 to elaborate on the design. To make a leaf, with the narrow end of the tip pointing outward, squeeze frosting from your piping bag at a 45-degree angle onto the surface of your cookie. As you continue to apply pressure, lift the piping bag slightly, and then release the pressure to create a tapered end on the leaf.

Repeat steps for every cookie: Switching as desired between piping tips for different colors and texture.
Cookie Storage and Freezing Instructions
Room temperature - These Easter sugar cookies will stay fresh at room temperature (around 70°F) for 2-3 days.
Freezing and Make-ahead Instructions - The cookies also freeze well, frosted or unfrosted.
If you've already frosted them, give the buttercream time to form a crust before freezing. This hardened texture will form if the room is not too hot or humid (room temperature or slightly cooler is great) and keeps the design from getting smudged.
After buttercream has formed a crust on your cookies, place them in a single layer in an airtight container. Gently add wax or parchment paper on top of the first cookie layer so any frosting doesn't get caught on other cookies or frosting but paper instead.
Continue filling container with cookies, separating each layer with paper.
These adorable Easter bunny cookies will retain their flavor for about three months in the freezer. Let them come to room temperature before serving.
🧺 Packaging Bunny Cookies for Baskets
This adorable cookie would be a fun addition to Easter baskets! To add them to yours:
- Let frosting crust fully
- Slide decorated cookies into cellophane treat bags
- Tie off the tops with ribbon and store flat in a cool, dry place so the faces don’t smudge
Recipe FAQ
You can absolutely decorate these without royal icing which is the reason I created this tutorial.
I use a simple homemade buttercream that pipes cleanly, holds its shape, and crusts enough to stack and store. It’s beginner-friendly, tastes better than royal icing (in my opinion!), and you don’t need any special drying time or complicated techniques
An open star tip is perfect. I typically use something like a Wilton 14 or 16 (anything similar works).
The star tip gives you that fluffy, textured look with minimal effort.
Yes — as long as the buttercream has time to crust. Let the decorated cookies sit at room temperature until the surface feels set (not sticky), then stack with wax paper or parchment between layers.
If you’re transporting them, keep them flat so the faces don’t get smudged.
Once the frosting has crusted, store the cookies in an airtight container at cool room temperature.
If your kitchen runs warm, you can refrigerate them — just know the cookies may firm up a bit in the fridge. Either way, let them come back to room temp before serving for the best texture.
Keep it simple: one color for the bunny's body, ears, and face. You can do a smooth buttercream bunny (fastest), a fluffy “fuzzy” bunny using a star tip, or add a tiny bow/bowtie for an extra-cute detail.
Pastels are always a win for Easter — but you can also keep them white and just add pink ears.
Print (or draw) a simple bunny outline, cut it out, and use it as a template.
Lay it over rolled dough and trace around it with a paring knife.
Yes.
For best results, freeze the cookies undecorated: bake, cool completely, then freeze in an airtight container with parchment between layers. Thaw at room temperature and decorate.
You can freeze decorated cookies too — just let the buttercream crust first, freeze them in a single layer until firm, then stack carefully with parchment.

More Cookies to Try


Easter Bunny Sugar Cookies with Buttercream
- Total Time: 2 hours
- Yield: 35 cookies 1x
Description
Instead of royal icing, these Easter bunny sugar cookies use no-chill dough and buttercream frosting to make decorating approachable & fun.
Ingredients
Cookie Ingredients
- 12 tablespoons butter (170 grams) unsalted butter, room temperature
- 3 cups + 2 tablespoons (380 grams) all-purpose flour, spooned and leveled
- ⅔ cup (150 grams) white sugar
- ½ cup (90 grams) firmly packed light brown sugar
- 2 teaspoon vanilla extract
- 1 teaspoon almond extract
- 1 ¼ teaspoon Diamond Crystal kosher salt
- 1 ½ teaspoon baking powder
- 2 cold, large eggs, straight from the fridge
Buttercream Ingredients
- 6 cups (750 grams) powdered sugar
- 12 tablespoons (170 grams) of unsalted butter, room temperature
- ½ cup (150 grams) heavy cream (see notes)*
- 4 teaspoon vanilla extract
- 2 teaspoon almond extract
- Pinch of salt
- Lemon juice to cut sweetness
- Food gels to dye your frosting
Instructions
Sugar Cookie Dough
- Preheat your oven to 350 degrees Fahrenheit.
- Cream butter, vanilla and almond extracts, and sugars together in your mixing bowl for 3 minutes.
- Stop the mixer and add salt, baking powder, as well as your eggs and flour. Mix for about 2 minutes on medium speed. Dough will initially look crumbly but pull together.
- Roll the dough into a ball on a clean, flat, floured surface. I like dividing half at a time and rolling it out to about ¼ inch before pressing the cookie cutters into the dough.
- Use a spatula to lift and transfer dough onto ungreased aluminum baking sheets, with about 2 inches between each of them. Bake for 11-14 minutes (longer time for larger cookies, shorter for small ones).
- Transfer them to cooling racks after they’ve sat on the baking sheets 5 or so minutes outside of the oven and are firm enough to handle.
Buttercream Frosting
- Combine unsalted butter, powdered sugar, almond and vanilla extracts, heavy cream, and salt in mixing bowl. Beat with electric mixer in very short bursts to avoid confectioners’ sugar flying everywhere before you increase the mixer speed to high for about 3 minutes.
- Taste test. Add splash of lemon juice if too sweet.
- Spend 3-4 minutes dragging the spatula from the middle of your bowl to its edges to achieve nice, smooth frosting.
- Divide buttercream. To keep it simple, I used pink and white gel food coloring, along with a bit of green for small accents. After mixing each color, put them into separate piping bags, leaving some white in your mixing bowl for backup.
Cookie Assembly
- Load buttercream into piping bags, fitted with a small open round or open star tips (like Wilton #14 or #16). For my green leaves, I used #352.
- With the narrow end of the tip pointing outward, squeeze frosting from your piping bag into the area of the bunny's ears to form the pink underside. As you continue to apply pressure, lift the piping bag slightly, and then release the pressure to create each design. Do this at a 45-degree angle.
- Grab your piping bag of white frosting to trace around your bunny's ears. Continue piping and filling in each cookie by creating lines of frosting back and forth across each cookie.
- As a last step, use accent colors link pink and green to add details around each bunny's neck.
Notes
- Regarding the buttercream: When my kitchen is colder, I add more liquid to my bowl. The moisture helps colder, stiffer ingredients mix together more easily. If your kitchen is humid and/or warm, start with about ⅓ cup (80 grams) of heavy cream and add more from there.
- If you have leftover buttercream, you can freeze it for up to 3 months in an airtight container. Let it thaw and rewhip before using.
- Note that the nutritional information is approximate and can vary based on specific ingredient brands and measurements.
- Prep Time: 45 minutes
- Decorating Time: 1 hour
- Cook Time: 15 minutes
- Category: Dessert
- Cuisine: American
Nutrition
- Serving Size: 1 cookie
- Calories: 313 kcal
- Sugar: 29.3 grams
- Sodium: 118 mg
- Fat: 14.7 grams
- Saturated Fat: 9.3 grams
- Unsaturated Fat: 5.2 grams
- Trans Fat: Negligible
- Carbohydrates: 43.2 grams
- Fiber: 0.5 grams
- Protein: 2.9 grams
- Cholesterol: 51 mg

Stacy Hall
Perfect timing for Easter. Thank you. These look fantastic !
Susan
Thank you! Hope you enjoy! 🐰
Jen
Made these cookies a couple of days ago and they were delicious!! I love that this is a no-chill recipe. I will definitely be making them again!
Susan Gravatt
Yay! Thanks so much, Jen, and I'm very happy you enjoyed them. 🙂 They were a blast to make!